Stylish Revamp

Redecorating on a Budget

  • Home
  • About
  • Home Tour
  • Projects
  • Disclosure

Repurposing Driftwood into a Charming DIY Whale

June 6, 2014 By stylishrevamp 1 Comment

Repurposing driftwood into a charming whale.

Every time we go to the Island Home we collect pieces of driftwood  and I have been holding on to this piece since last summer. I have been seeing driftwood/reclaimed wood whales online that I love so I decided to make one of my own.

DIY Driftwood Whale

I had my husband draw the outline for me and I used a jigsaw to cut it out. It was my first time using the jigsaw and it wasn’t as easy as it looks on t.v. I think I tried to cut it too quickly.  I had my husband touch up the misguided cuts then he used a grinder to smooth out the edges.

[Read more…]

Filed Under: Before and After, DIY Crafts Tagged With: Driftwood, Whale, Wood

Serving Tray

May 26, 2014 By stylishrevamp Leave a Comment

 Today I finished a few small projects and the first one  I am going to share with you is a  serving tray that I made. I will post the other projects later in the week.  They were  super easy and quick.

I have been on the hunt for a cheap serving tray that I could rework to use on our screened in porch.  I have searched Goodwill and all my other favorite spots and haven’t found anything that would work.

So today I finally got to work and made one myself.

DIY Wooden Serving Tray

[Read more…]

Filed Under: DIY Crafts Tagged With: Tray, Wax, Wood

Outdoor (Solar) Lamp

May 17, 2014 By stylishrevamp 3 Comments

My thrift shop lamp has been revamped into an outdoor solar lamp and I love it!

DIY Solar Lamp

[Read more…]

Filed Under: Before and After, DIY Crafts, Fabulous Finds Tagged With: lamp, solar lamp, thrift shop

Family Birthday Calendar

February 16, 2014 By stylishrevamp Leave a Comment

Several months ago my sister in law saw a family birthday calendar on Pinterest that she liked and she asked me if I could make one for her.  I told her I would and I FINALLY started and completed it! It wasn’t that hard to do it just seemed like every time I would think about getting started something would get in the way….Mainly CHARLIE

DSCN4593

He is so cute but he is A LOT of work!!!

Anyway, back to the Calendar…this is the finished product.

DIY Family Birthday Calendar

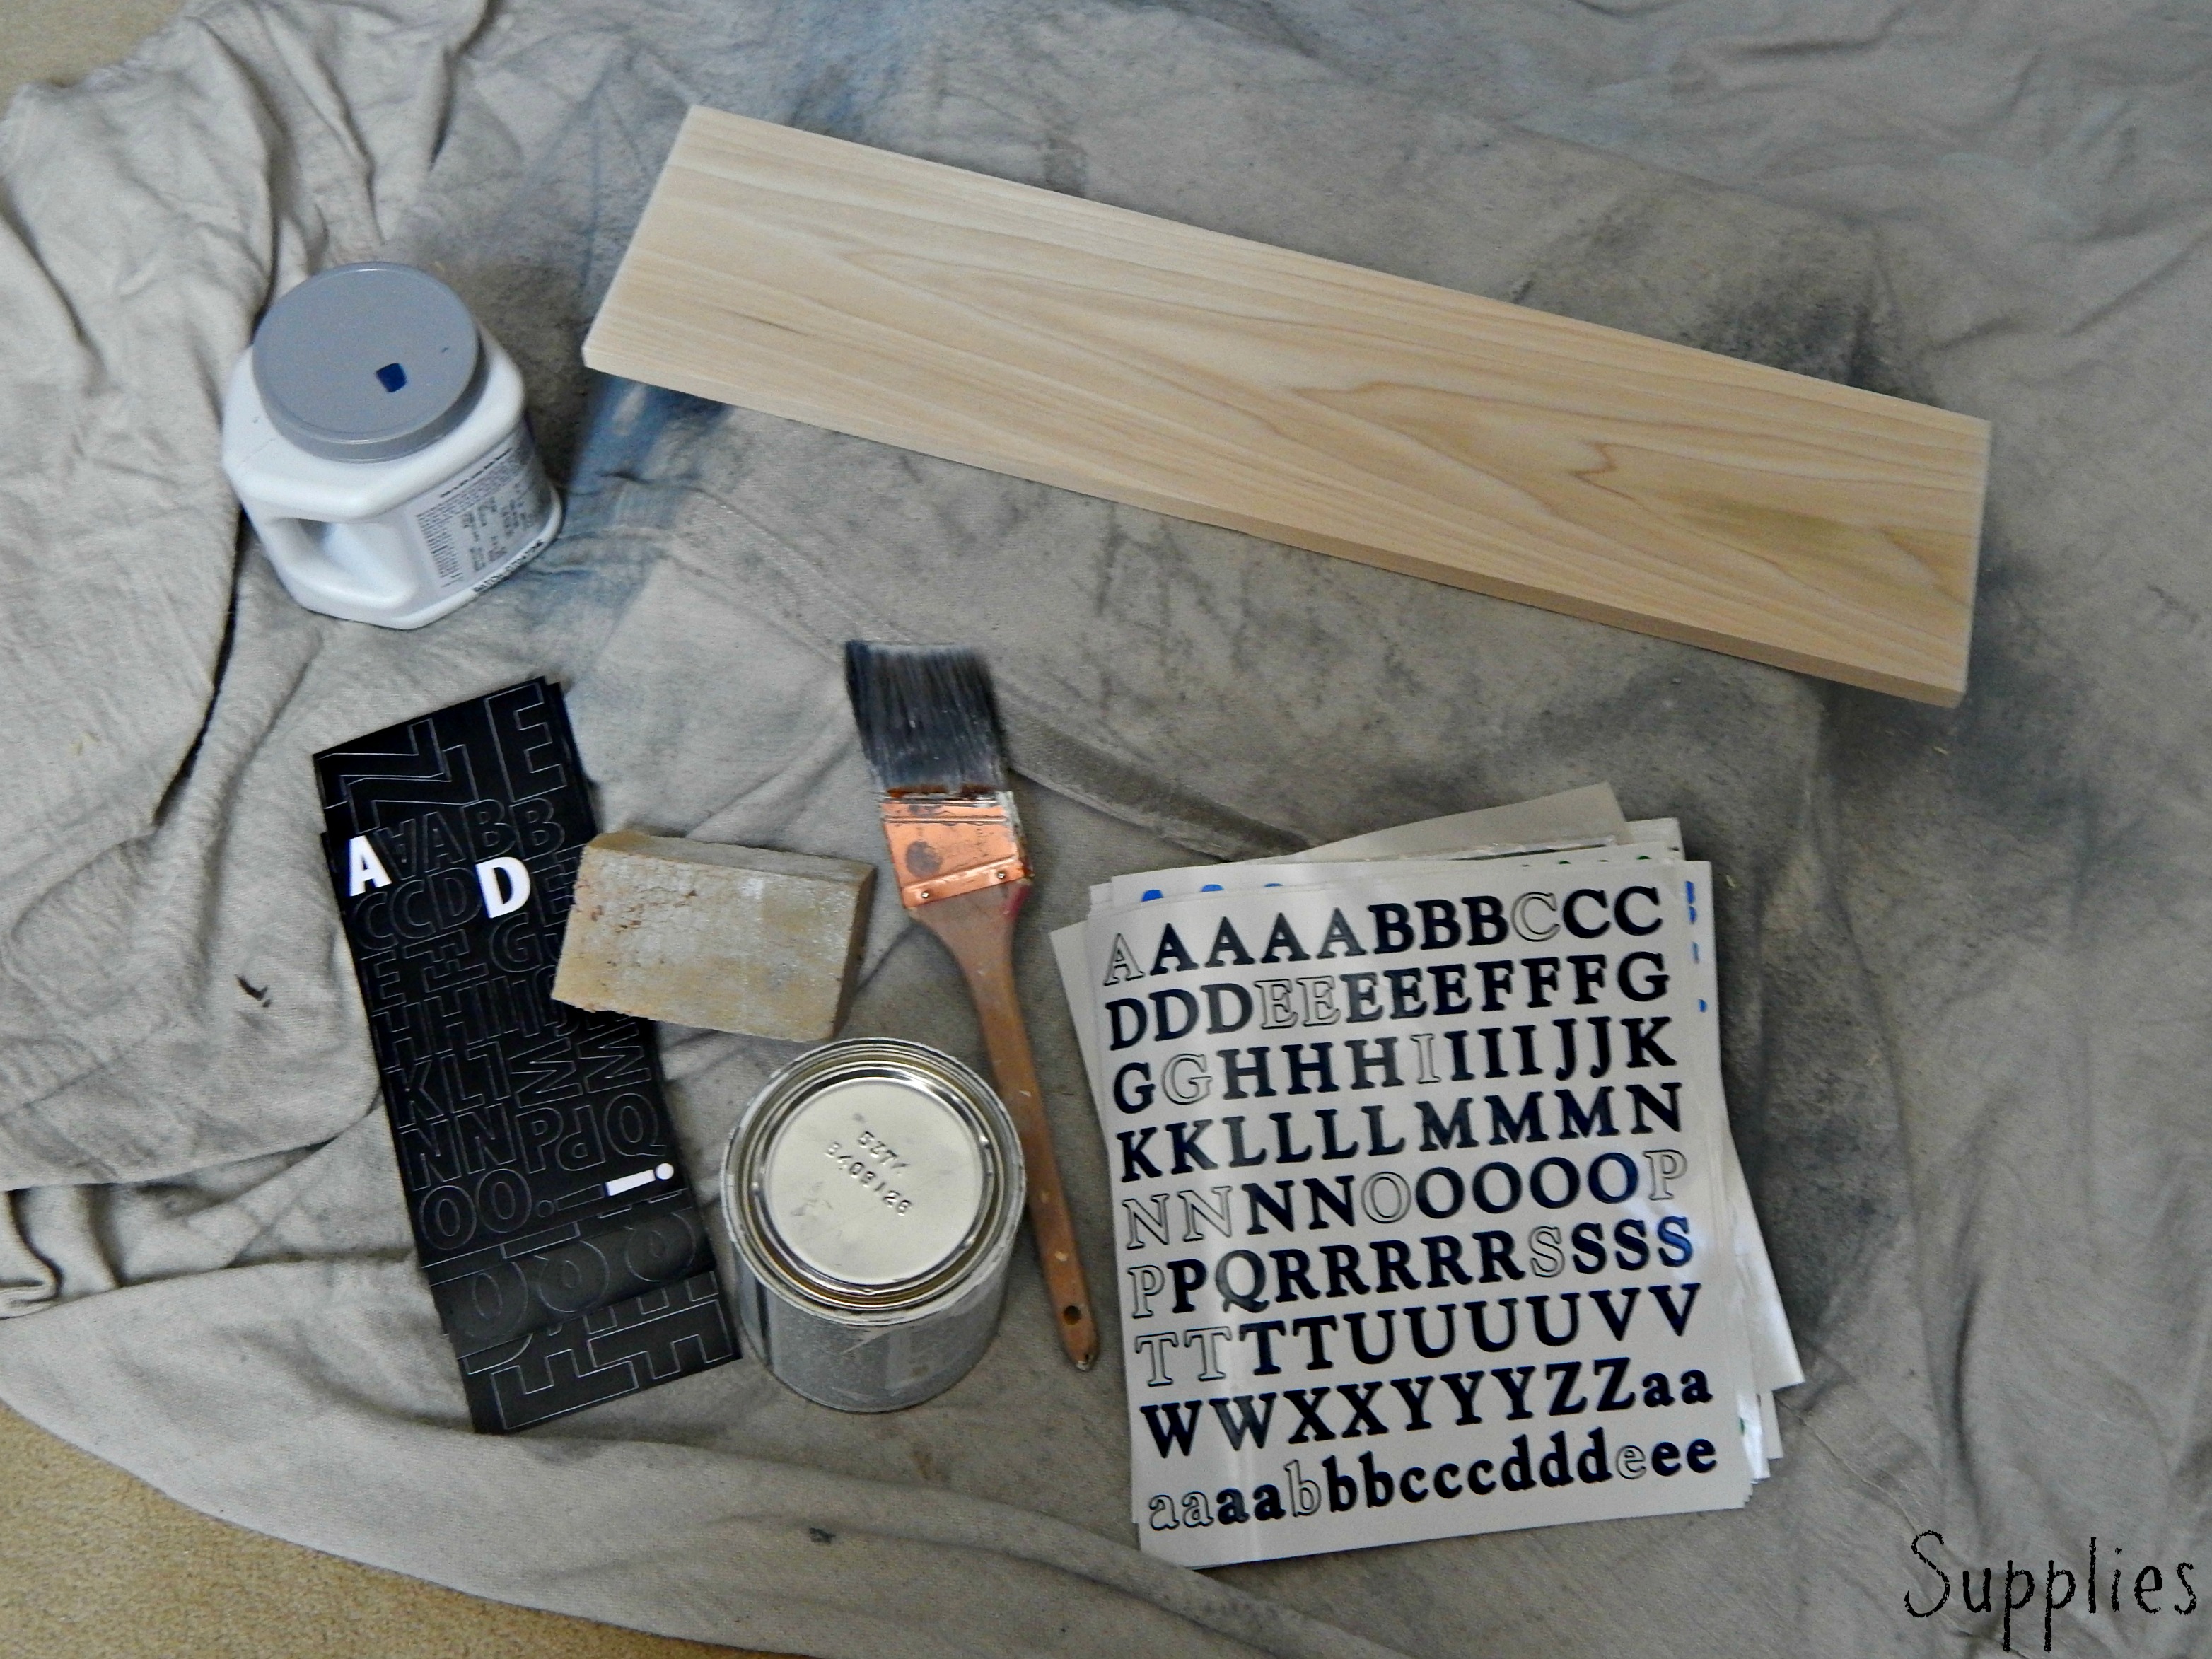
My supply list included:

Scrap of wood

Vinyl lettering

Decorative tape

paint and brush

eye hooks

decoupage

sanding block

stickers

tags

Family Birthday Calendar Supplies

The first thing I did was sand my piece of wood. Then I did a base coat of white paint.  Once that was dry I added the vinyl lettering and spelled out Family Birthdays.  I then painted over the entire board with my second paint choice which was blue.  After that was dry I removed the vinyl lettering.  I used the sanding block over the entire board again. I like the effect it had on the lettering. I then added  the stickers for the months of the year.  I was going to stencil those  but I knew I would never be able to get that done.  I added some decorative tape just to give it some dimension and add a little something extra to it.  I added eye hooks to the bottom and attached tags for the names and dates of the birthdays.  I will eventually switch the tags out for metal disks once I master the art of metal stamping.  Right now I am still in the learning process!
DIY  FamilyCalendar

I think it turned out great.  I might have to make one for myself…

DIY Family Calendar

(All photos are courtesy of Kolson Close Up)

We are linking up to:

sunday_button  workitwednesday_zpscfc92ec3

Filed Under: DIY Crafts Tagged With: Paint, vinyl lettering, Wood

Revamped Wine Rack

January 6, 2014 By stylishrevamp Leave a Comment

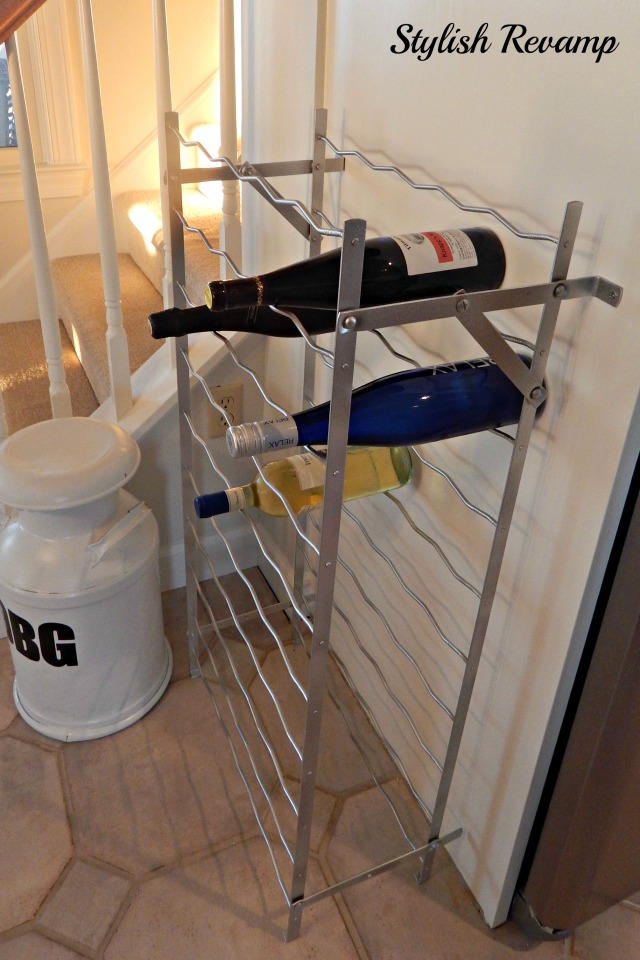
I finished this wine rack several months ago and am just now getting around to sharing with you today.  I found this piece for $19.00 at an antique shop on our way to the Island Home. I am not sure what kind of rack it is but I am going to use it as a wine rack.   This is what it looked like when I found it.

Vintage Wire Rack

I really like the red but it just was a bit too much for the kitchen.  I decided to spray it using the stainless steel paint that I had on hand.  It matches the appliance in the kitchen. It is simple, neat and keeps the kitchen looking organized!

DIY Vintage Wire WIne Rack

Spray Painted Vintage Wire Rack Turned into Wine Rack

I think this piece is really unique and I am glad I found it!

We are linking up to:

GiveMeTheGoodsMondaynewbutton_zps121b9e82

Filed Under: Before and After, DIY Crafts, Fabulous Finds Tagged With: DIY, Paint, wine rack

Home Office

December 28, 2013 By stylishrevamp 3 Comments

We have been working in the basement on and off for a few months and I decided to carve out a space for our blog work. We also set up a little photography studio for my tech guy!

We built a simple desk that suits us and gives us plenty of space for our individual needs.  We still need to add some finishing touches but we are getting there.

DIY Desk With Horse Aluminum Legs

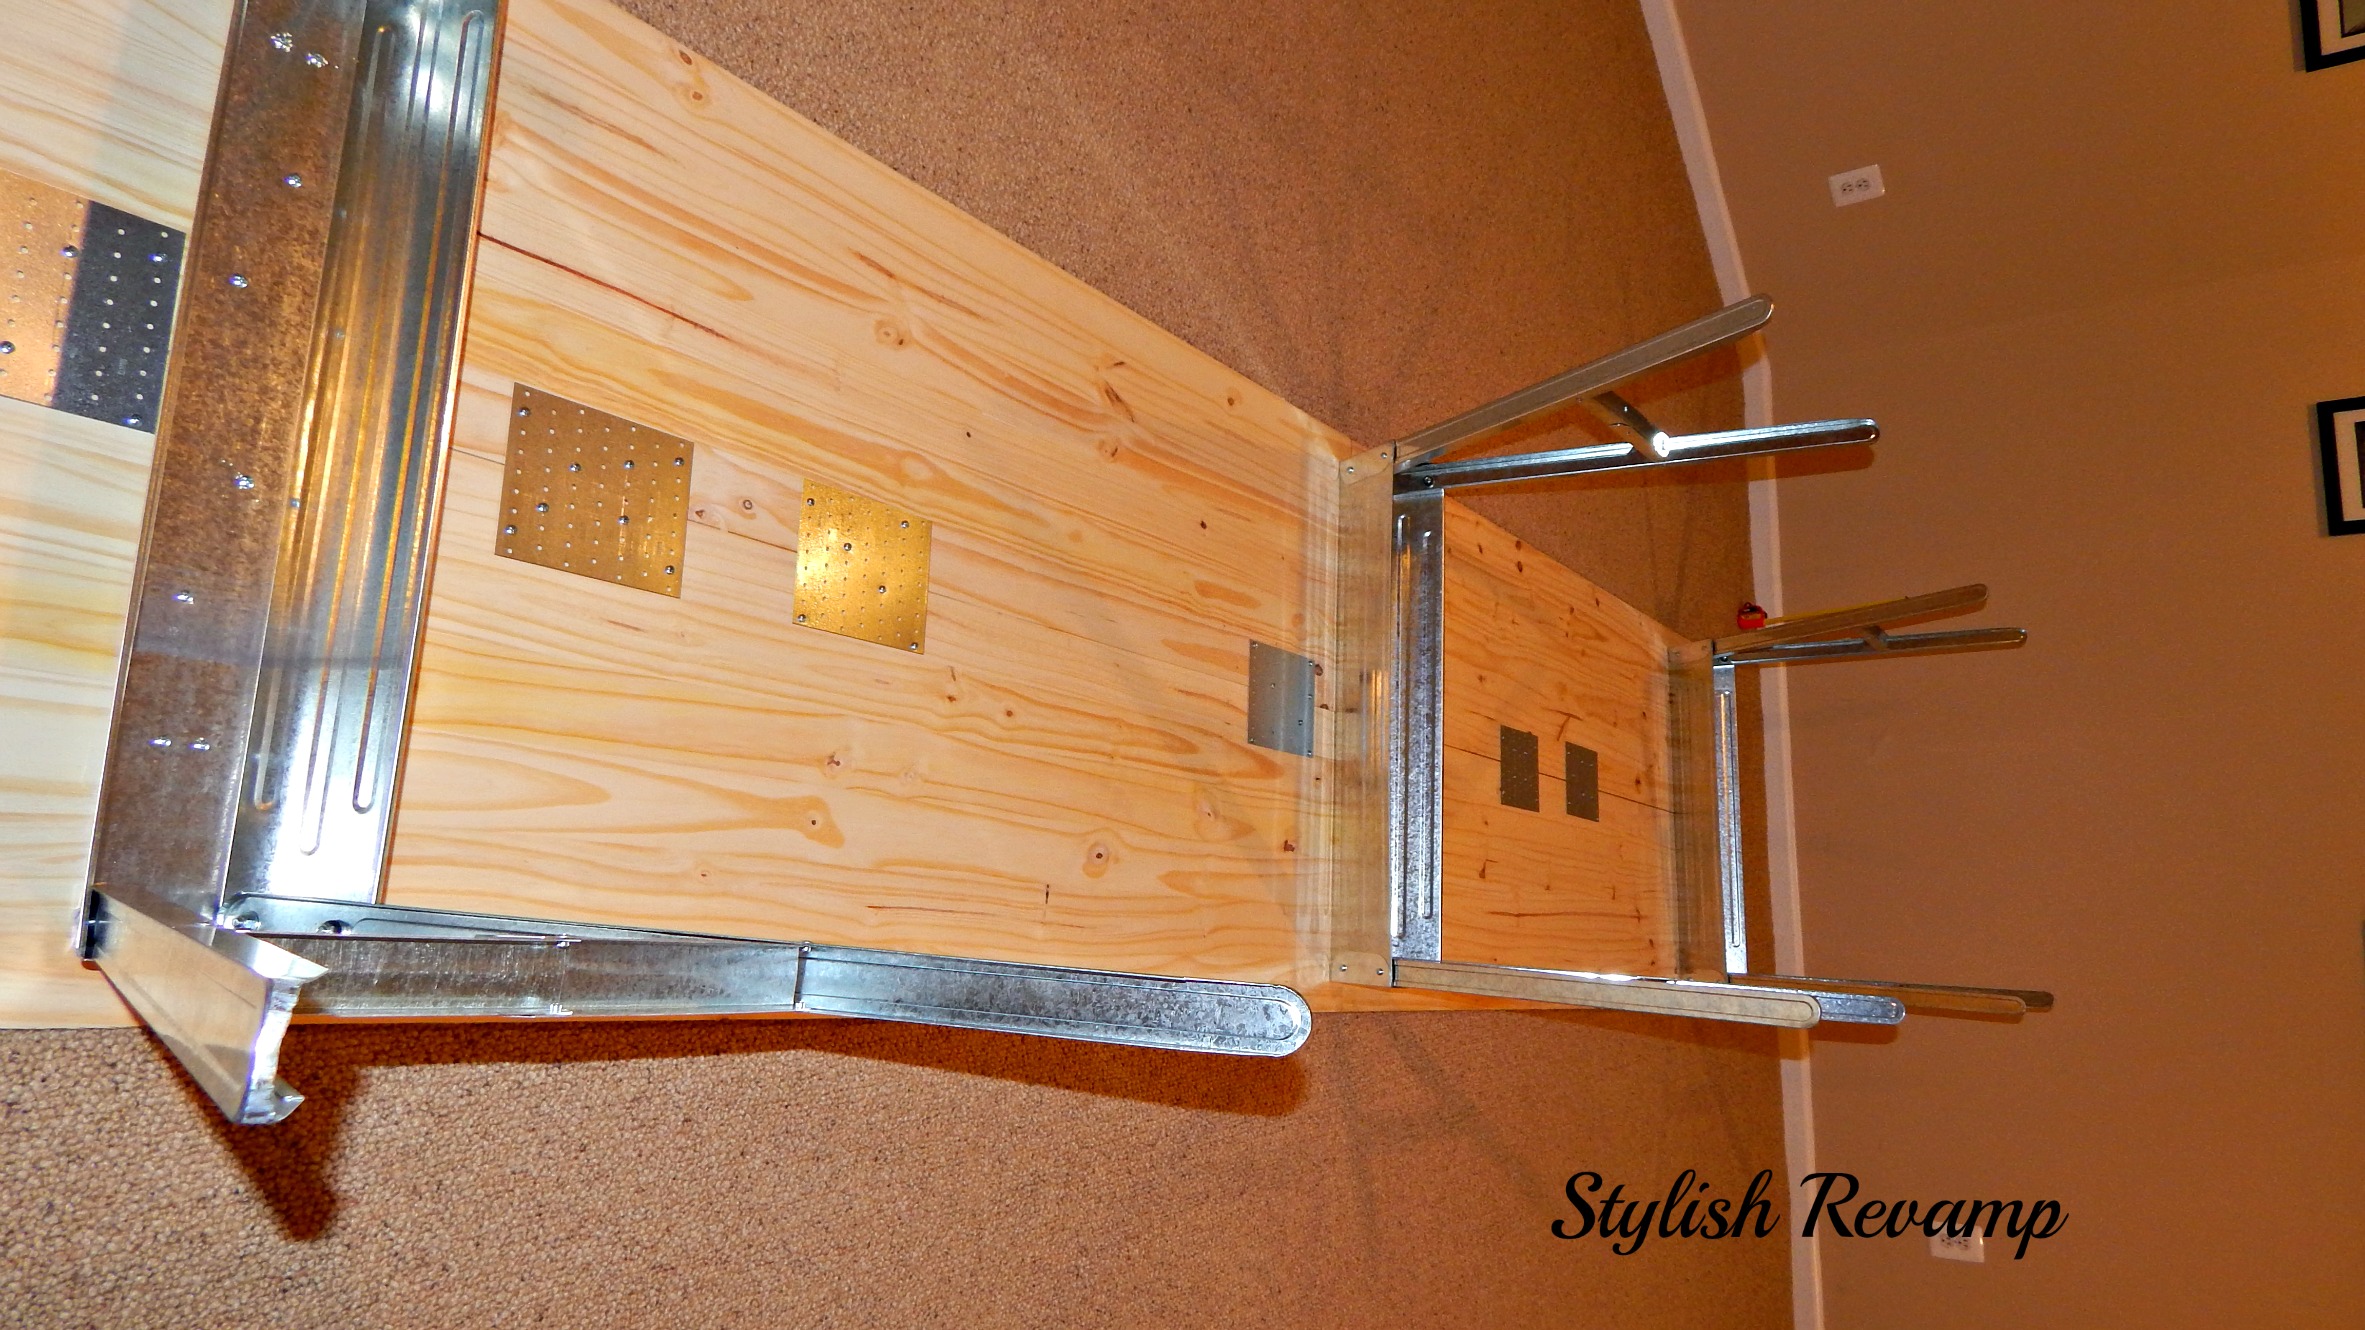
We made the desk from metal/aluminum sawhorses and four 2 feet by 6 feet planks of wood.

                               DIY Desk With Stain        DIY Desk With Saw Horse Legs

We used joiners to pull the seams together on the four separate planks of wood.  Then we attached the sawhorses to the planks with metal screws.  I used leftover wood to trim out the front and sides of the desk to give it a more finished look.  I did not countersink the screws on the trim pieces which adds a more industrial look to the piece. Once that was complete I finished it off with barn wood grey stain.

DIY Desk Saw Horse Legs

DIY Desk With Saw Horse Aluminum Legs

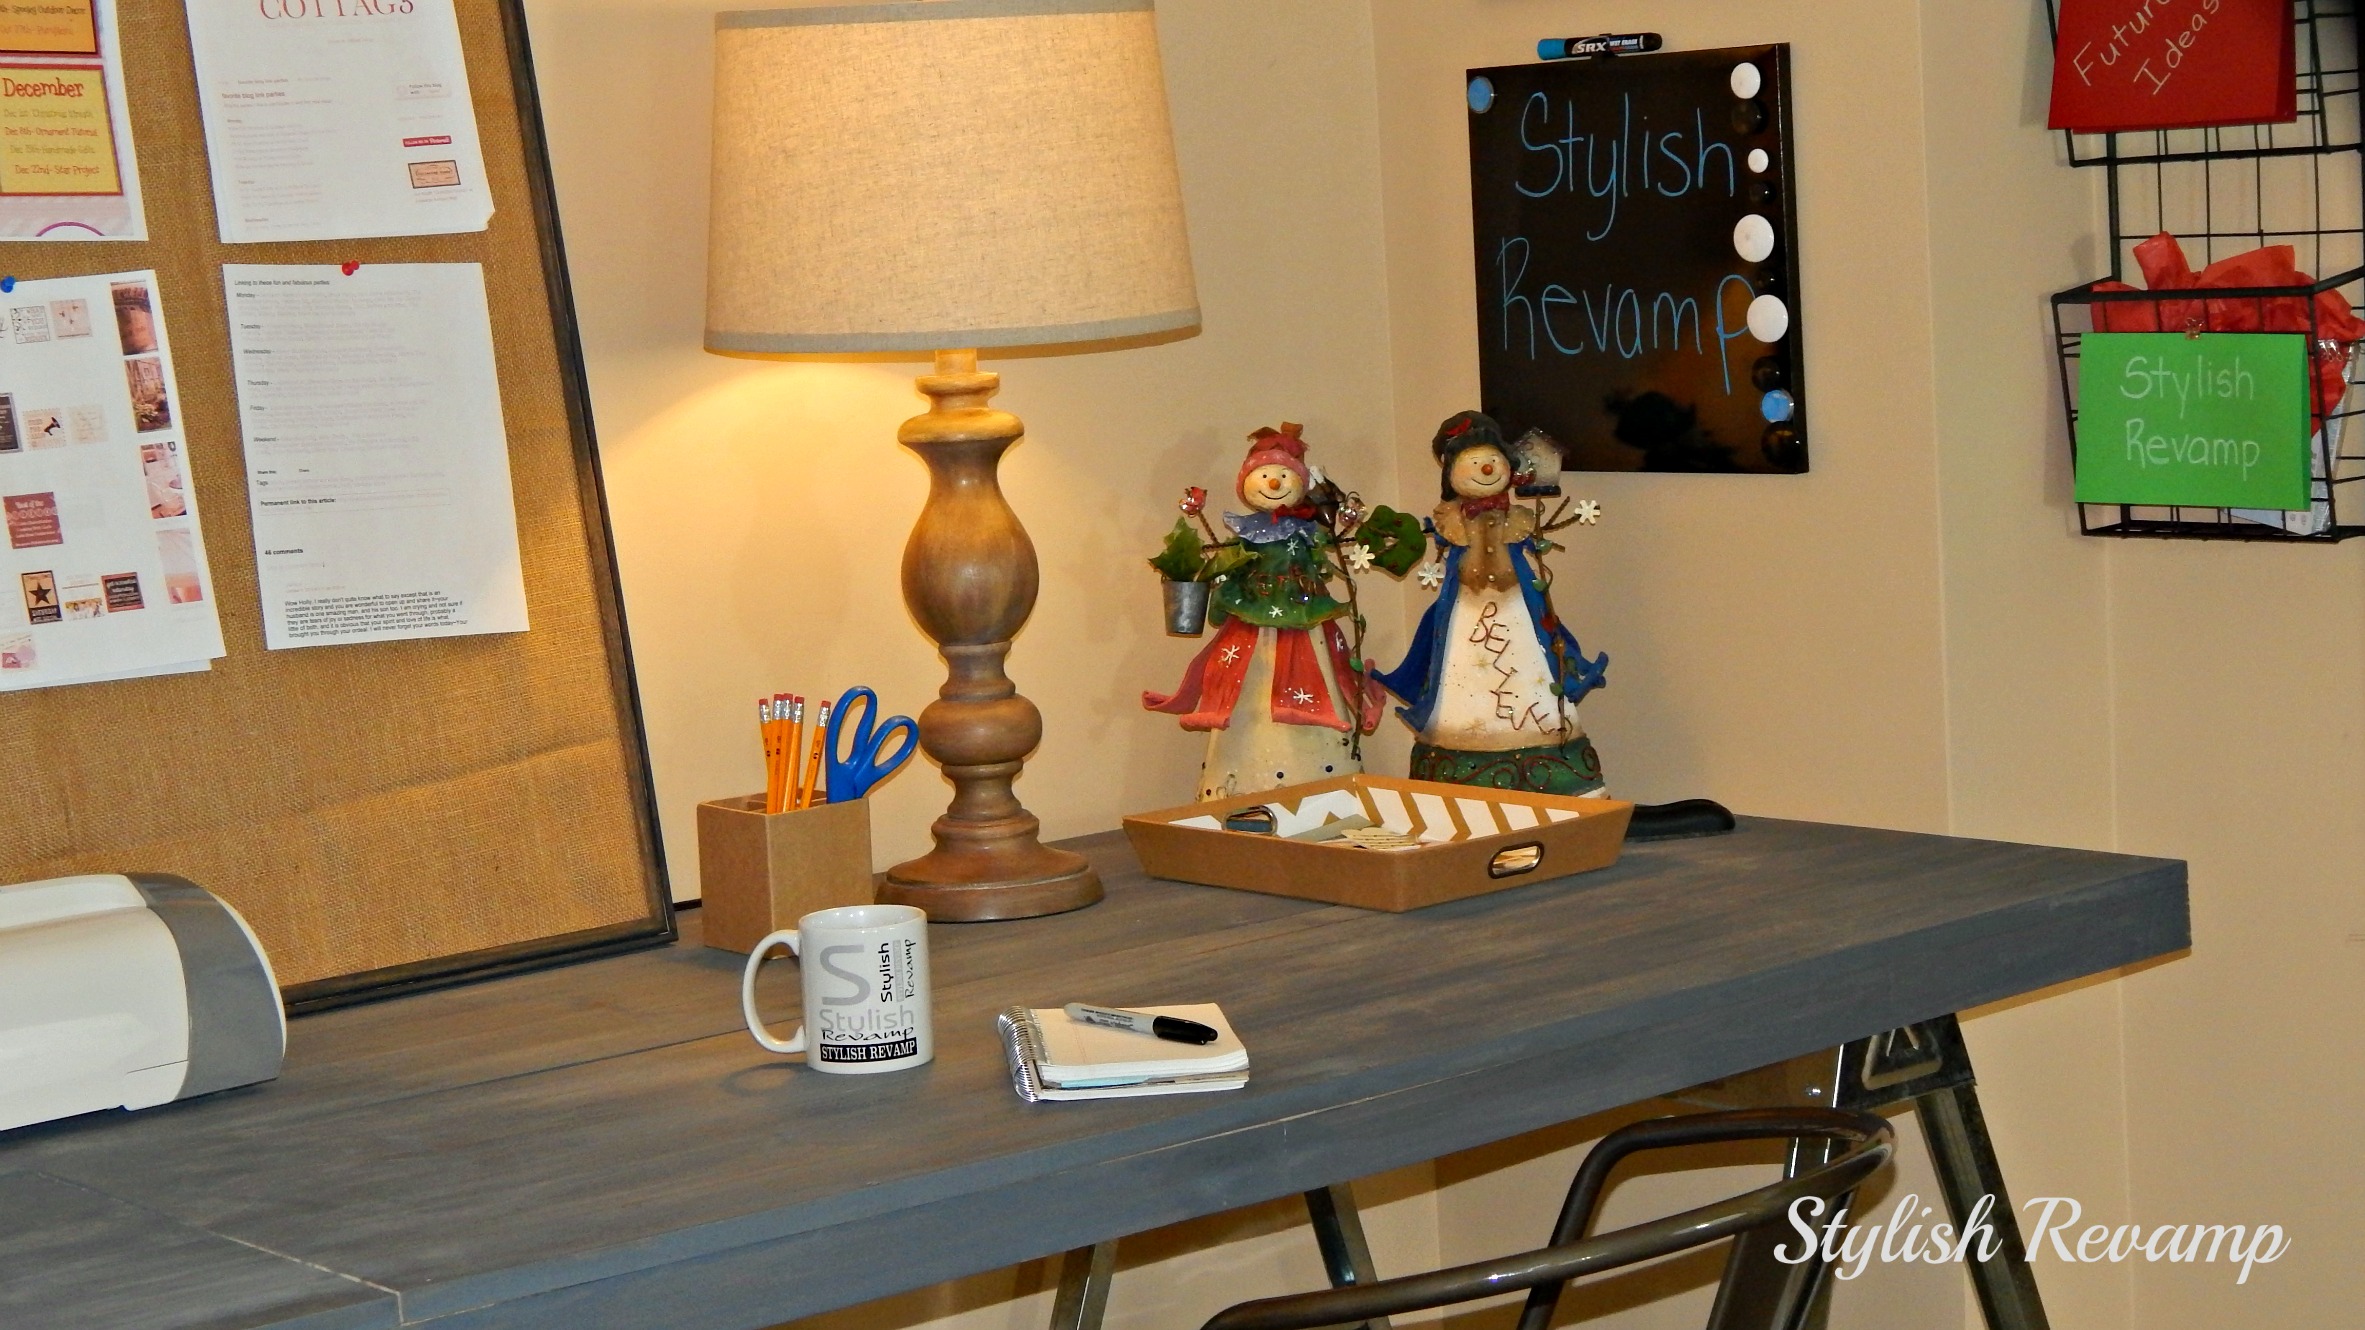
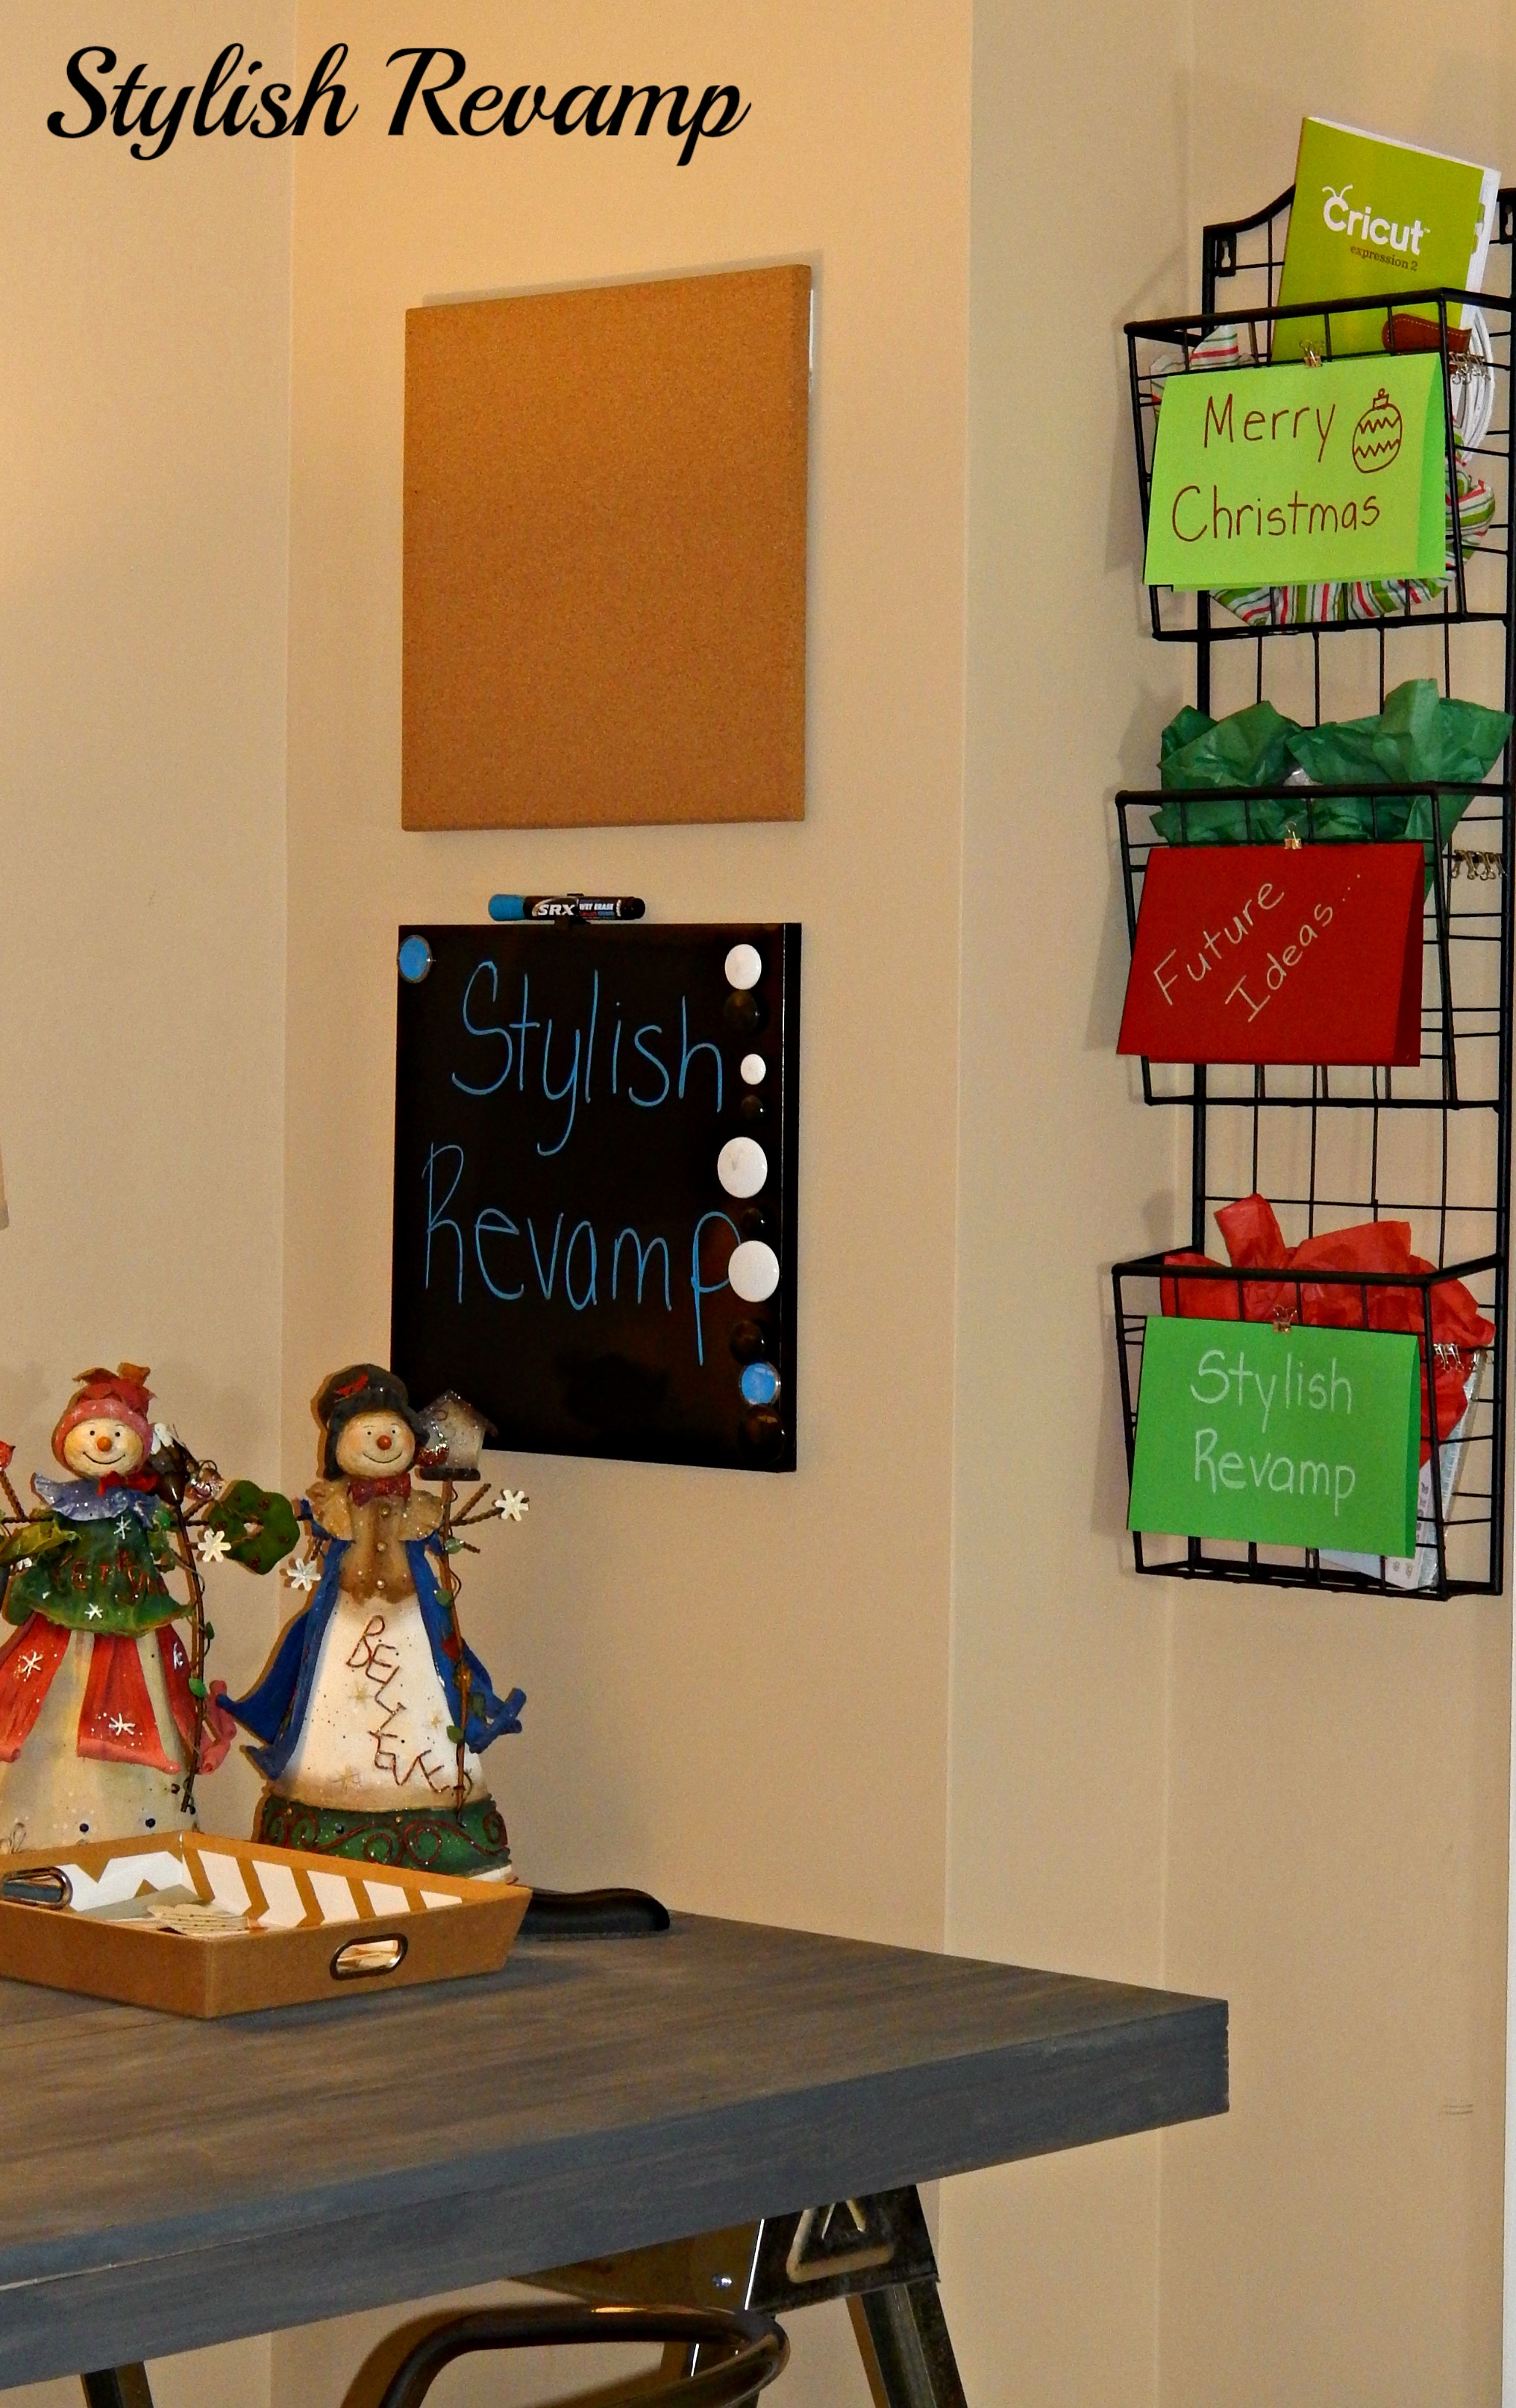
We recovered an old bulletin board with burlap,  added a few whiteboards and hung our wire rack organizer which was a gift from two of our biggest supporters (Thanks Kim and Sandy!)

DIY Desk

   Personalized Mug By Personalization mail.com

Check out our personalized mugs from Santa! He also gave us the Cricut Expression 2.  We are still trying to figure our how to use it.  I will leave that up to my tech guy to figure it out and explain it to me!

DIY Desk TJ Maxx Lamps

DIY Desk Cricut Cutter

We are Linking up to:

GiveMeTheGoodsMondaynewbutton_zps121b9e82  TDCbutton  inspiration-exchange-image-1 

Related articles
  • Office Space (illustratednutrition.com)

Filed Under: DIY Crafts, Home Tour Tagged With: Desk, stain, Wood

Christmas Home Tour

December 8, 2013 By stylishrevamp 6 Comments

Welcome to our Christmas Home Tour.  Sit back with a warm drink and enjoy some of our favorite Holiday decorations.  I love pulling these decorations out year after year.  It brings back such lovely memories of Christmas past.  We also try to add a few new touches along with some favorite vintage finds. I hope you all enjoy!

Christmas Decor

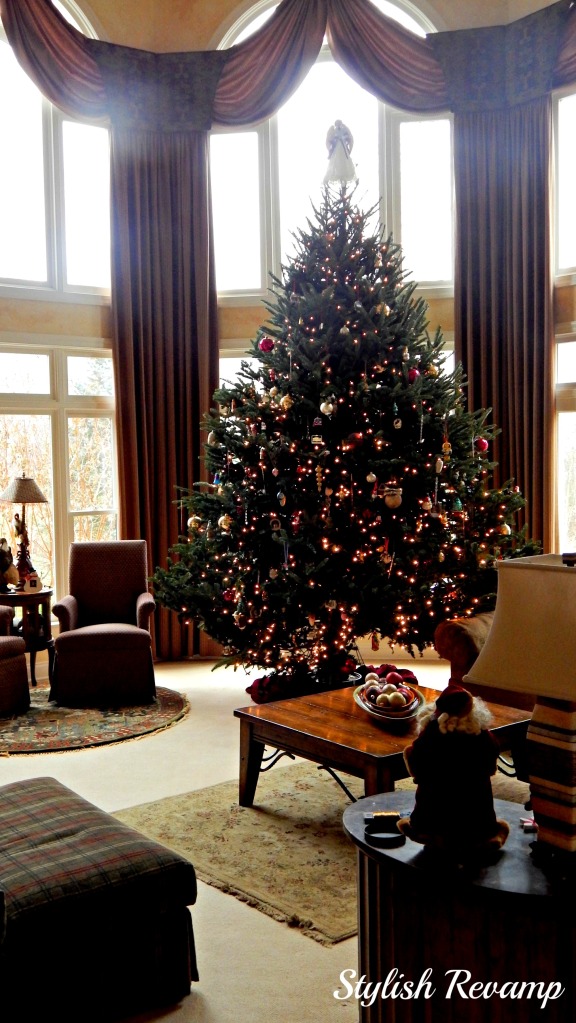
This is our family room tree.  We go each year to a farm and choose the largest tree we can find.  This is where Santa leaves all the gifts.

Family Room Christmas tree

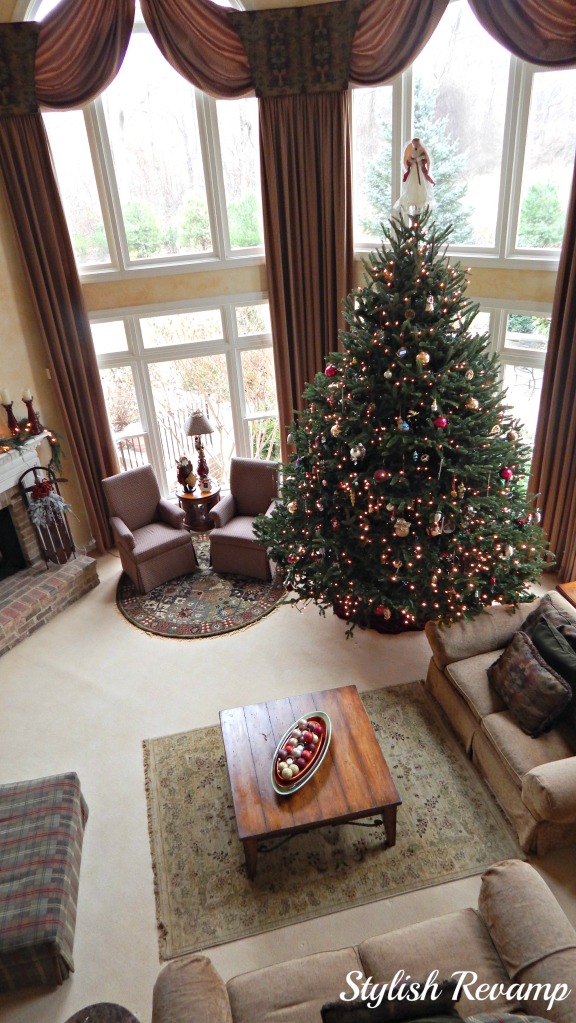
The view from upstairs… I like watching the boys look over the banister on Christmas morning!

Christmas Mantel

We leave cookies and milk for Santa on this fireplace Hearth.

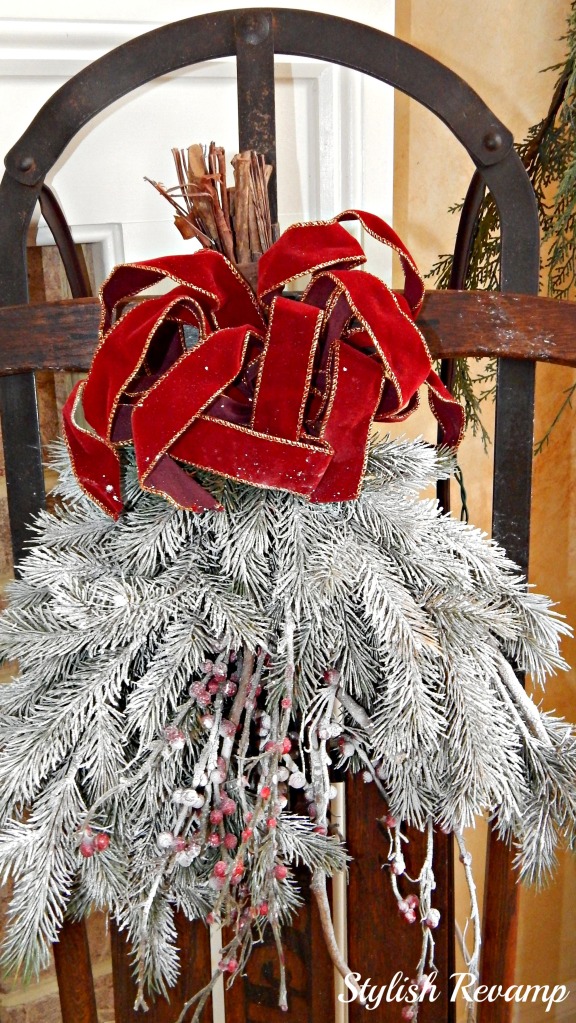
Vintage Sled  With with Flocked Tree Branches

This is a vintage sled that my husband and I bought before we were married.  I just spruced it up with  some pine branches and ribbon and sprayed everything with a light dusting of snow.

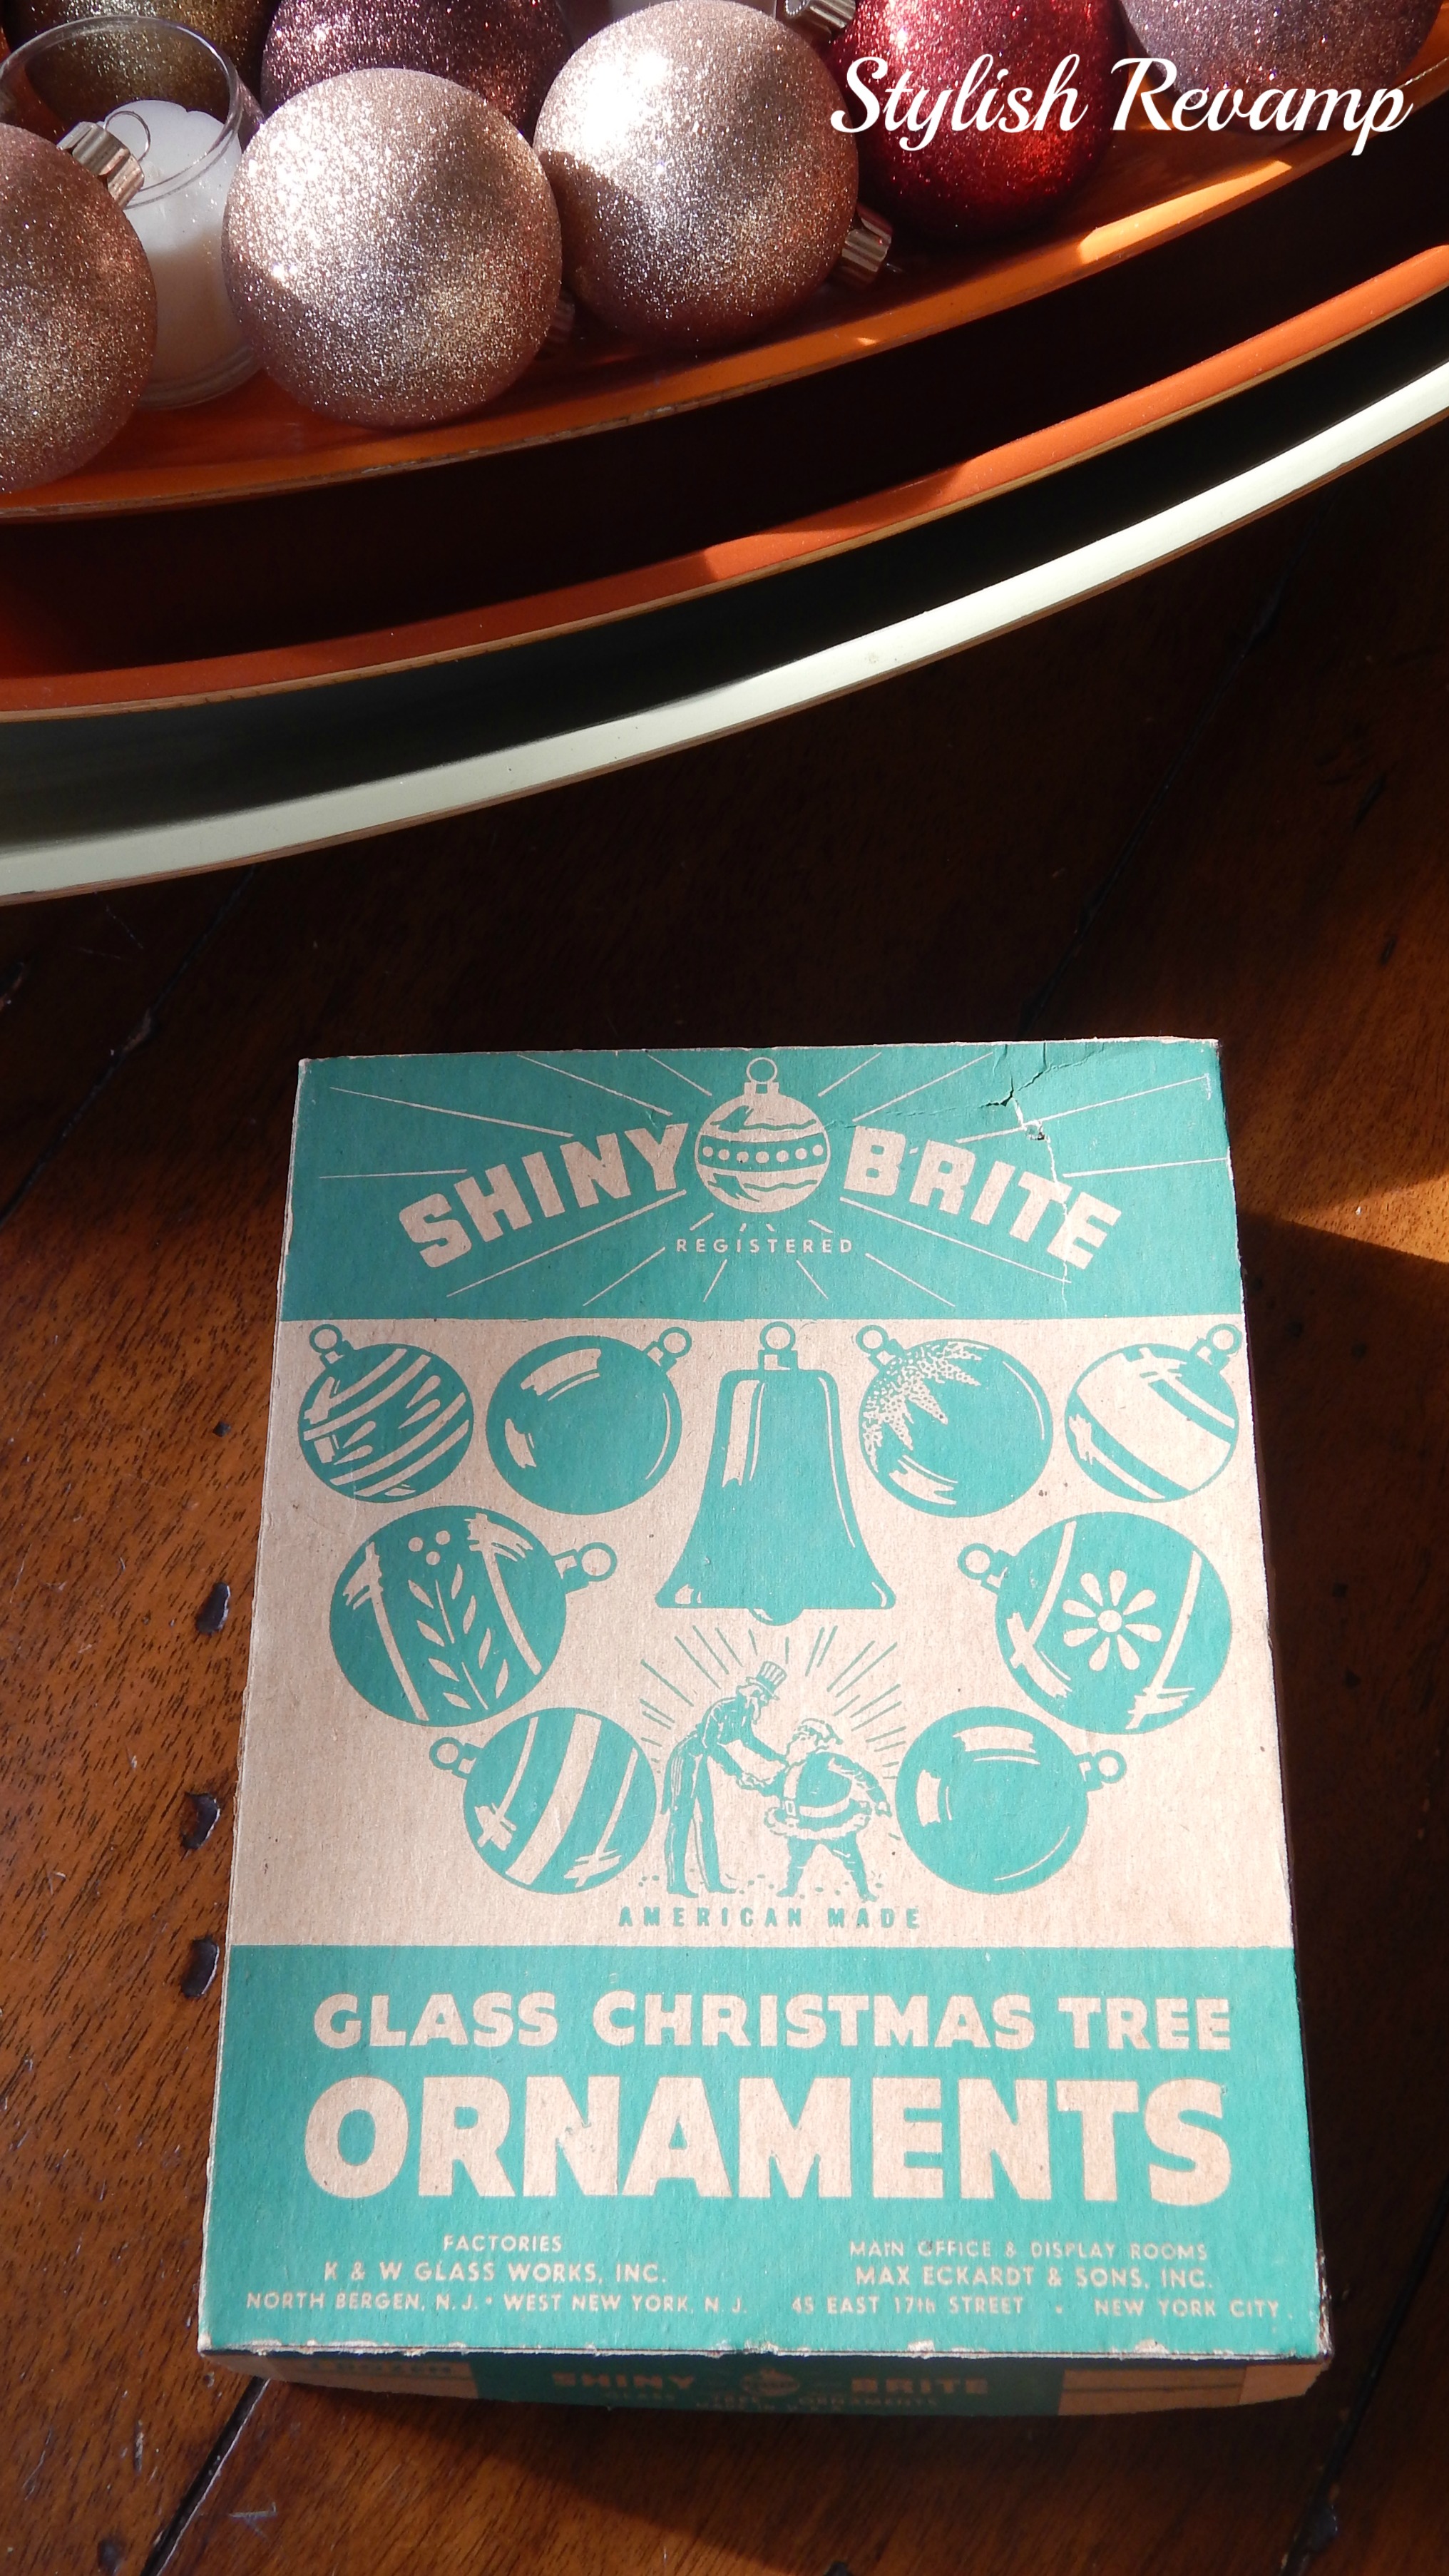
Vintage Shiny Brite Christmas Ornaments

I like to use some of my favorite vintage finds on the Family room Christmas tree like these Shiny Brite ornaments! I love finding vintage Holiday decorations.  I also have the milk glass light bulbs that I will show you in a later post.  They are one of my favorite Christmas items.

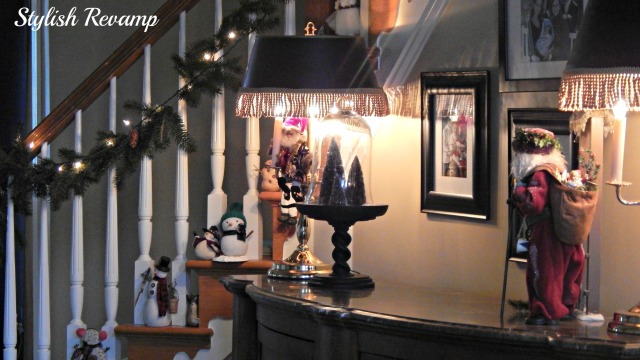
Next up is my foyer.

Banister decked out for Christmas

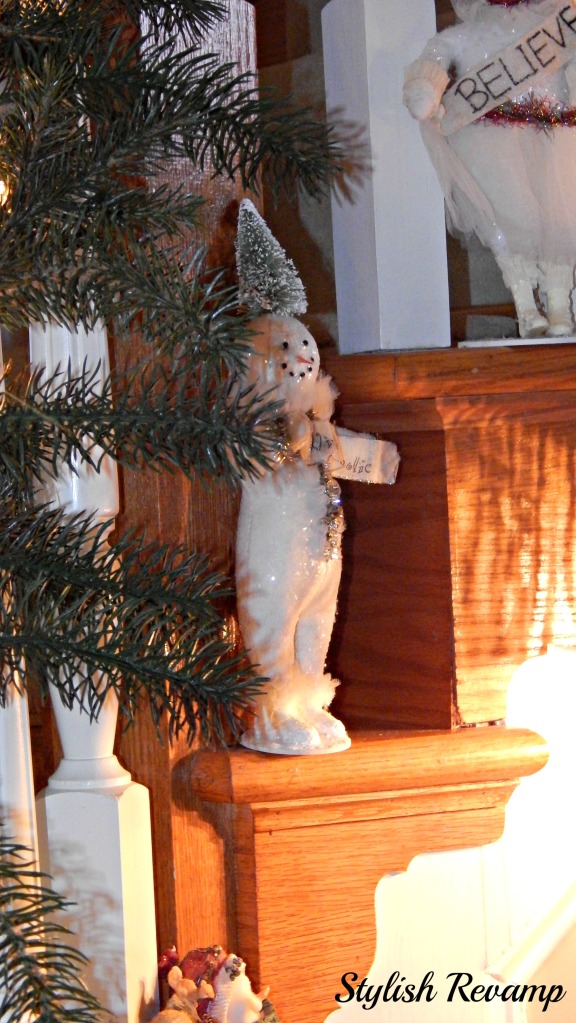
I put  garland around the front stairs.  I also add snowmen on each step.  I got this idea from a dear friend that uses Nutcrackers.  Thanks Debbie for the great idea!

Banister decorated with Snowmen

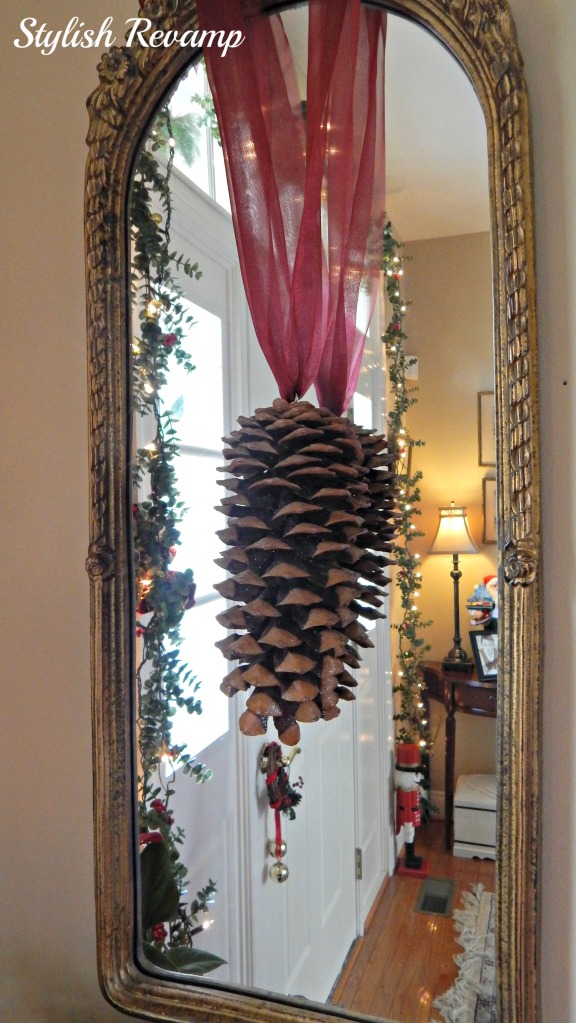
Large Pinecone Christmas Decor

This is the mirror by my front door.  I add the large pinecone every year.  I like the simplicity of it.

Wooden Santas

My tech guy Gman  made the snowman in art class and my Best Friend gave me the lovely Santa for Christmas last year!

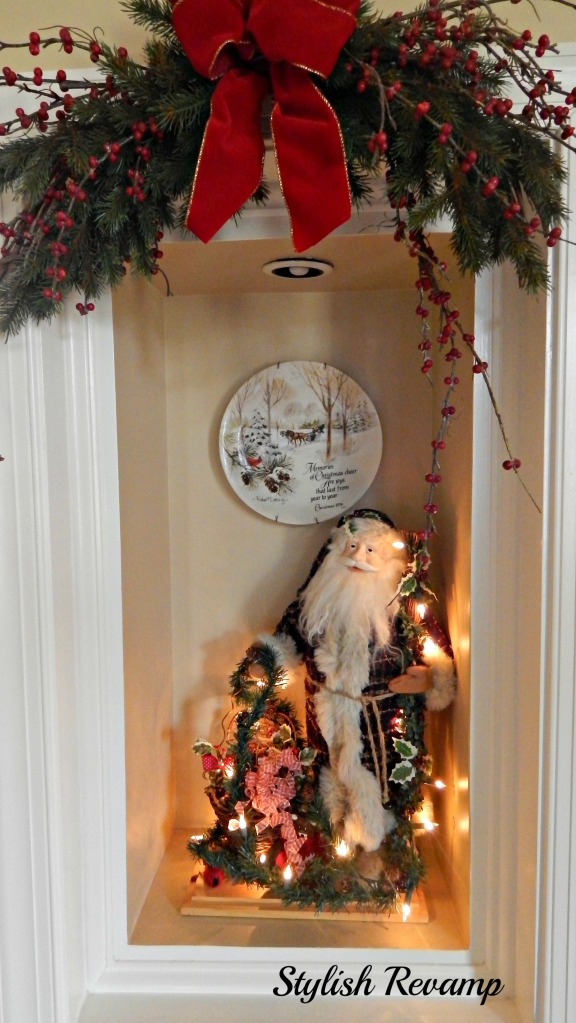
Vintage Christmas Plate

When my oldest two boys were younger, I would let them pick pick out a special Christmas decoration. My youngest still carries on this tradition.  This Santa is something my middle son picked out.  I added the vintage plate above in the alcove and the garland with winterberry.

Christmas decor

Christmas Cloche

Nutcracker

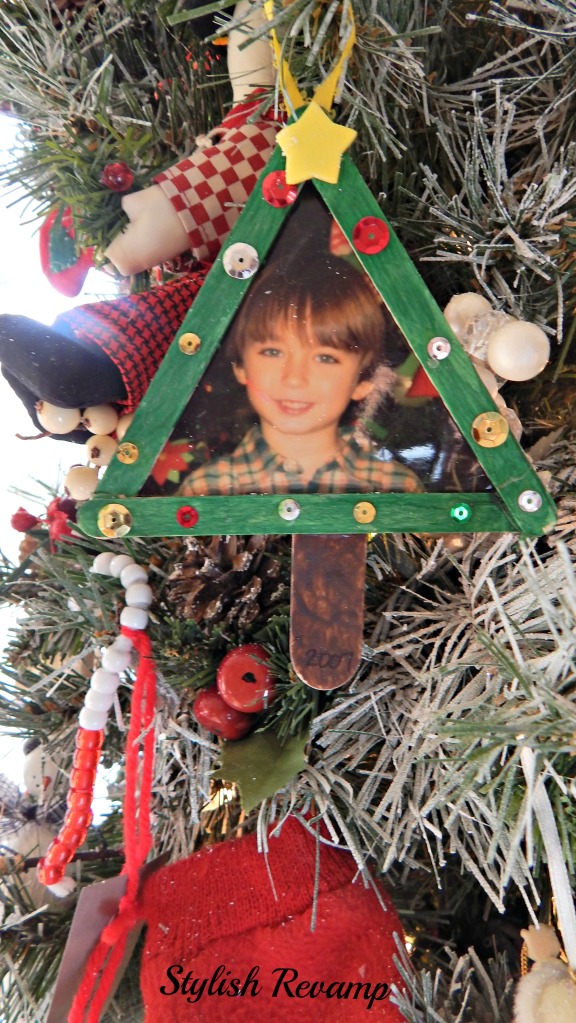
Next up is my Kitchen Christmas Tree.  I love this tree, it is an oldie but a goodie.  I decorate this pencil tree with all the boys’ handmade ornaments and gifts from school.

Homemade Christmas Ornaments

This is my tech guy when he was in preschool!  I miss those days!

Homemade Christmas Ornaments and Keepsakes

 Christmas Pencil Tree

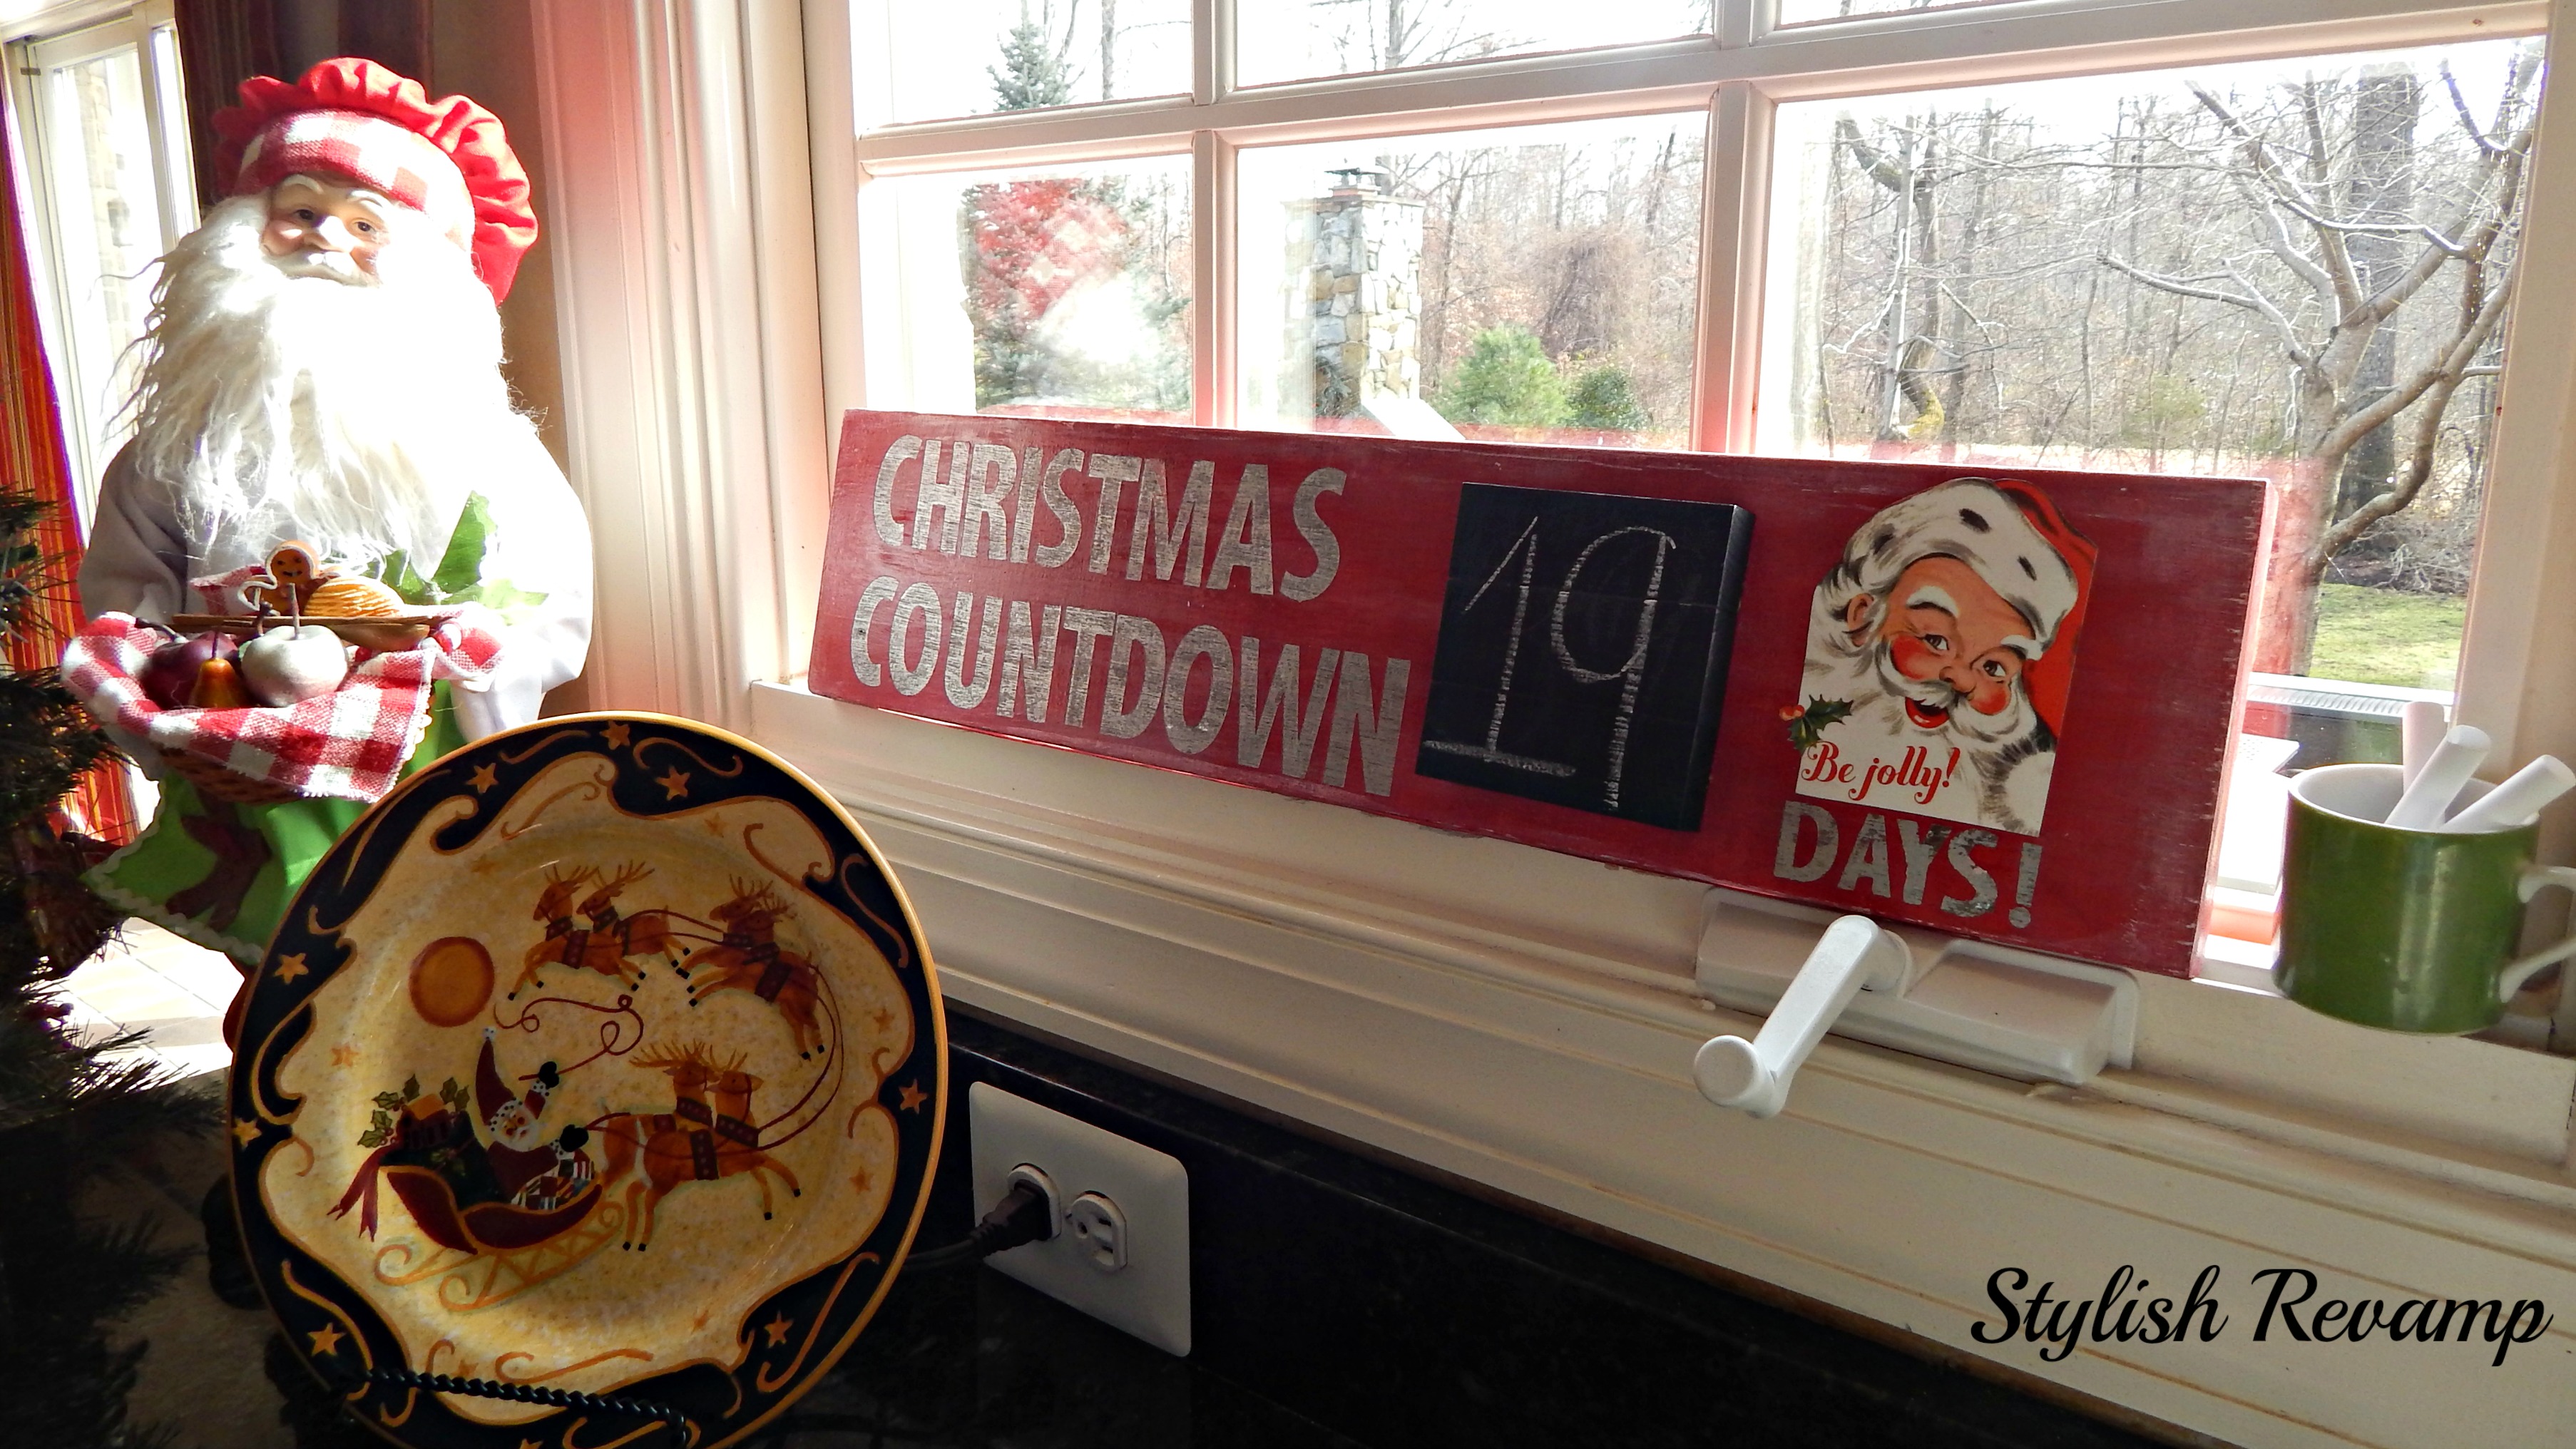
Also in my Kitchen is my handmade Christmas Countdown sign that I showed you here.

DIY Christmas Countdown

Vintage Reindeer

I love these vintage reindeers that I found at a consignment shop.

Silver Christmas Mantel

Flocked Christmas Tree

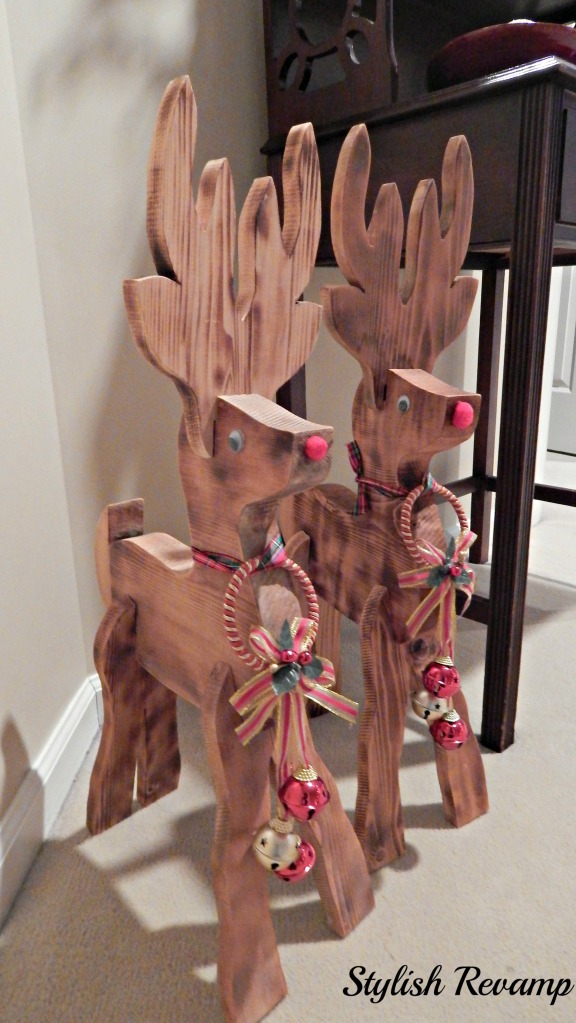
DIY Wooden Reindeers

My dad made me these reindeers when I moved into my first apartment…many years ago! I love, love, love them!

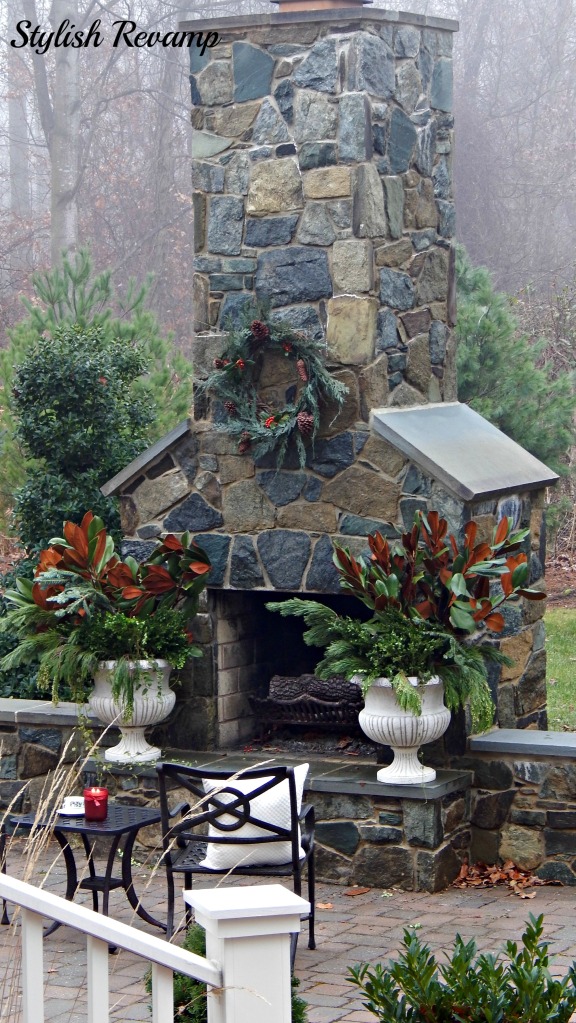
Finally, a sneak peak at my outdoor decor.

Outdoor Fireplace

Outdoor Fireplace

I hope you enjoyed our Christmas Home Tour.

We are linking up to:

GiveMeTheGoodsMondaynewbutton_zps121b9e82  inspiration-exchange-image-1  TDCbutton

Holiday Decor Link-Up!

Filed Under: DIY Crafts, Home Tour Tagged With: Christmas, Home Tour, Vintage

Holiday Wreath

December 6, 2013 By stylishrevamp Leave a Comment

This past week has been a mad dash to get all of my Christmas decorating done.  Today I am sharing my front door wreath.  I got this idea from a magazine last year.  So easy and super cute!

Christmas Wreath with Stocking

Come back this weekend.  I will be doing my Christmas home tour.

We are linking up to:

LinkBackButtonSmall_zps6e176a35

Filed Under: DIY Crafts, Home Tour Tagged With: Christmas, Wreath

Christmas Countdown

November 21, 2013 By stylishrevamp 4 Comments

Today I am sharing with you, my homemade totally free Christmas Countdown sign.  Everything I used, I found around the house and the garage!

DIY Christmas Countdown

Don’t pay attention to the number of day until Christmas.  That is what the actual countdown was when I made the sign and I am not ready to know how many days are REALLY left until Christmas until I get through Thanksgiving first! Then I can begin to panic a bit because I already feel like I am behind.

The sign was really easy to make.  I found the wood in the garage left over from a previous project.  I sprayed the entire piece of wood with a silver spray paint which I used on a bottle cap project that you can find here. I also used the silver paint on my wine rack which I will share with you in a later post. Once the silver paint was dry, I used my vinyl letters to spell out Christmas Countdown and Days! I then used Pure White Chalk Paint from Annie Sloan to cover the entire piece.  Once that was good and dry, I used Emperors Silk Annie Sloan Chalk Paint to paint over the entire piece again.  While that was drying, I used a smaller piece of wood and sprayed it with chalkboard paint for the number part of the sign.  I then found one of our Christmas cards from last year and cut out the Santa.  When everything was dry, I peeled off the vinyl letters to reveal the silver paint beneath the letters.  I used wood glue to attach the chalkboard piece of wood to the sign. I then decoupaged the Santa to the sign and then gave the piece a light sanding so some of the white would show through the red. I think the sign is adorable and once I get my fall decorations down I can’t wait to decorate with it!

 DIY Christmas Countdown

ALSO I WANTED TO WISH MY OLDEST A HAPPY 18TH BIRTHDAY! I CANNOT WAIT TO SEE YOU OVER THANKSGIVING BREAK!

We are linking up to:

inspiration-exchange-image-1  GiveMeTheGoodsMondaynewbutton_zps121b9e82  LinkBackButtonSmall_zps6e176a35  d17035f5-81a7-412b-86d2-920026553078_zpse68bbd5f  sunday_button  button

Filed Under: DIY Crafts Tagged With: Christmas, Paint

Driftwood Christmas Tree

November 14, 2013 By stylishrevamp 9 Comments

Design your own DIY Driftwood Christmas Tree/ Easy step by step process with materials list.

I love this time of year.  The weather is finally turning cold and I love getting ready for the Holidays.  I enjoy everything about it. Although, I think my favorite part is decorating the house and I have had this project on my mind since last year…

While I was out shopping with some friends, I saw a Driftwood Christmas Tree but it was $65.00.  I knew I could make my own version of it for a lot less.  Since then I have seen them in the Restoration Hardware Catalog ($79.00-$179.00) and The Home Decorators Collection Catalog ($63.00).  So here is my version of the Driftwood Christmas Tree.

Driftwood Christmas Tree Restoration Hardware Hack

My Supply List Includes:

Cardboard Cone Shape (I got mine from Michaels)

Driftwood

Hot glue Gun and Glue Sticks

Artificial Spray Snow

Driftwood Christmas Tree

It was pretty much the same process as the Driftwood Wreath which you can find here.  Some of the trees I saw, the driftwood was placed horizontally around the tree. For my first tree, I thought placing the driftwood vertically would be easier.  So I found similair size pieces and glued them around the base like this…

DIY Driftwood Christmas Tree

I continued adding pieces all the way around the base overlapping them as I moved up the tree.   I had to break  some of the driftwood into  smaller pieces just to get the right size.  It’s very easy to do and I like how each tree has it’s own character. This is what the tree looked like before I added the spray snow.

 DIY Driftwood Christmas Tree

           This is a picture of it with the  spray snow.  I am not sure which one I like the best… with or with out the snow?

DIY Driftwood Christmas Tree with Snow

DIY Driftwood Christmas Tree

This was such an easy and inexpensive project that anyone can do.

DIY Driftwood Christmas Tree. ..Quick easy step by step process.

I hope you enjoyed this quick and easy Driftwood Project.

Until Next Time,

SR_signature


GiveMeTheGoodsMondaynewbutton_zps121b9e82  inspiration-exchange-image-1

Filed Under: DIY Crafts Tagged With: Christmas, Driftwood, Holidays, Tree

  • « Previous Page
  • 1
  • 2
  • 3
  • 4
  • 5
  • 6
  • Next Page »

Meet the Team

Hi, I'm Kathy! Mom to 3 boys, lover of thrift shopping and all things vintage.

Follow along with me as I revamp our home using thrifted finds!

Subscribe via Email


Visit Stylish Revamp's profile on Pinterest.

Our Favorite Posts

  • Driftwood Christmas Tree
    Driftwood Christmas Tree
  • IKEA BILLY Bookcase Hack
    IKEA BILLY Bookcase Hack
  • DIY Headboard
    DIY Headboard
  • Revamping my Closet with the IKEA Pax Wardrobe
    Revamping my Closet with the IKEA Pax Wardrobe
  • How to Make A DIY Driftwood Wreath
    How to Make A DIY Driftwood Wreath

Categories

  • Before and After
  • DIY Crafts
  • Fabulous Finds
  • Friday Favorites
  • Goodwill Goods
  • Home Tour
  • Projects and DIY
  • Thrift Shop
  • Thrift Shop Thursday
  • Uncategorized

Topics

Basket Chairs Chalk Paint Christmas Christmas Decor Christmas Tour Consignment Shop Consignment Shopping Desk DIY Driftwood Fall Flea Market gold Goodwill Halloween Holiday HomeGoods Home Office Home Tour IKEA Kitchen ladder Master Bedroom Michaels Milk Cans Nautical Paint paint pen Pillows pumpkins Shopping Sign spray paint thrift Thrifting thrift shop Thrift Shopping thrift shop thursday Tour Vintage White dishes wine rack Wood Wreath

Archives

Follow us on Pinterest!

Visit Stylish Revamp's profile on Pinterest.

Follow us on Twitter!

Tweets by @StylishRevamp

Follow us on Instagram

Screen Shot 2018-09-16 at 8.50.53 PM

Like us on Facebook!

Like us on Facebook!

Copyright © 2025 · Chic Pro Theme On Genesis Framework · WordPress · Log in