I think everyone has hopped on the Marie Kondo bandwagon. I watched one episode on Netflix and I have to say it stressed me out. I can live with mess for only so long before I lose it. That was the case with our pantry. I wanted to tackle it before Thanksgiving and time just got away from me. I decided to wait on the revamp until after the Holidays and it drove me crazy looking at the mess every day. It got to the point where we were buying things because we couldn’t find the ones we already had in the pantry.
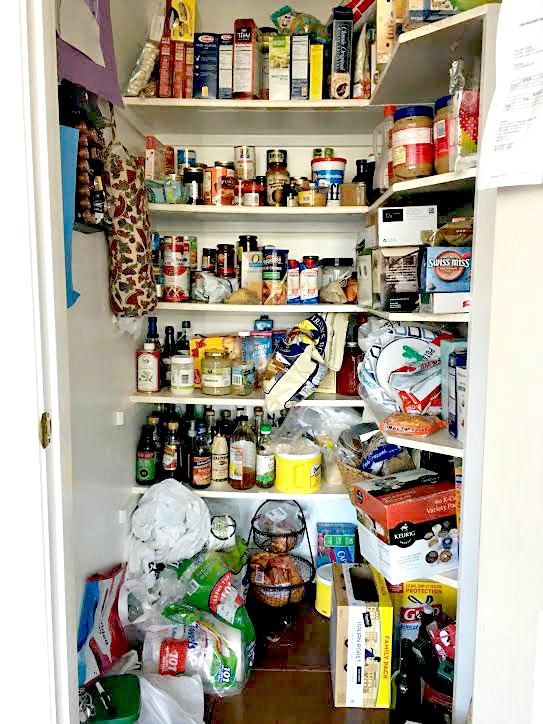
This is the hot mess we lived with in November and December. Chaos like this drives me crazy. I am the type of person that has to have my house in order when I go to bed. No dishes in or on the sink when I go to bed at night, pillows fluffed on the couch and throws folded and placed where they need to be. It just helps me function better, especially when I start my day off with a clean kitchen. So this mess was difficult to deal with to say the least. After Thanksgiving, I knew I wouldn’t have time to complete it and I wanted to decorate and enjoy my Christmas home but this mess was always lurking in the back of my mind.
So, January was a fresh start. Once the Holiday decor was boxed and put away, we emptied out the pantry and got to work. I have to admit, this was my least favorite project ever. I felt like it was never-ending. So much stuff to sort through and quite frankly it was just mind numbing. I liked the actual revamping of the shelves and I didn’t mind painting the entire pantry but going through the food and organizing it was pure misery.
My version of tidying up the pantry
I have to admit the outcome was so worth the two weeks of misery I went through getting this space organized. I’ll take you back through the process and show you what it looked like.

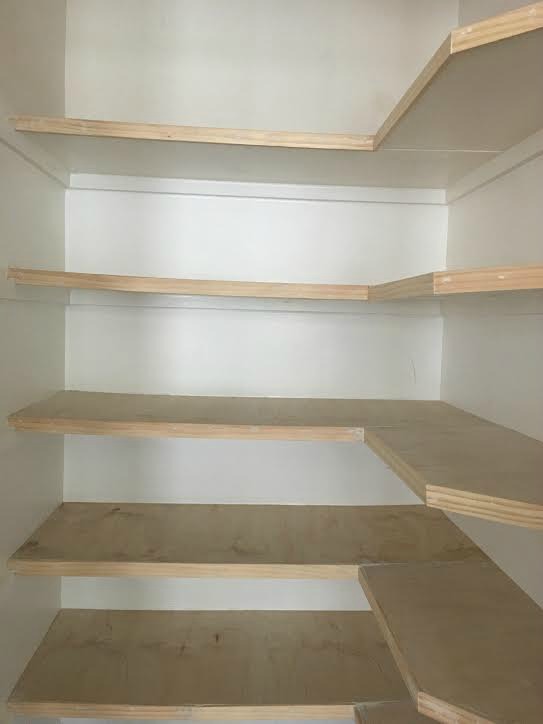
This is what the panty looked like once we removed all the food. I then got busy removing all the old contact paper that originally lined the shelves. Once that was done, I scrubbed everything down with hot soapy water.
Then we made a trip to Home Depot. We picked up some Lauan Plywood (it is the very thin plywood that everyone is making faux shiplap from and something I am trying to talk my husband into doing in our sunroom. I’ll keep you posted on that situation). We had them cut the plywood down to the right size in the store and my husband made the angled cuts once we were home. We also bought some 1 x 2’s to trim out the shelves.
Once that was done, we puttied the nail holes and sanded everything. Then I got busy painting. I painted the ceiling, shelves, walls and the trim a nice bright white.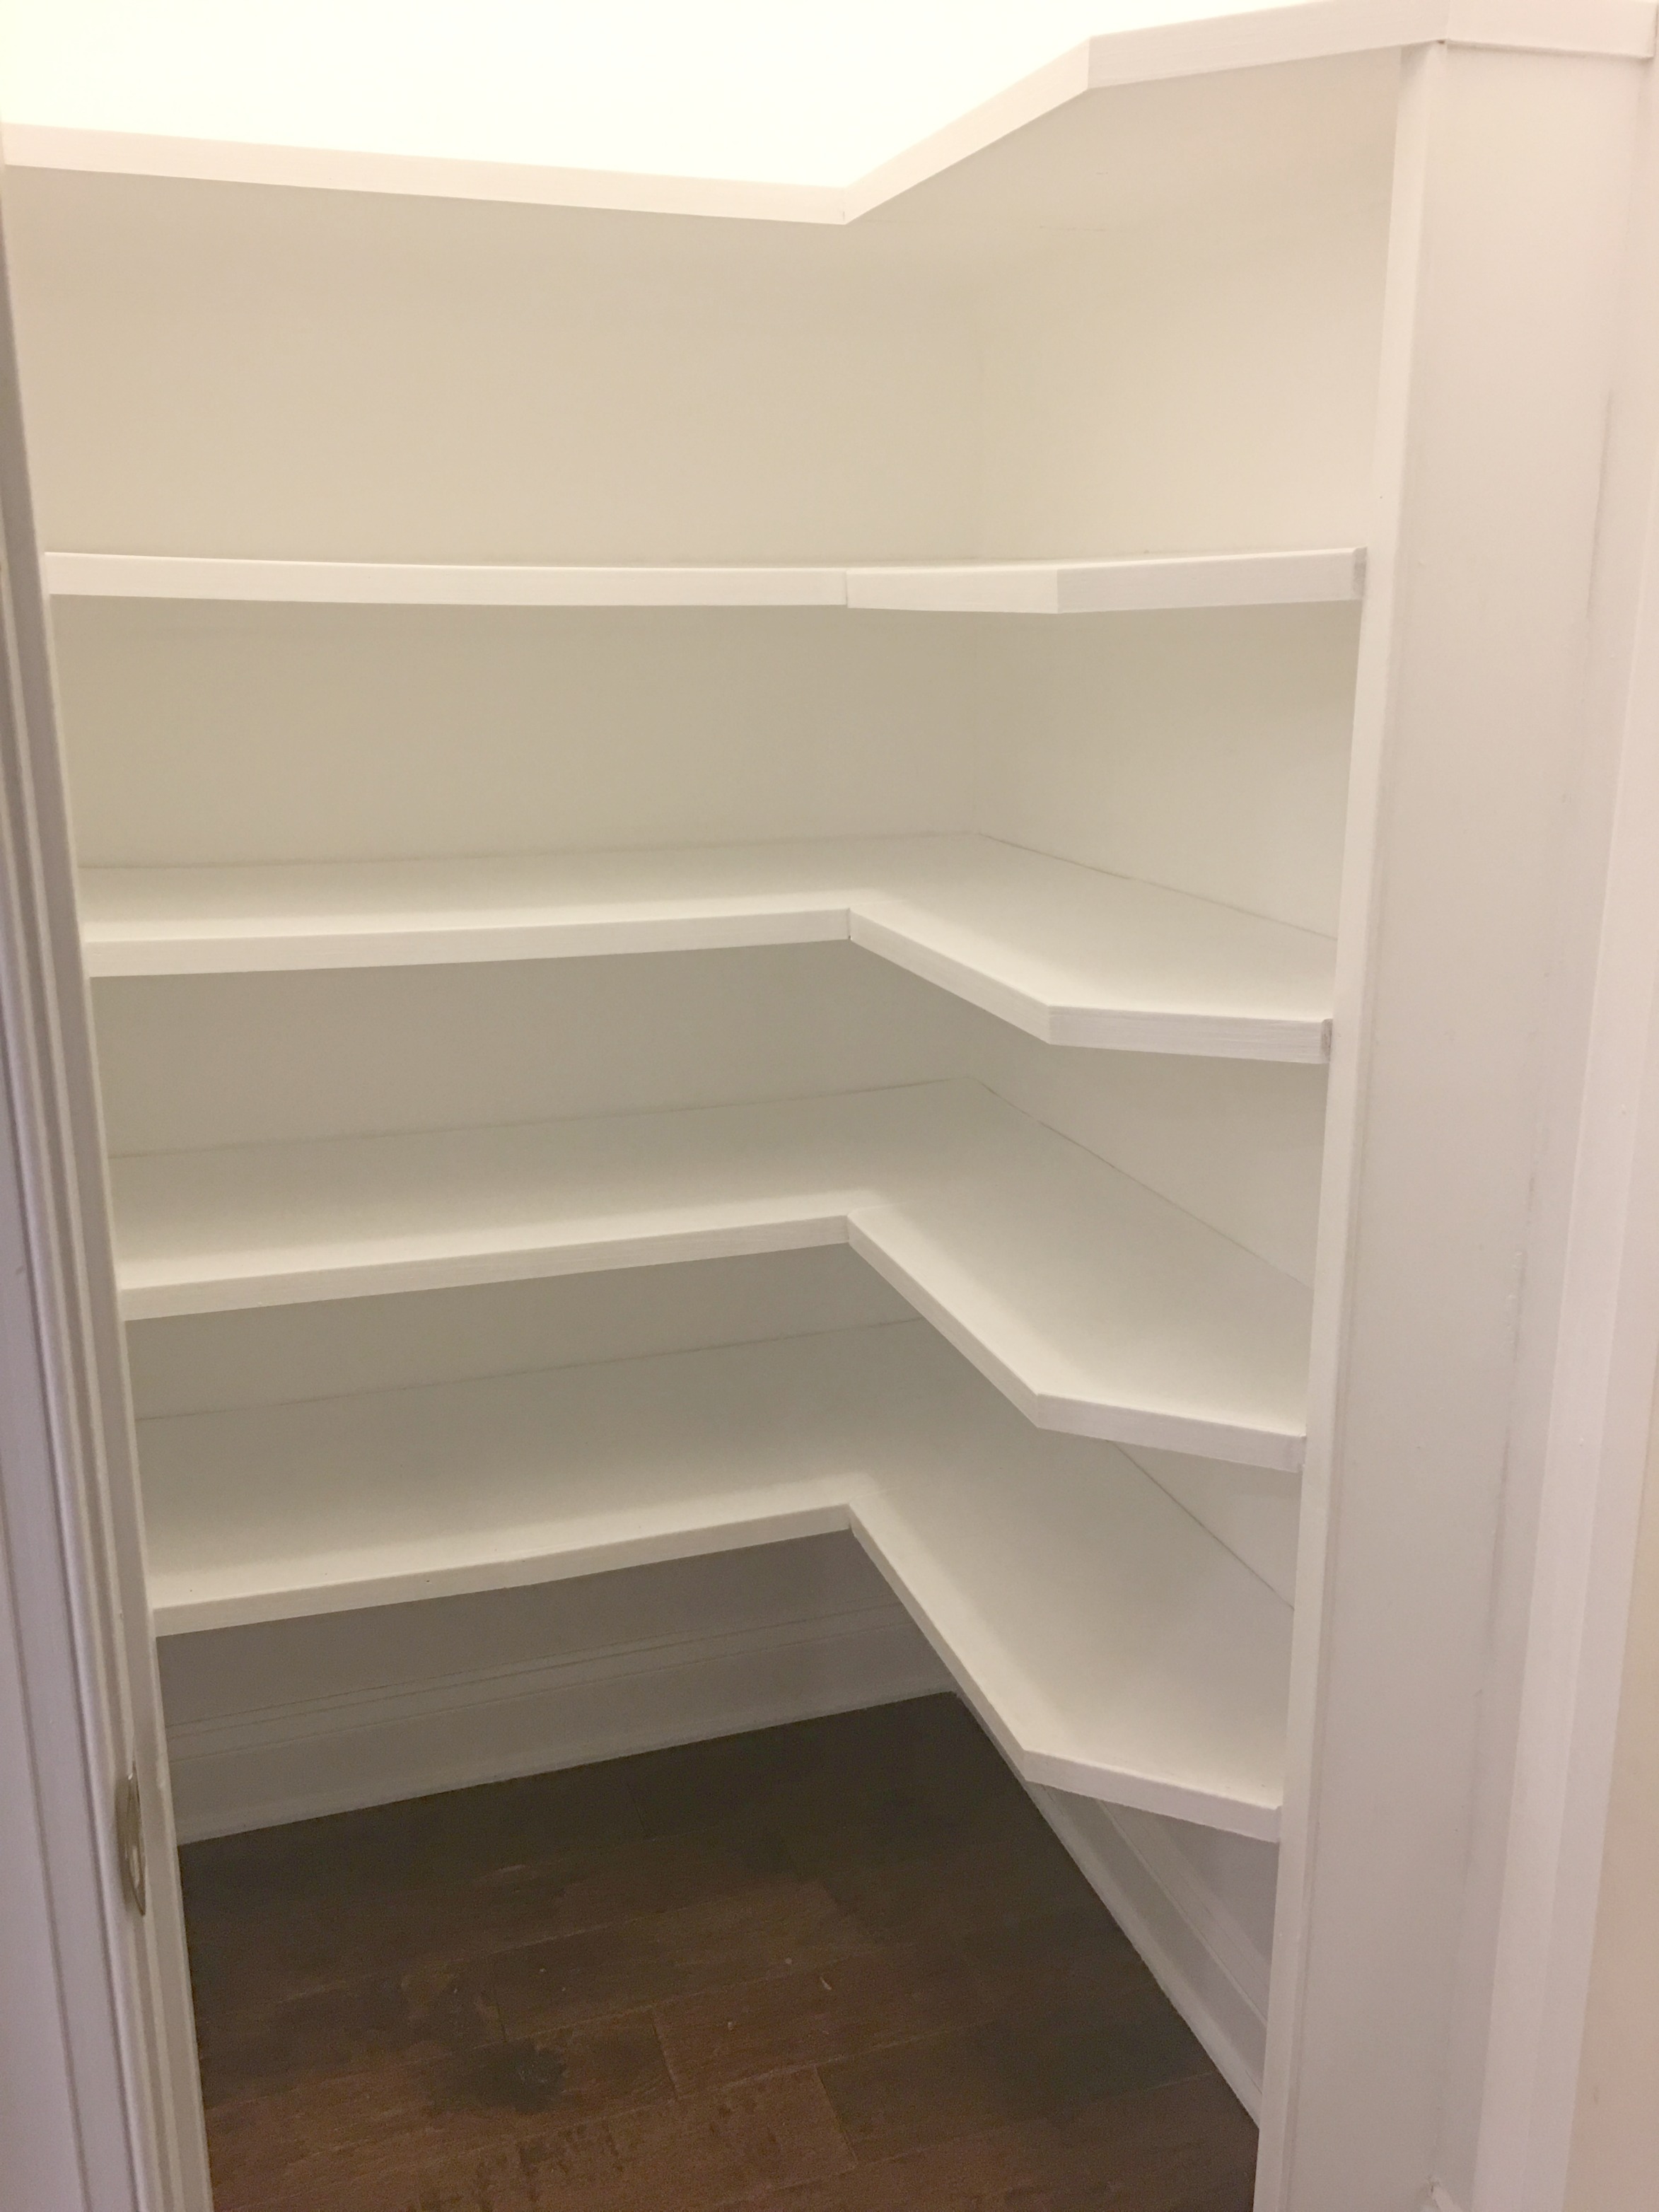
Resurfacing and trimming out the shelves made a huge improvement. Finishing out everything with bright white paint brightened up the space a great deal. The earlier paint was an off white with yellowish undertones not to mention any touch ups done throughout the years was done in different paint. So not only was it disorganized but we had about 4 different color paints jobs going on in there.
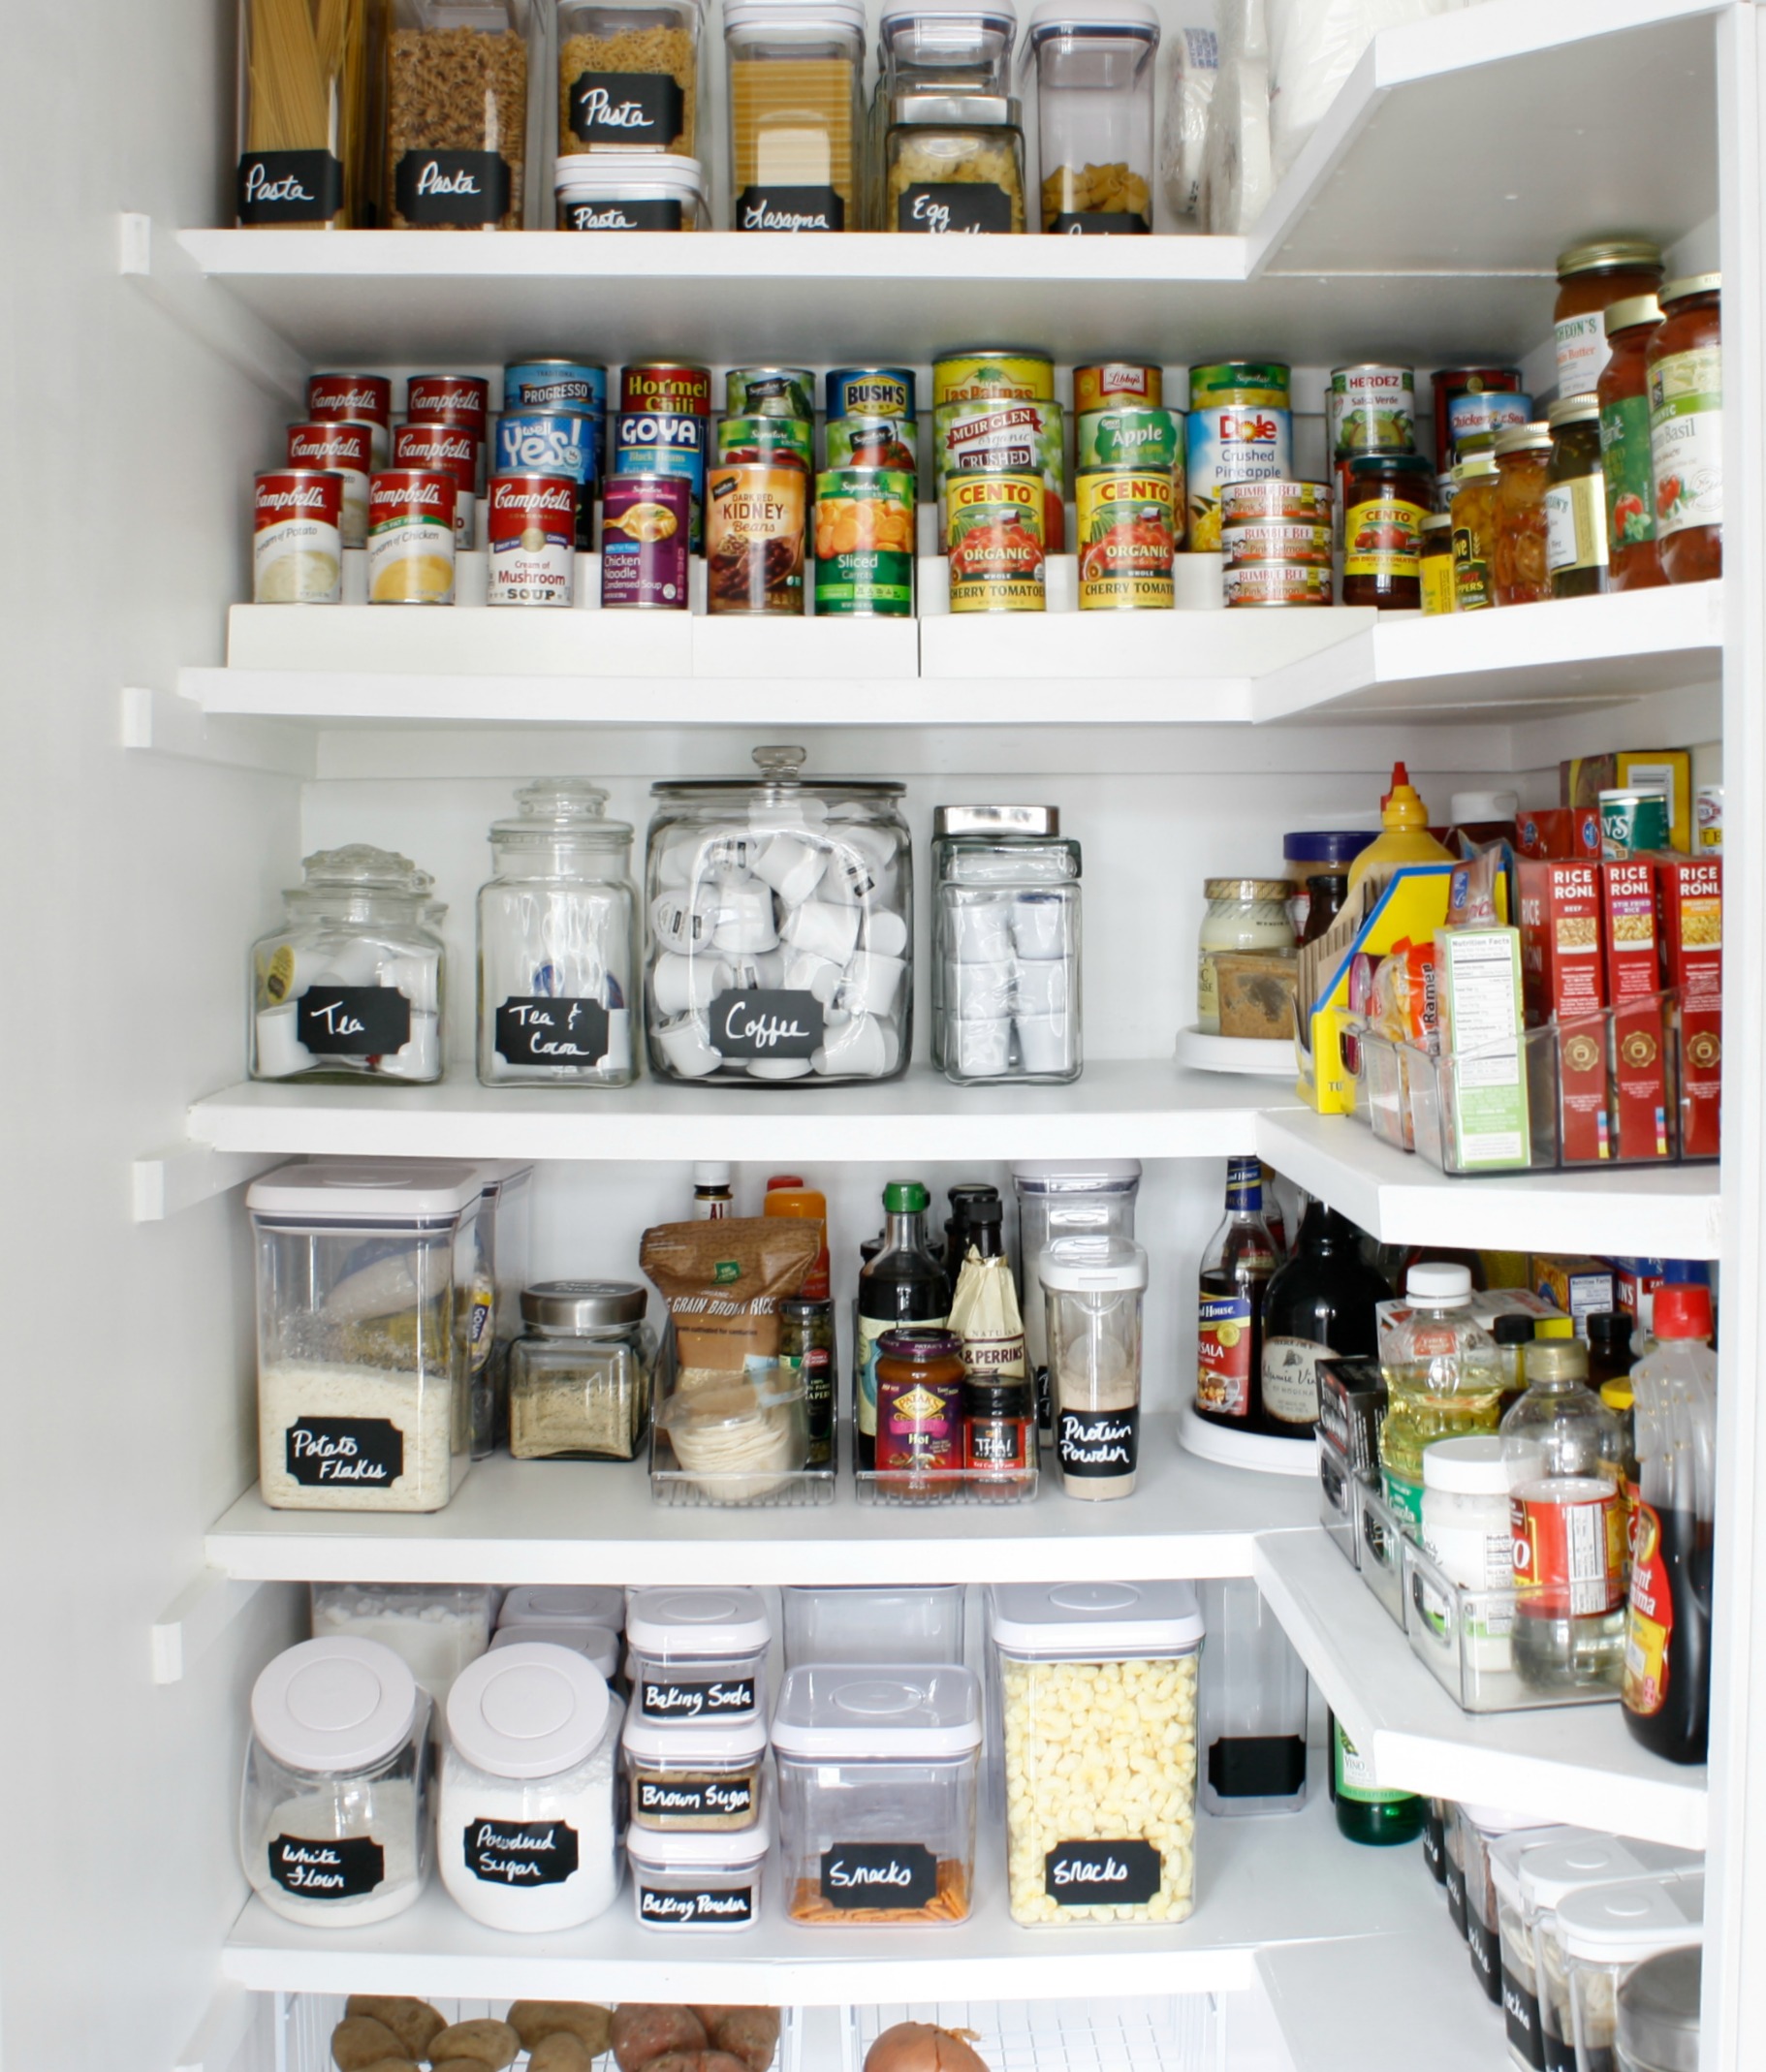
Now the fun(ish) part, the organizing in pretty containers. I have collected glass jars from Goodwill for years. I also asked for pantry organization items for Christmas and I have shopped at Bed Bath and Beyond too.
Getting rid of most of the cardboard packaging in the pantry was the biggest space saver of all. I never thought I would have enough plastic and glass containers to organize my pantry or that I would be able to fit everything back on the shelves but I did and I still have extra space.
Pantry Organization
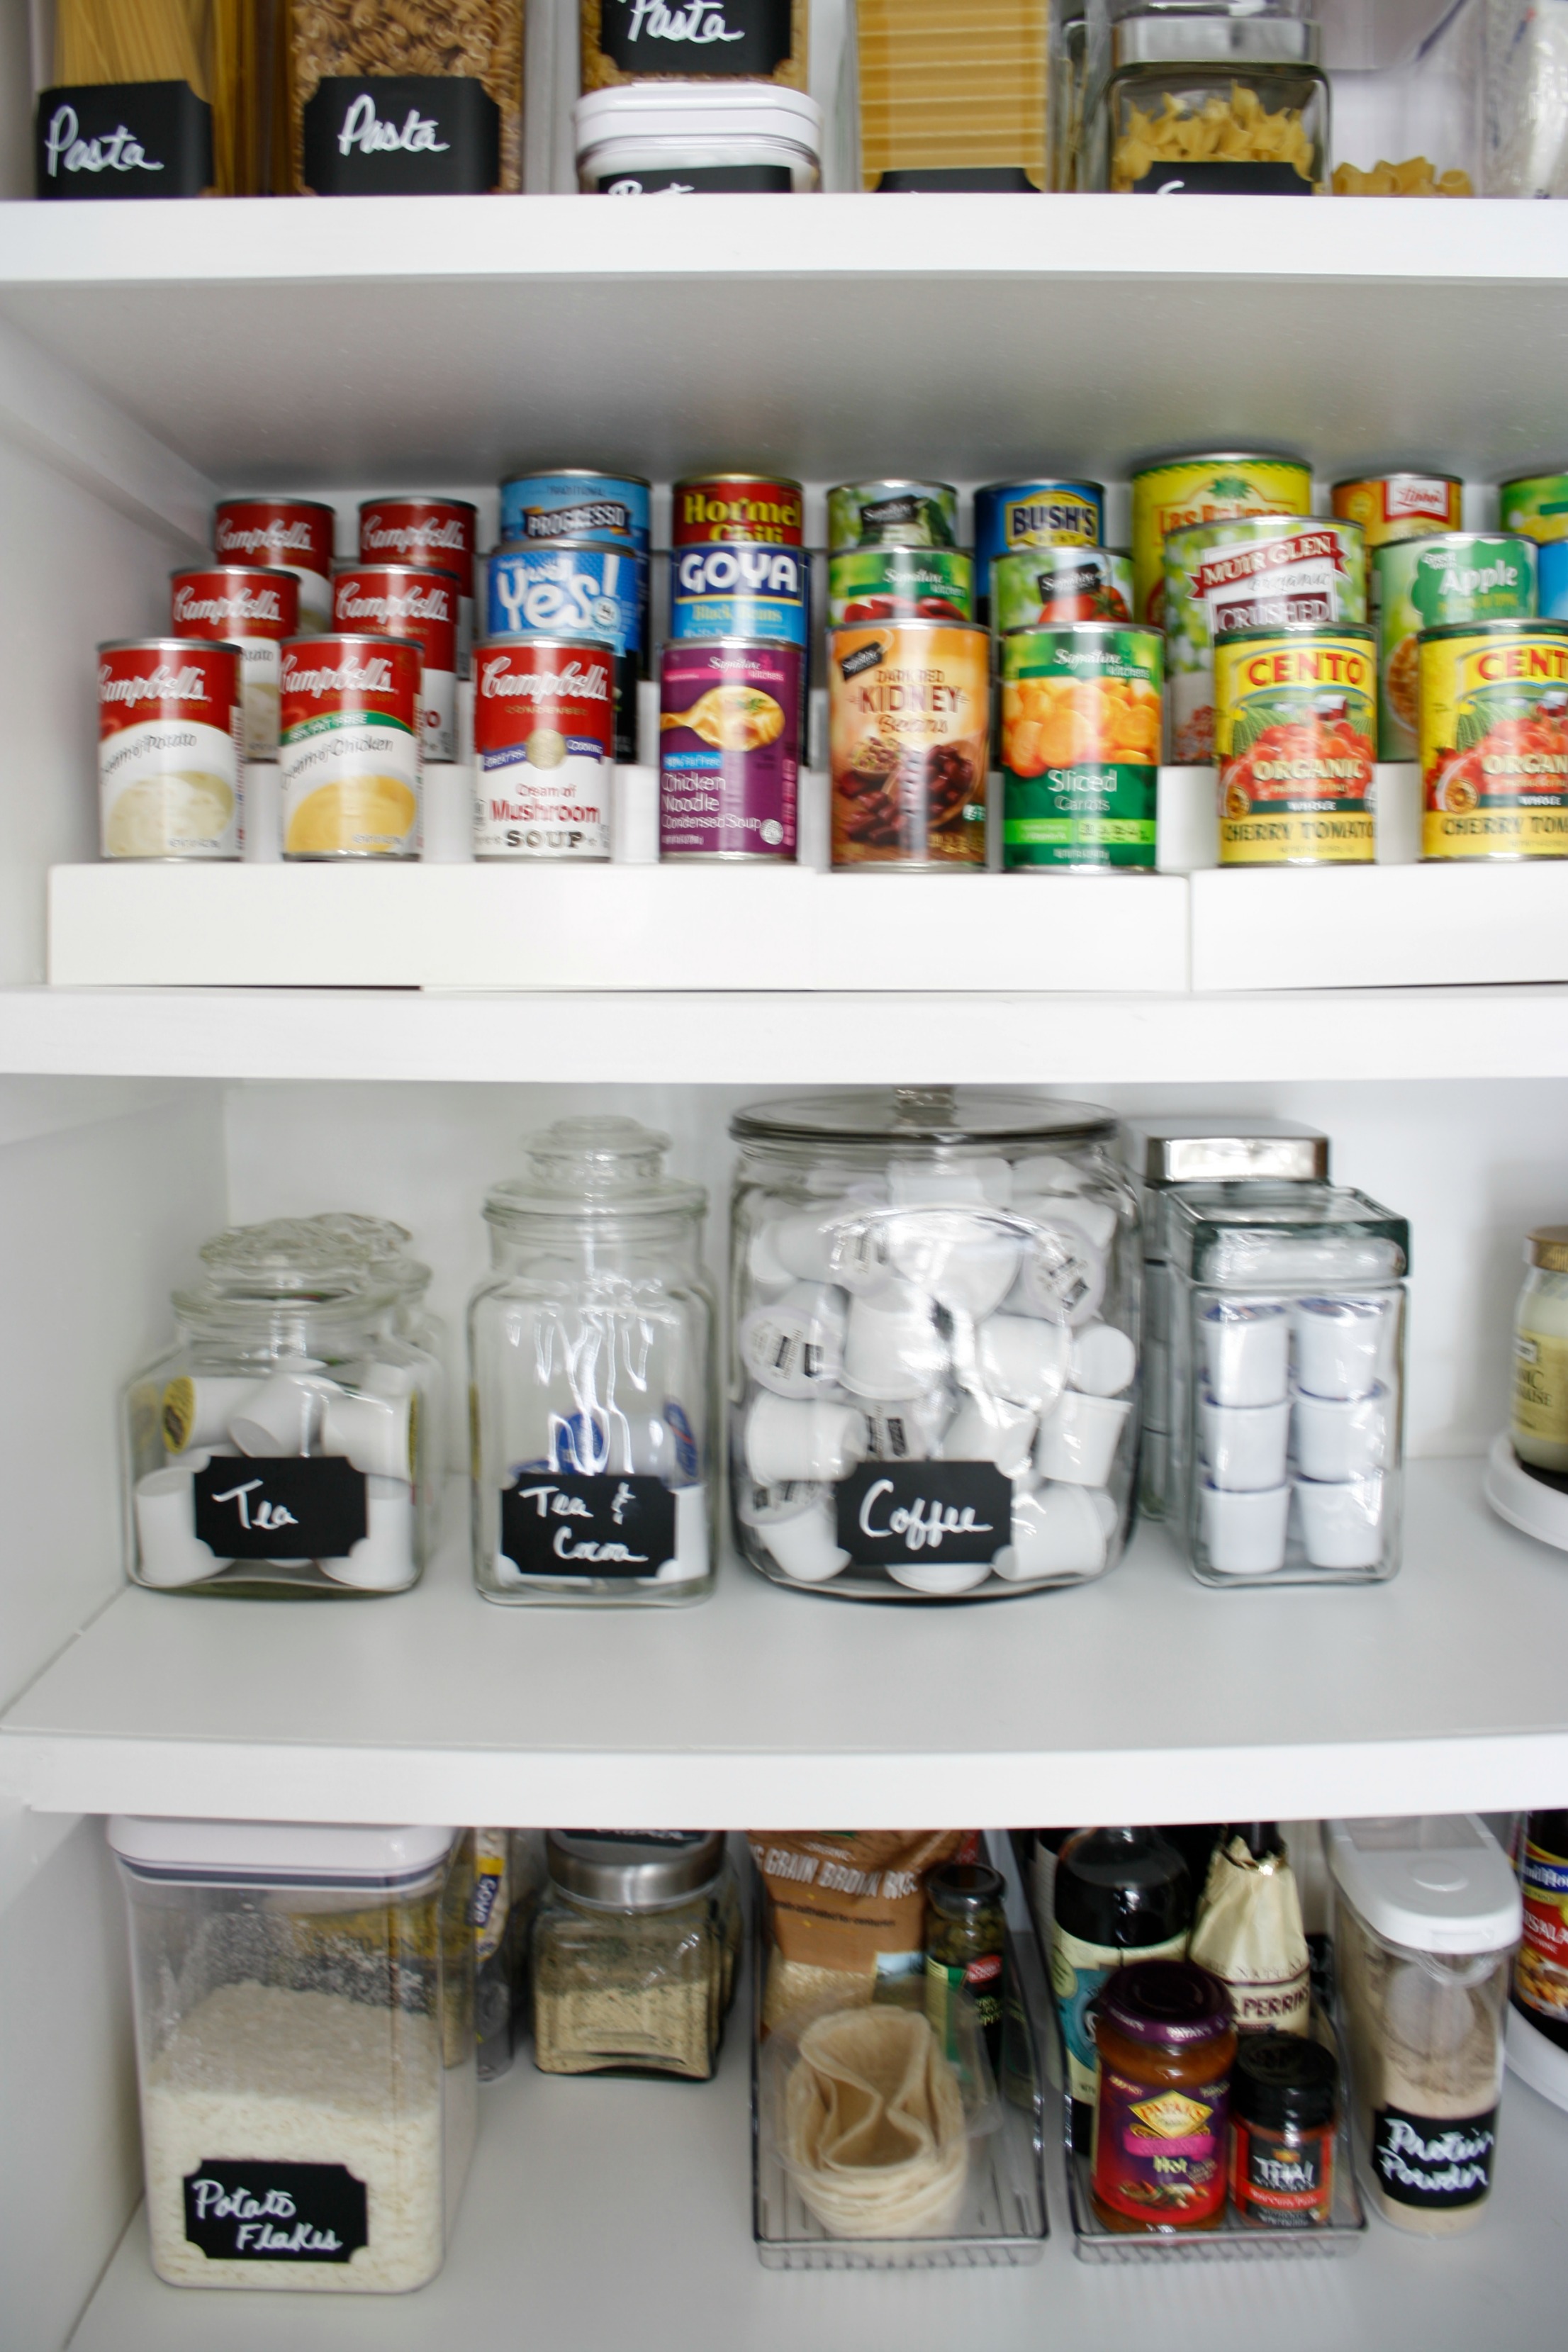
Adding the shelf risers for canned goods is a great space saver and it makes everything assessable and easy to see. Placing together similar loose items in tray keeps everything organized as well.
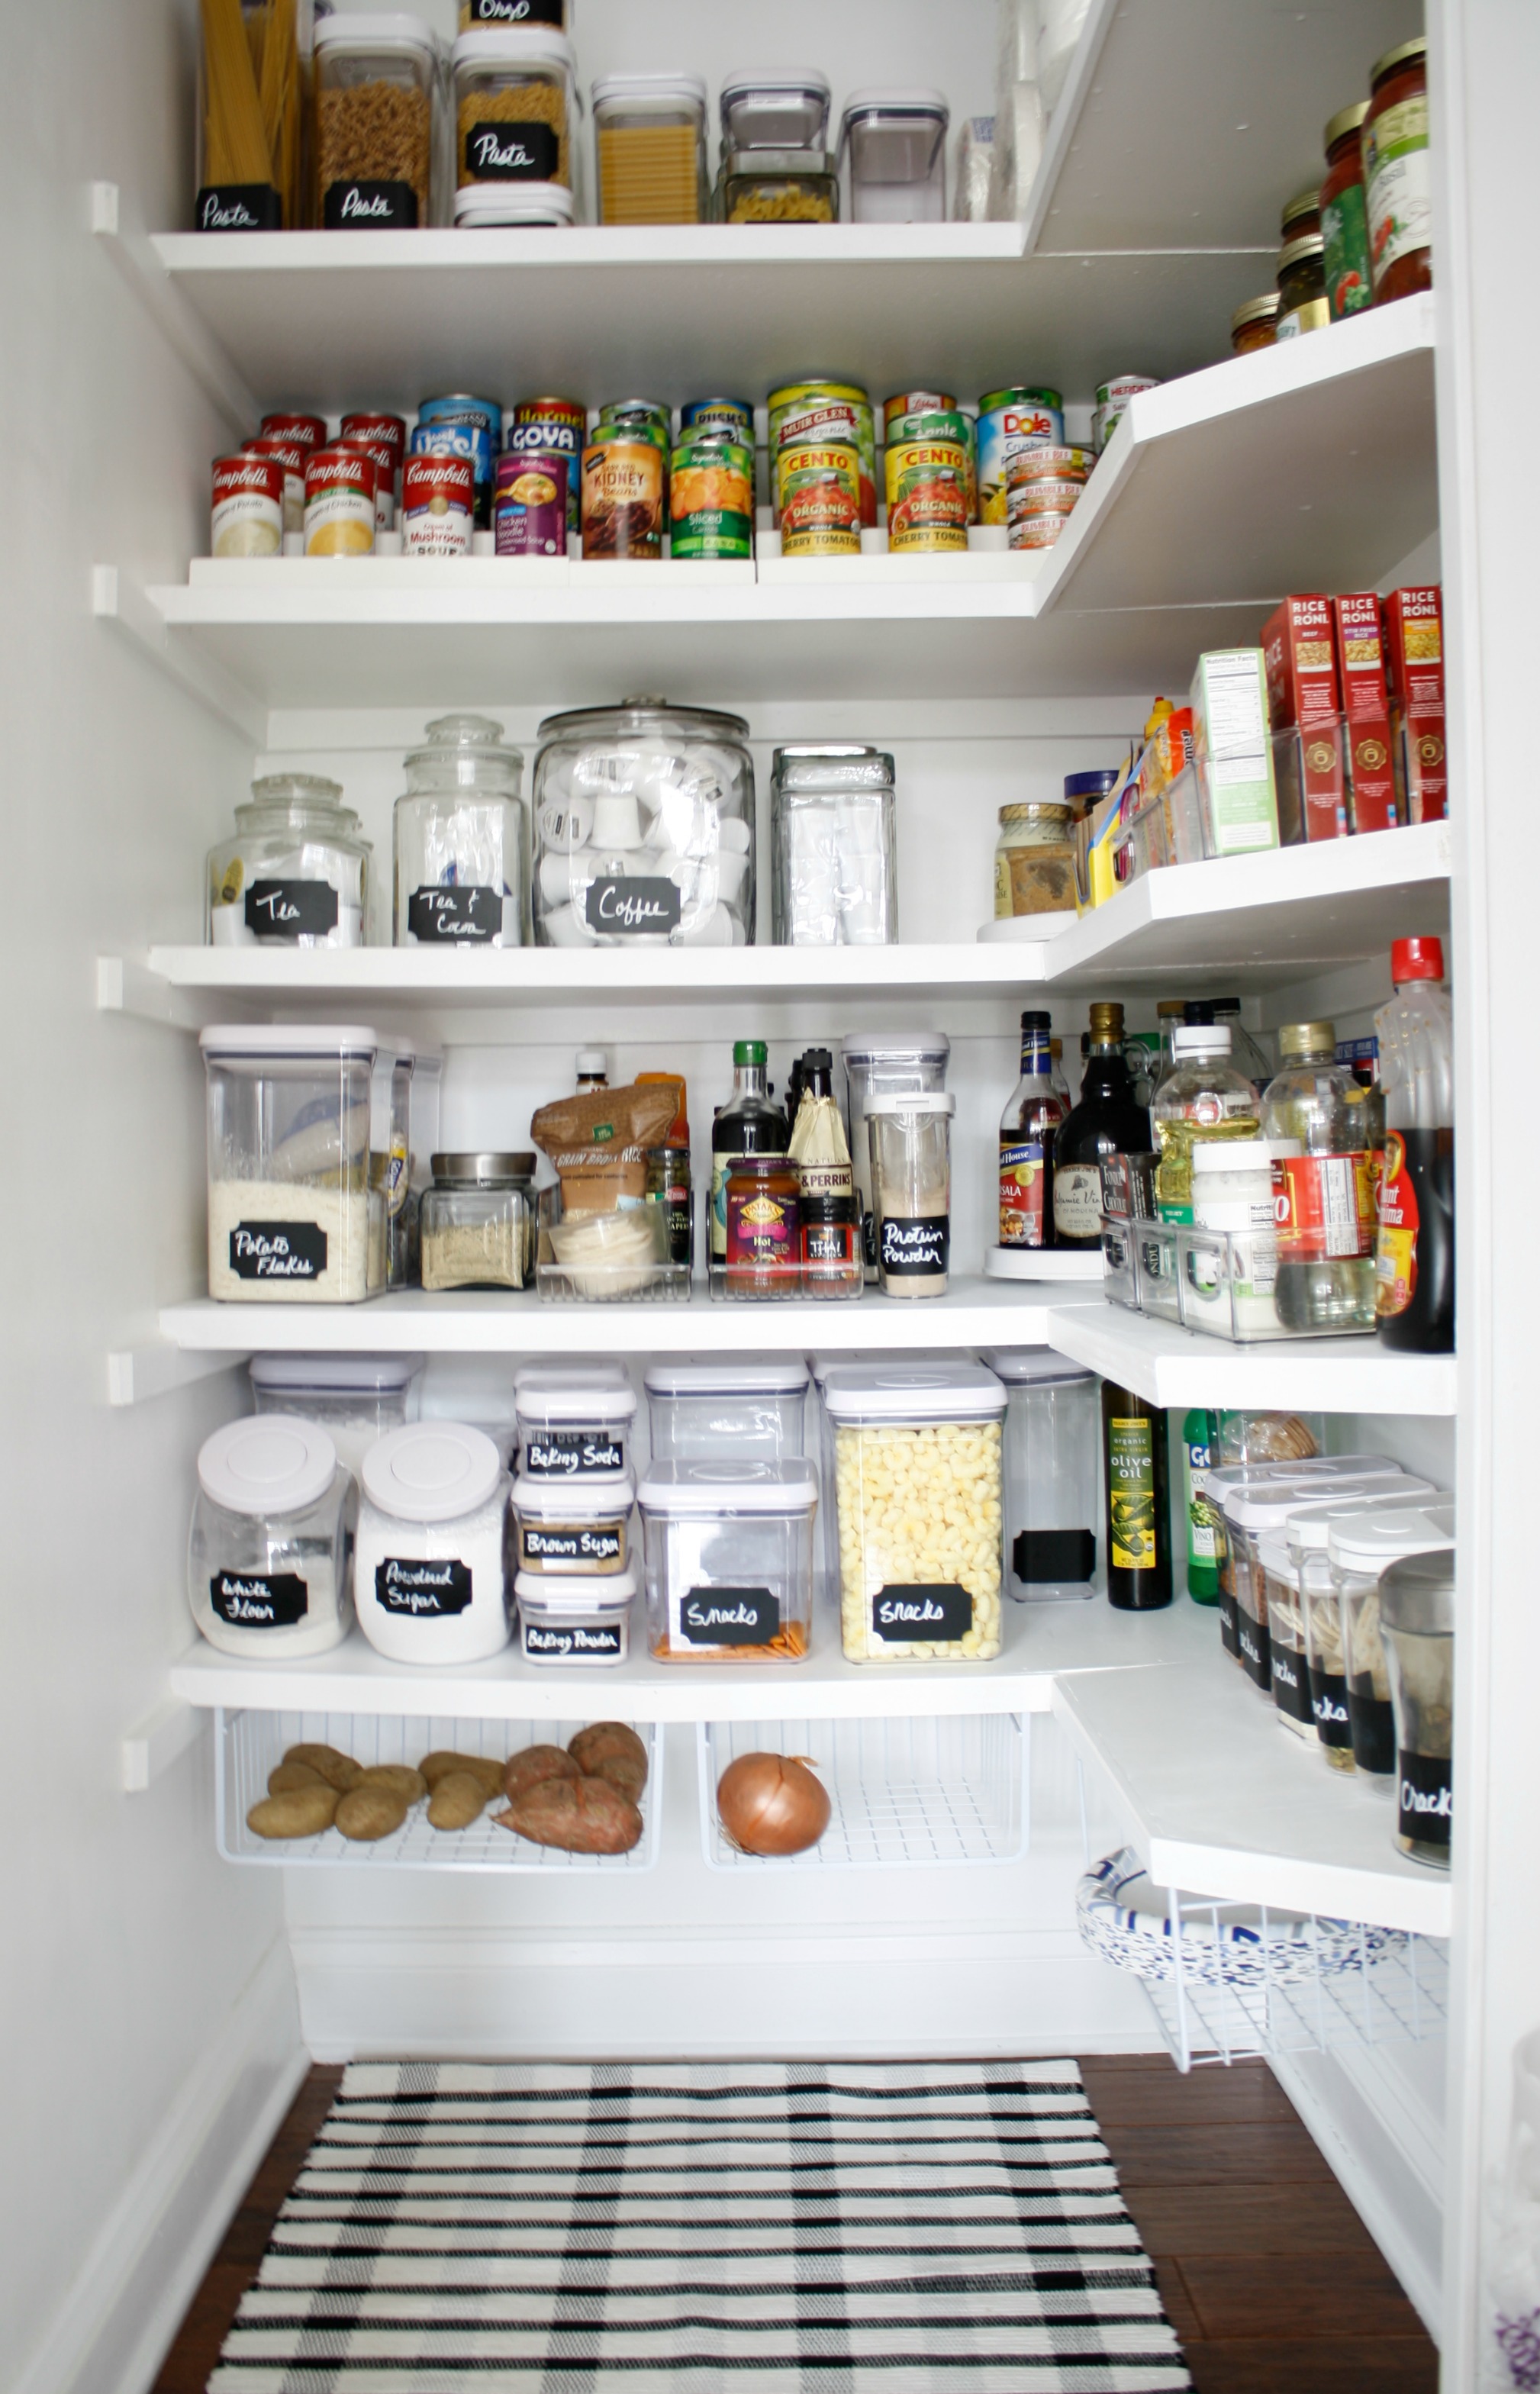
I wanted to keep everything off of the floor. Adding these wire basket from Home Depot was the perfect solution to keeping things off the floor and organized. I will link everything at the end of the post. These baskets are a favorite! My brother-in-law made me this hand loomed rug and I adore it!
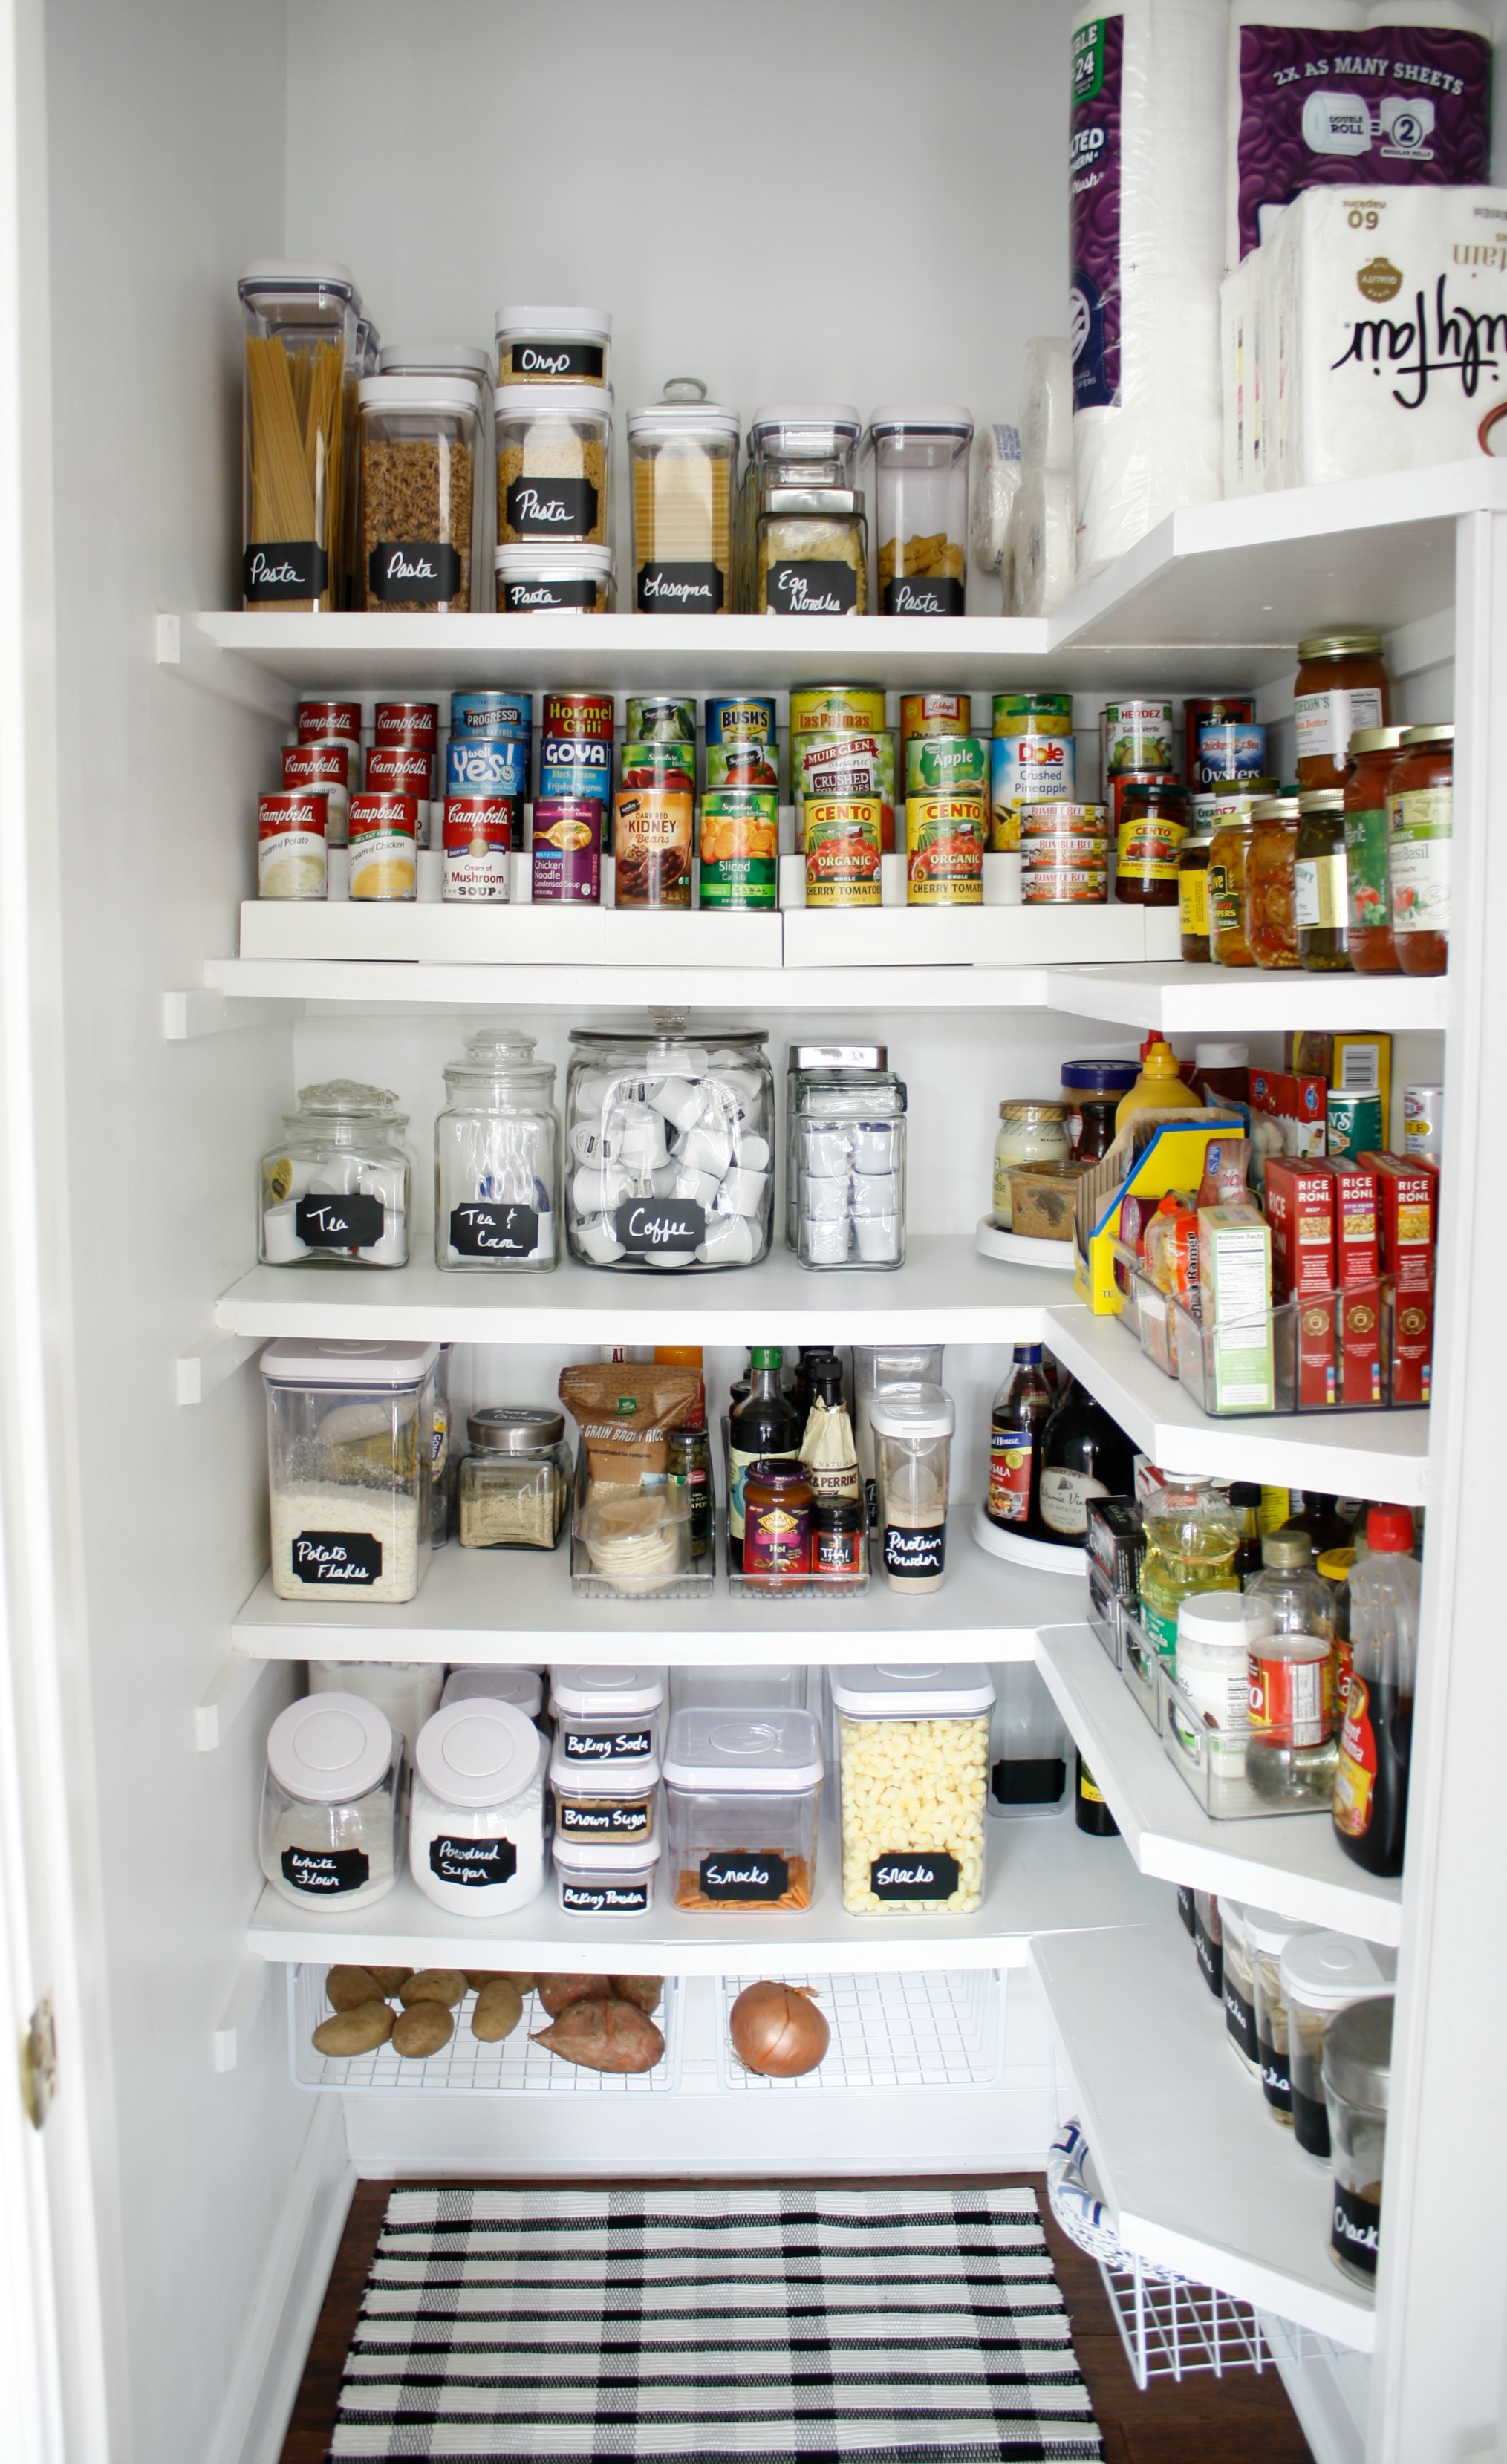
Some of the glass jars that I picked up at Goodwill throughout the years do not have an airtight seal. For the containers that are not air tight, I use them for all my coffee and tea k cups or packaged food. I also added two lazy susans in the corners. I may still add one to each shelf. We are also still think of adding another shelf up high for all of our paper products but for now, I think everything fits and we are fine as is.

Here are a few of my take aways from this project followed by links to products in our pantry revamp.
- remove items from cardboard packaging
- place similar loose items together in a clear tray
- add wire basket for potatoes and onions
- use risers for canned goods
- use lazy susan in corners for easy access
Links for items used in this post are below:
Hanging Wire Baskets (i used the white shelves and mine came in a four pack)
I love how organized the pantry is and I don’t mind putting groceries away now. Having said that, this project was a tough one for me but I am glad it is over and I am hoping it NEVER gets that messy again. Thanks for joining me on this adventure. For any questions on this or any other post, I can be reached at krkolson@gmail.com or you can leave me a message in the comment section.
Until Next Time,


You are all the goals!!! Thank you for sharing this!!!
What size is your pantry?
Hi Suzanne,
My pantry is approximately 4 feet wide and 6 feet deep. ~Kathy
What are the depth of the shelving to the wall and the height between shelving? Thank you!
Looks great & not too over the top (read: realistic to maintain)
Whats the vertical distance between your shelves ?
Thank you! The shelves are spaced 11 inches apart. It has been easy to maintain and has helped me from purchasing items that I do not need just because I couldn’t find them! Thanks for stopping by-Kathy
Is the angled wall because of the door? How wide are your shelves? Can you send me a picture with the door so I can see how it fully looks?
The side shelves are angled because the would have extended past the door frame. The back shelves are 16 inches in depth and the side shelves are 13 inches in depth. All the shelves are spaced 11 inches apart. If you go to my blog post,http://www.stylishrevamp.com/2019/07/14/dressing-pantry-vintage-door/ you can see what it looks like with the door. I hope that helps. THanks for stopping by-Kathy
Thank you for this tutorial! How thick is the plywood and how did you secure the smaller angled board so it doesn’t tip forward?
I believe it’s 3/4 of an inch plywood. Then we added the trim on the front to make it appear thicker. It is supported with a brace underneath (1×2) and also attached to a 1×6 that runs vertically at the ench of the shelf. They were originally installed over 20 years ago and we just added the trim and painted them a few years ago. They have held up great and works fine with the limited space we have. Sorry for the delay in getting back to you. Thanks for checking our space out.