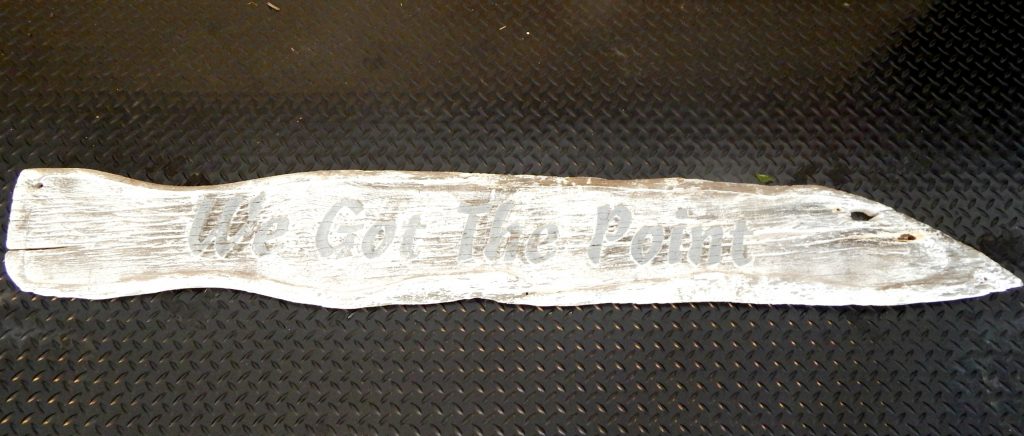
When we bought our home on the Island, it already had a name or at least a little driftwood sign above the door letting people know that We Got The Point and that’s how people usually know where we are located on the Island. The previous owners named the home and everyone wanted us to leave the sign so several years later We still Got the Point. Our home is on a point of land that juts out to the water which is how the previous owners came up with the sign…so we are just going to go with it.
Since our home is out on the point, it gets a lot of wind and we get damage from the salt water. The driftwood Point sign was in need of a little revamp. I was a bit worried about painting it since I do not have the steadiest of hands when it comes to small detail work but I found a little something that made it super easy!
How to Paint a Driftwood Sign the Easy Way
I made a trip to Home Depot (for something totally unrelated to this project) and I always stop by the paint section. That is where I found this…
The Sharpie Paint Pen was super easy to use. I used it just as I would an actual Sharpie marker. I was worried that it might run or drip but it really worked no differently than a regular marker.
First, I painted the entire sign with white paint that I had on hand and let it dry completely. Once that was done, I traced the letters with the Sharpie Paint Pen. This helps create a border that I can work within.
The original lettering was grey but I chose to go with black. Sadly, I have not been back to the Island Home to install it but you can see it finished now and later I will share it once I hang it back on the house.
Yep, I love it! Even if I did not choose to label our home with this slogan!
I already have in mind the sign I want to make for Christmas with the Sharpie Paint Pen!
Until Next Time,


[…] few weeks ago I shared with you an easy DIY paint job on my house sign which you can read about here. Today I wanted to share with you a quick follow up on that driftwood sign. My oldest was home […]