I have been working on several projects and haven’t gotten around to finishing any of them yet! We are back from our Easter trip so I am ready to get busy and complete some of these projects.
Here is what I am working on at the moment.

Redecorating on a Budget
I have been working on several projects and haven’t gotten around to finishing any of them yet! We are back from our Easter trip so I am ready to get busy and complete some of these projects.
Here is what I am working on at the moment.
I went to Goodwill a few weeks ago and found this fabulous Gateleg Table. It needed a bit of work and I had to wait to do the painting in between the snow storms but it is almost finished. I am so ready for this snow to be gone for good! Once the weather warms up, I will probably do another light sanding on the top and one more coat of stain and possibly a coat of dark wax on the legs.

I think it looks pretty good considering this is how it started out…
I am sharing a simple project today. I have been thinking of painting this table for a while and could’t decide on exactly what I wanted to do. I really like the look of the grain sack fabric and thought I would do my version of it on this little table.

(Photo courtesy of Kolson Close Up)
I used my last bit of Pure White Annie Sloan Chalk Paint. I did two coats with a good sanding in between each coat. I painted the blue stripes Sherwin Williams Indigo Batik. Once everything was dry I used my sanding block to rough it up a bit and makes the stripes a bit faded so It looked more like the grain sack cloth stripes
I picked this table up a long time ago for a few dollars at a consignment shop. I liked the color when I picked it up and it looked perfect in the kitchen by my bench. I have since moved it upstairs in my sitting room and the color just didn’t go with my bedroom.
This was the piece before…

( photo courtesy of Kolson Close Up)
I use this little table all the time. It is so versatile.
If you like the look of grain sack furniture check out this chair by Confessions of a Serial-Do-It-Yourselfer.
We are linking up to:


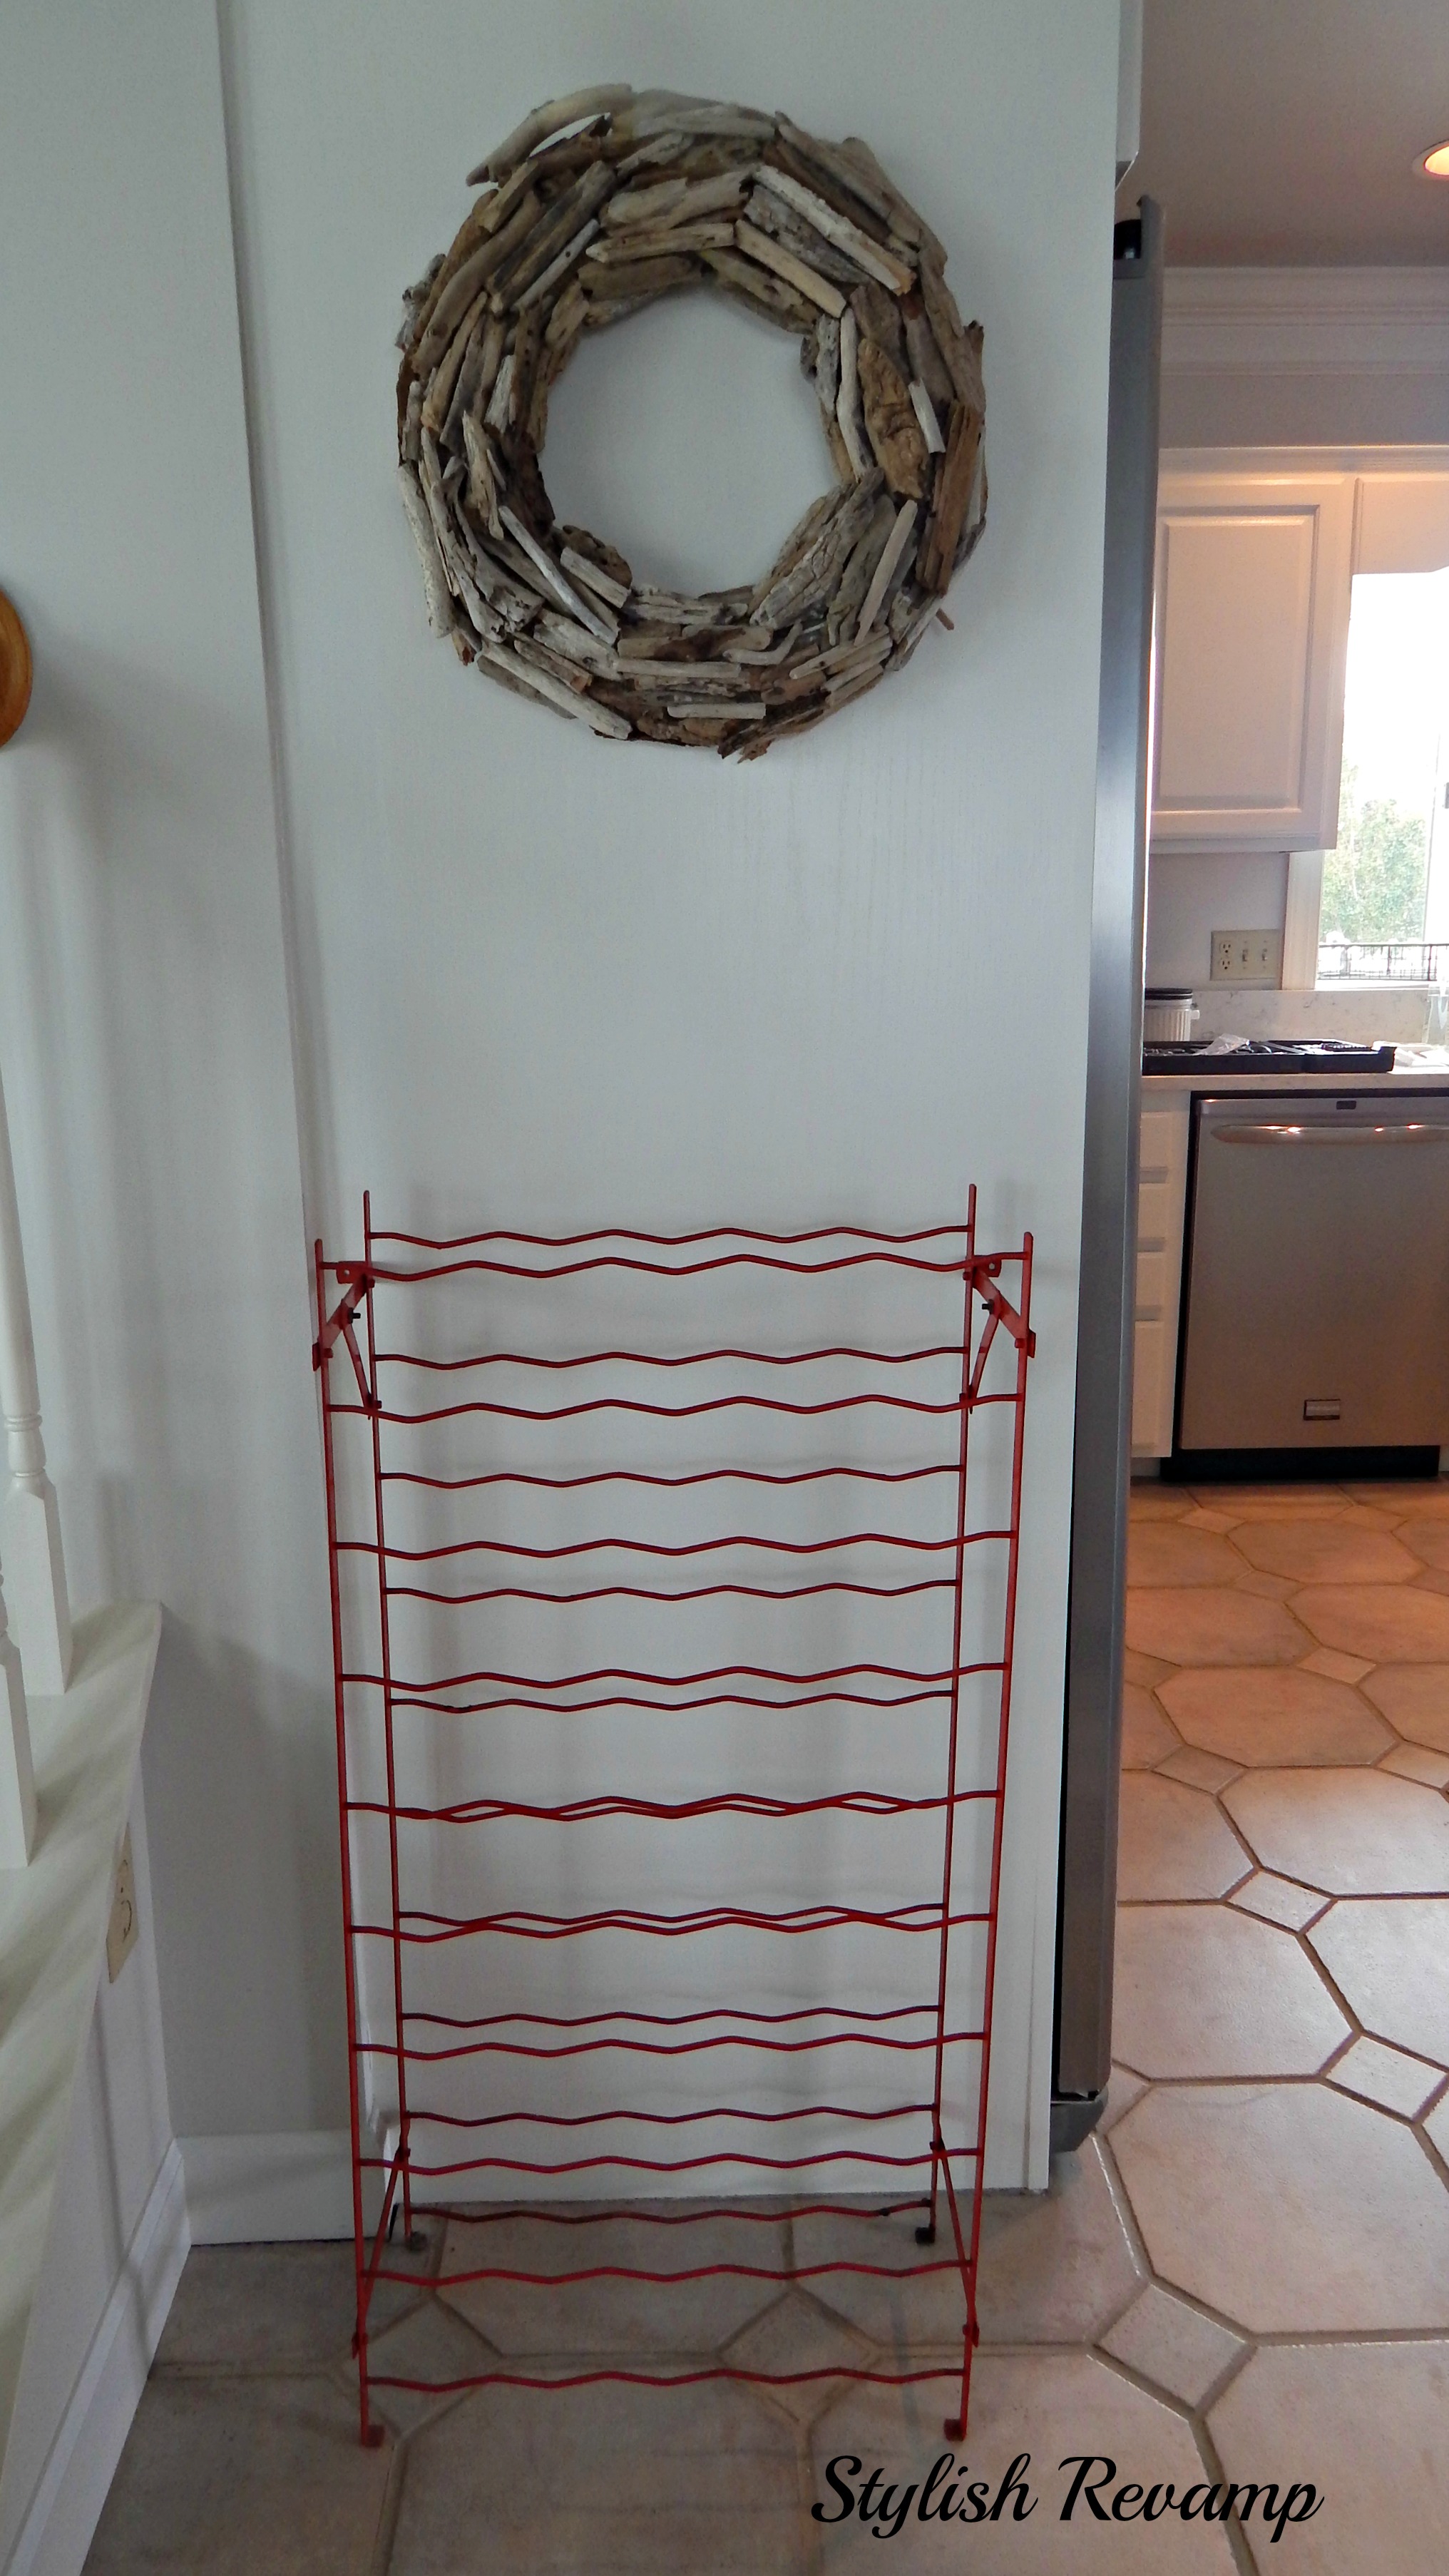
I finished this wine rack several months ago and am just now getting around to sharing with you today. I found this piece for $19.00 at an antique shop on our way to the Island Home. I am not sure what kind of rack it is but I am going to use it as a wine rack. This is what it looked like when I found it.

I really like the red but it just was a bit too much for the kitchen. I decided to spray it using the stainless steel paint that I had on hand. It matches the appliance in the kitchen. It is simple, neat and keeps the kitchen looking organized!


I think this piece is really unique and I am glad I found it!
We are linking up to:
I admit I am not one that goes on the hunt for fabulous furniture finds with all the knowledge I may need. When I do go on the hunt, I don’t even know what I am looking for until I find it. Well, that is about to end. I am sure you all have heard of One Kings Lane. It is an online marketplace that has great collections of designer and vintage items that are listed daily. If you haven’t checked them out you really should! Not only is it an online marketplace but they also have a blog and a fabulous Home Decor Resource which they have asked us to help introduce it to you.

Check out one of my chairs that I have had for years and did not know anything about it. I like it because it is unique. By going to the Home Decor Resource Guide by One Kings Lane I learned that my chair is the same style as a Wainscot Chair.

I love all the detail on the back and the arms of the chair.

I love the versatility of chairs. All of my chairs I am sharing today are accent chairs. I like using them when I have dead space in an area plus they can always be pulled to the table for extra seating.
The next chair I am sharing is in the Queen Anne Style. The Queen Anne Style usually have carved motifs of shells, sunbursts or acanthus leaves. They also have cabriole legs.

The last chair I am sharing is a William and Mary Style Chair. I have shared this on the blog which you can find here.

If you haven’t already checked out the Home Decor Resource Guide from One Kings Lane yet you really should. Next time I am out shopping for my vintage finds I will be sure to use the Home Decor Resource Guide to know what I am buying!
Just a quick update on a few of my projects. Remember my flea market find? I finally made a quick trip to the house and was able to install this vintage match holder that I have revamped into a bottle cap holder.

While we were there, I also hung my GROCERY sign (click here to see how I made it). I really like the sign and it adds a little something to the kitchen.

Now here is a sneak peek at something I am going to be working on soon. I found this piece at one of my favorite spots near the Island. I have been there several times and never remember to take a picture. I am going to use this piece in my Island Kitchen as a wine rack. Here is my before picture. Remember my driftwood wreath which you can also see here. I will post more photos once I get it painted. Still trying to decide on a color. I am thinking of using the same Stainless Steel paint that I used on the vintage match holder but still not sure.
(BEFORE)
It has been a crazy couple of weeks around here but I am back and trying to finish up some projects that have been stashed in my garage and utility room for too long!
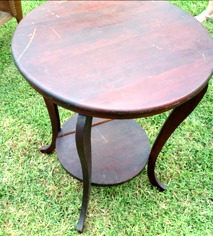
This past summer I picked up a few free pieces and one of them was a table top. It came from a shop that we used to go into all the time near the Island. One day we drove up and it was out of business but they left some things outside with a cardboard sign that said FREE! We picked up a pallet and the tabletop. The tabletop had paint smeared across it and the laminate was pulling away from the sides. I didn’t care it was free and I knew we could turn it into something. My son no longer ask me WHY? or ARE YOU SURE? He just says I will load it up for you…Thanks B.K.
The pallet is still sitting in the utility room but I finally painted painted the tabletop. Then it sat for a few more weeks until I could find a base. Two weeks ago we took a trip to the Island to finish up a few last minute things there and made a quick stop at one of my favorite spots and YES I found a table base. I had found one there before and I was back and forth trying to decide if I really liked it…and I am so glad I waited because I found this…..

and I knew it would be perfect for the tabletop!
It is kind of hard to tell in the photo but it kind of has a yellow tint to it but I knew that I could paint it so it was no big deal. The other thing you can’t tell from the photo is that the base it metal which I love. Here is the end result….

I just set it up in my living room so I could show you how it turned out. I used Annie Sloan chalk paint in Graphite for the tabletop and rubbed a bit of the Pure White paint over it so it wasn’t so flat. Once that was dry I stenciled the longitude and latitude of the Island. On the base I also used the Pure White. Super easy and I think it turned out great!


Come back later and I will show you some of my other finds and the odds and ends that we did at the Island Home before prepping the house for Winter!
We are linking up to:


![]()

Remember I told you my youngest and I went to a Flea Market, a few yard sales and a Consignment shop last weekend. We had a lot of fun even though we didn’t find a lot of stuff.

It is the thought of finding that one great thing even if it doesn’t look so great when you find it! I asked my middle son a couple of weeks ago when he was with me at The Island Home if he ever got sick of driving me all over going to my favorite spots and I just loved his answer. He said, ” No Mom, I think it is pretty neat when you see something and and tell me you have to have it and I think what does she want that_____ (insert any word that a teen might use to describe some of the things we bring home from the side of the road) for because I just don’t see it.” He then tells me that he thinks it’s pretty cool how my projects turn out! Anyway, this is the first thing I found at the Flea Market and I knew exactly what I wanted to do with it.

I bought these kitchen canisters from a consignment shop about 5 years ago for a few dollars. When I picked them up, they had maple wooden tops and I knew that I would paint them. Well, I did paint them and they were fine but when we decided to redo the kitchen by painting the cabinets, the walls and the ceiling the canisters kind of got paint splatters all over them. So I decided to give them a quick update.
 I started by repainting the tops again with the left over paint from my son’s headboard which you can find here.
 Next, I used a Sharpie paint pen in white to write on the tops of the lids.
Such a simple and easy project for under $5 and that includes the cost of the canisters,


We are linking up to:

I finally started and completed the free side table that I got on the Island. It sat in my garage for a few weeks because I couldn’t make up my mind as to what I wanted to do with it. So every time I went to get in my car there it sat reminding me that I needed to get to work. So here it is completed…

I used Louis Blue Chalk Paint. This time around, I found it to be very easy to use. I love the texture it gives to the piece. It looks weathered and kind of washed out. It will fit in nicely at the Island home. Once the paint dried, I applied a compass transfer that I order from amazon.com Also, very easy to use.

So the next time you see a piece of furniture that has seen better days just remember with a little paint you can completely revamp it into something new.
So it went from this…
to this…

We are linking up to:


