Stylish Revamp

Redecorating on a Budget

  • Home
  • About
  • Home Tour
  • Projects
  • Disclosure

Easy Ways to add Simple Fall Touches

October 11, 2020 By stylishrevamp Leave a Comment

Today I thought I would share some easy ways to add simple Fall touches to your home. Last year I went through my Fall decor and donated a lot of the things that I thought I would no longer use. When I pulled out my bins this year, I was kind of thinking I had made a mistake in getting rid of some of my decor. Things were looking a bit sparse at first but now I am enjoying the simple Fall touches and using items I have on hand with a few new additions.

It has been almost one year since my last post and it’s not like I have been too busy either. Since the beginning of the pandemic in March, I have pretty much been homebound. And I mean homebound. I started the shutdown full of nervous energy and completed a lot of mini projects that needed to be done. 4 months into the pandemic the energy started to fizzle. Now that Fall has arrived and we are entering into my favorite time of year, I am perking back up! I hope you enjoy my mini Fall Tour. Here we go!

Adding simple Fall touches

A few new items this year is the mini riser that the pumpkin is perched on and the stems with the mini pumpkins. I ordered these from The Nested Fig. I love this online store. I also follow Wesley on instagram @FarmShenanigans. Love, love, love his stories! I have learned so much from him and have gotten a lot of great inspiration from all the decorating tips he shares.

Fall Dining Room Decor

I also added my Dollar Store DIY pumpkins. You can see the DIY here. I have also been using these battery operated remote candles from Amazon and I am loving them. The last items I bought were two vintage tablecloths from ETSY.

Decorating with vintage tablecloths help create a curated look that I adore.

I purchased the tablecloths from PollyFrog on ETSY. I just added them to my vintage copper pots on my buffet, a simple and easy way to add Fall touches.

Decorating with Gourds
Decorating my Teak Ladder with Mini Pumpkins

I rounded out the Dining Room decor with a few gourds that I have had for years and I added a couple of mini jack o lanterns to my teak boat ladder that we picked up at a yard sale a few years back.

In the kitchen, I kept it simple with my sign that I made two years ago. I placed it above the cooktop. Notice the toilet paper pumpkin my youngest made in preschool 14 years ago. Don’t think for a minute that I didn’t think about dragging that out at the beginning of the pandemic when toilet paper was nowhere to be found!

DIY Fall Sign

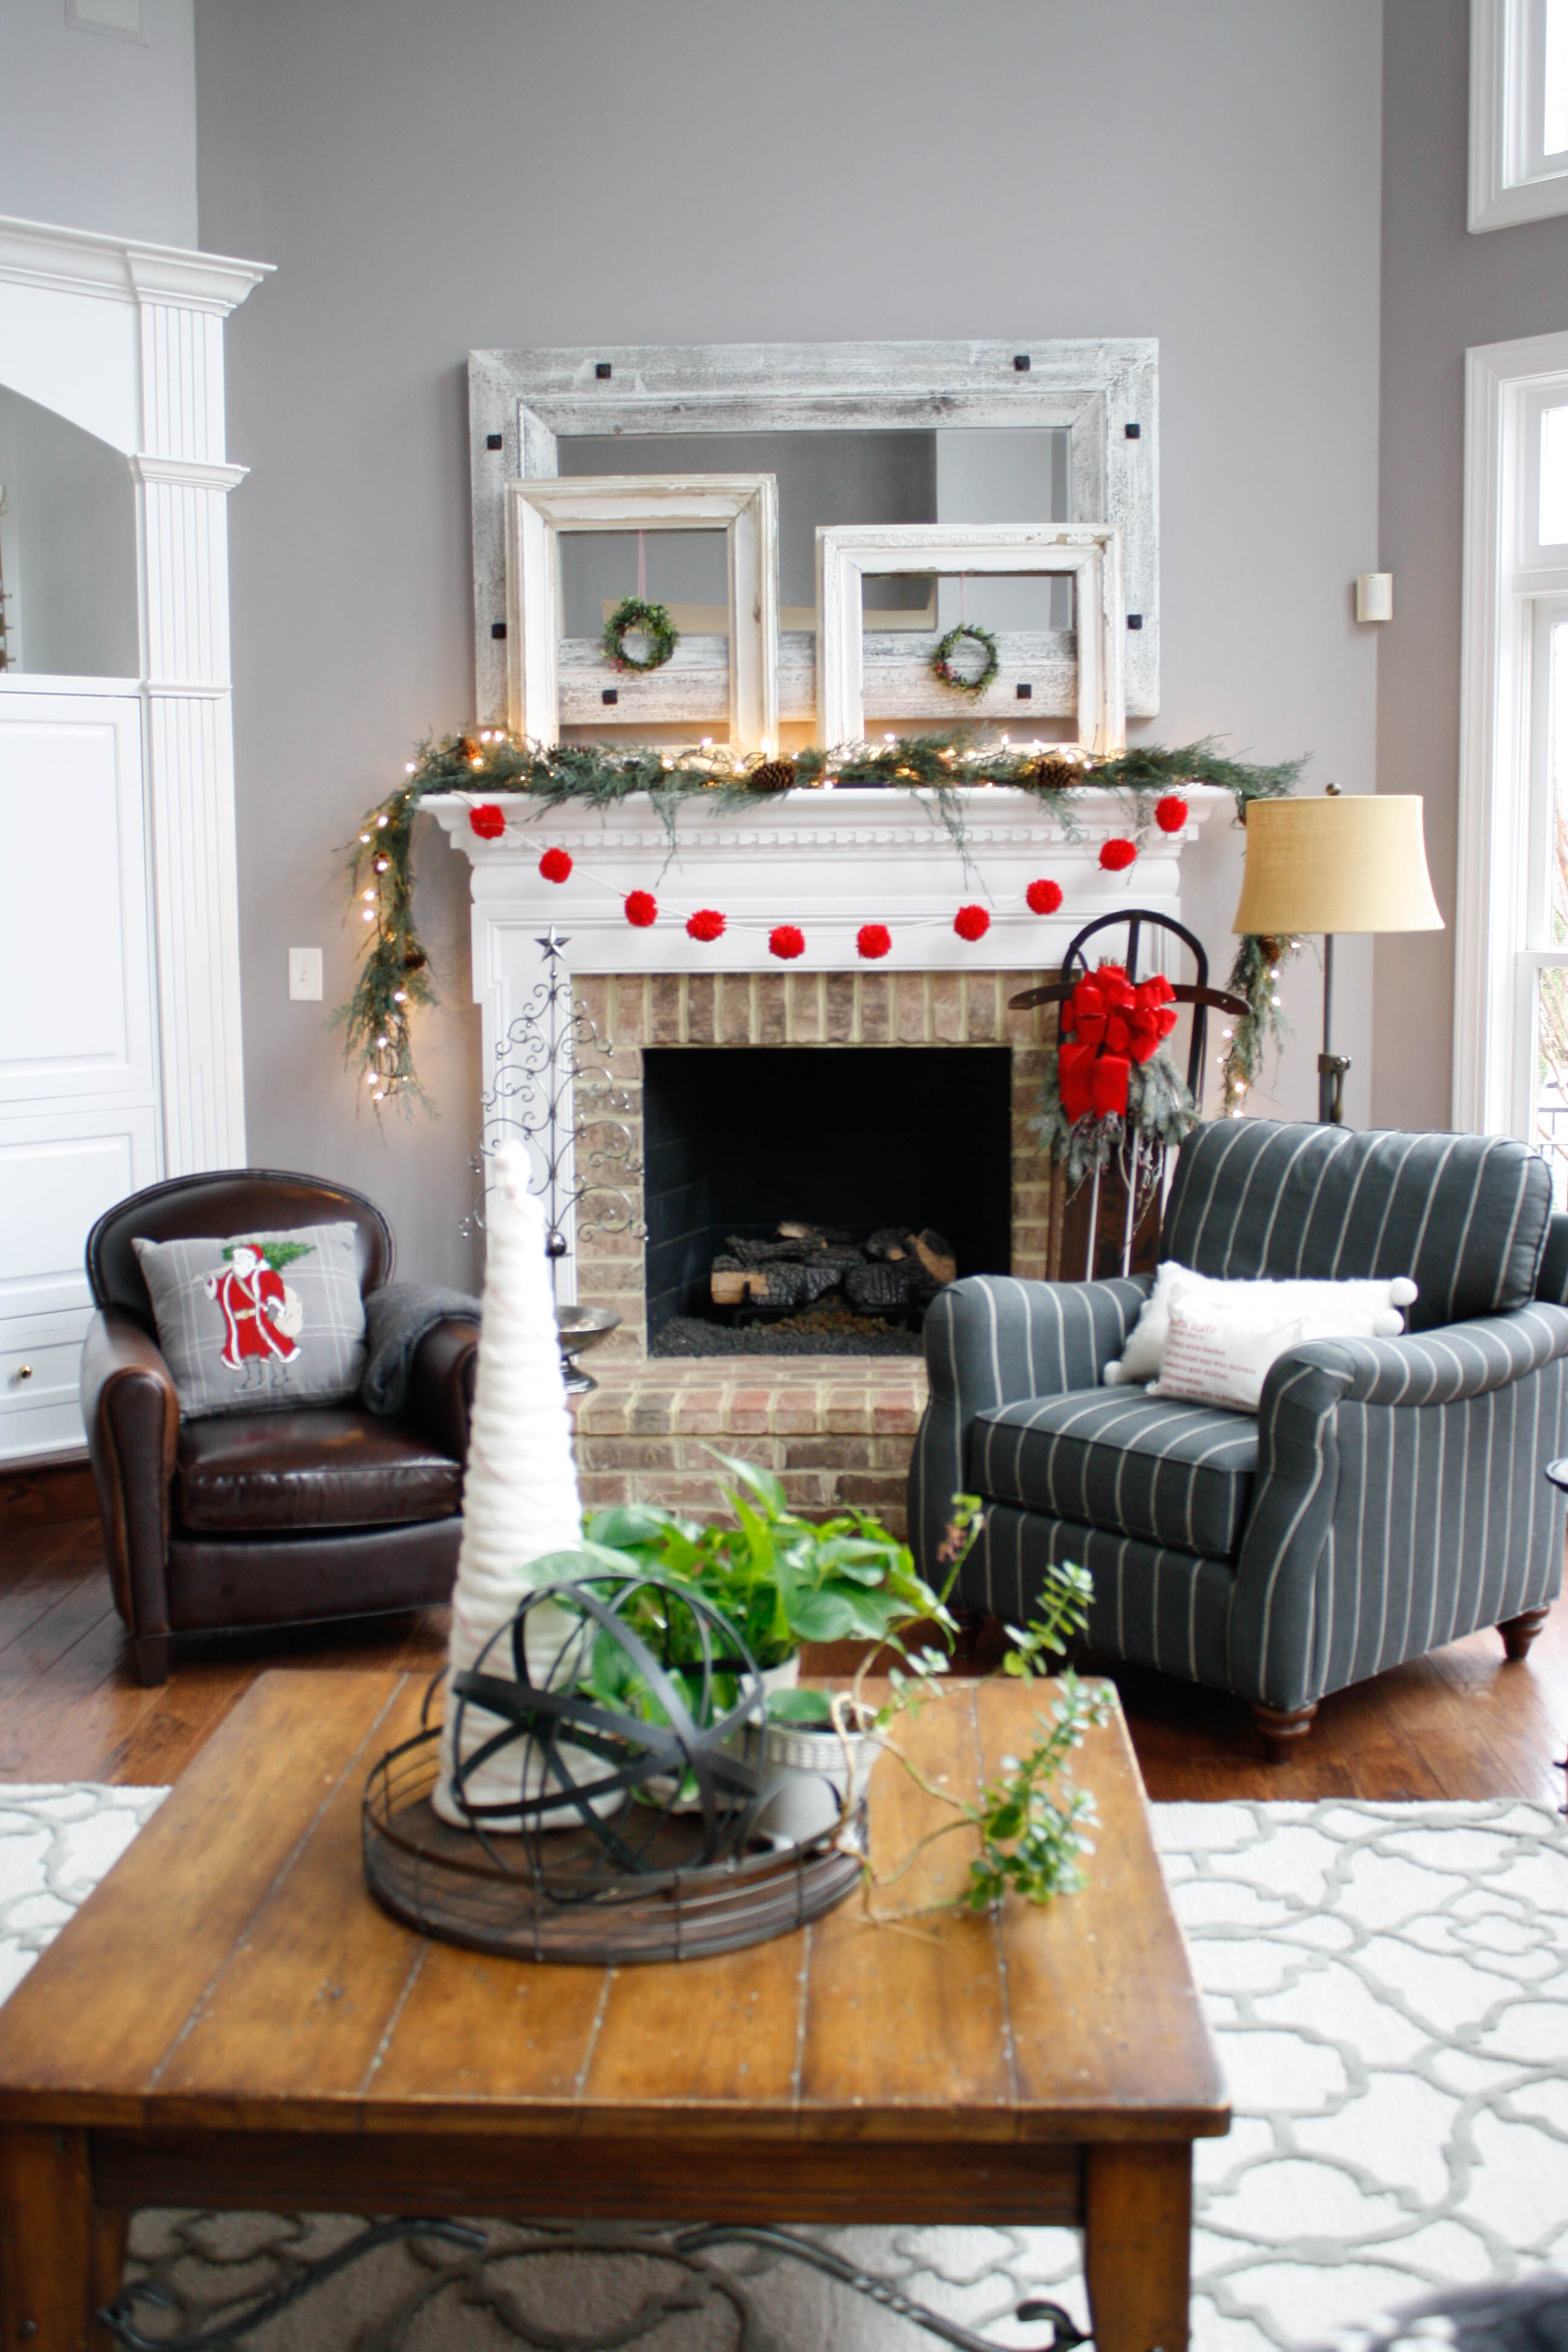
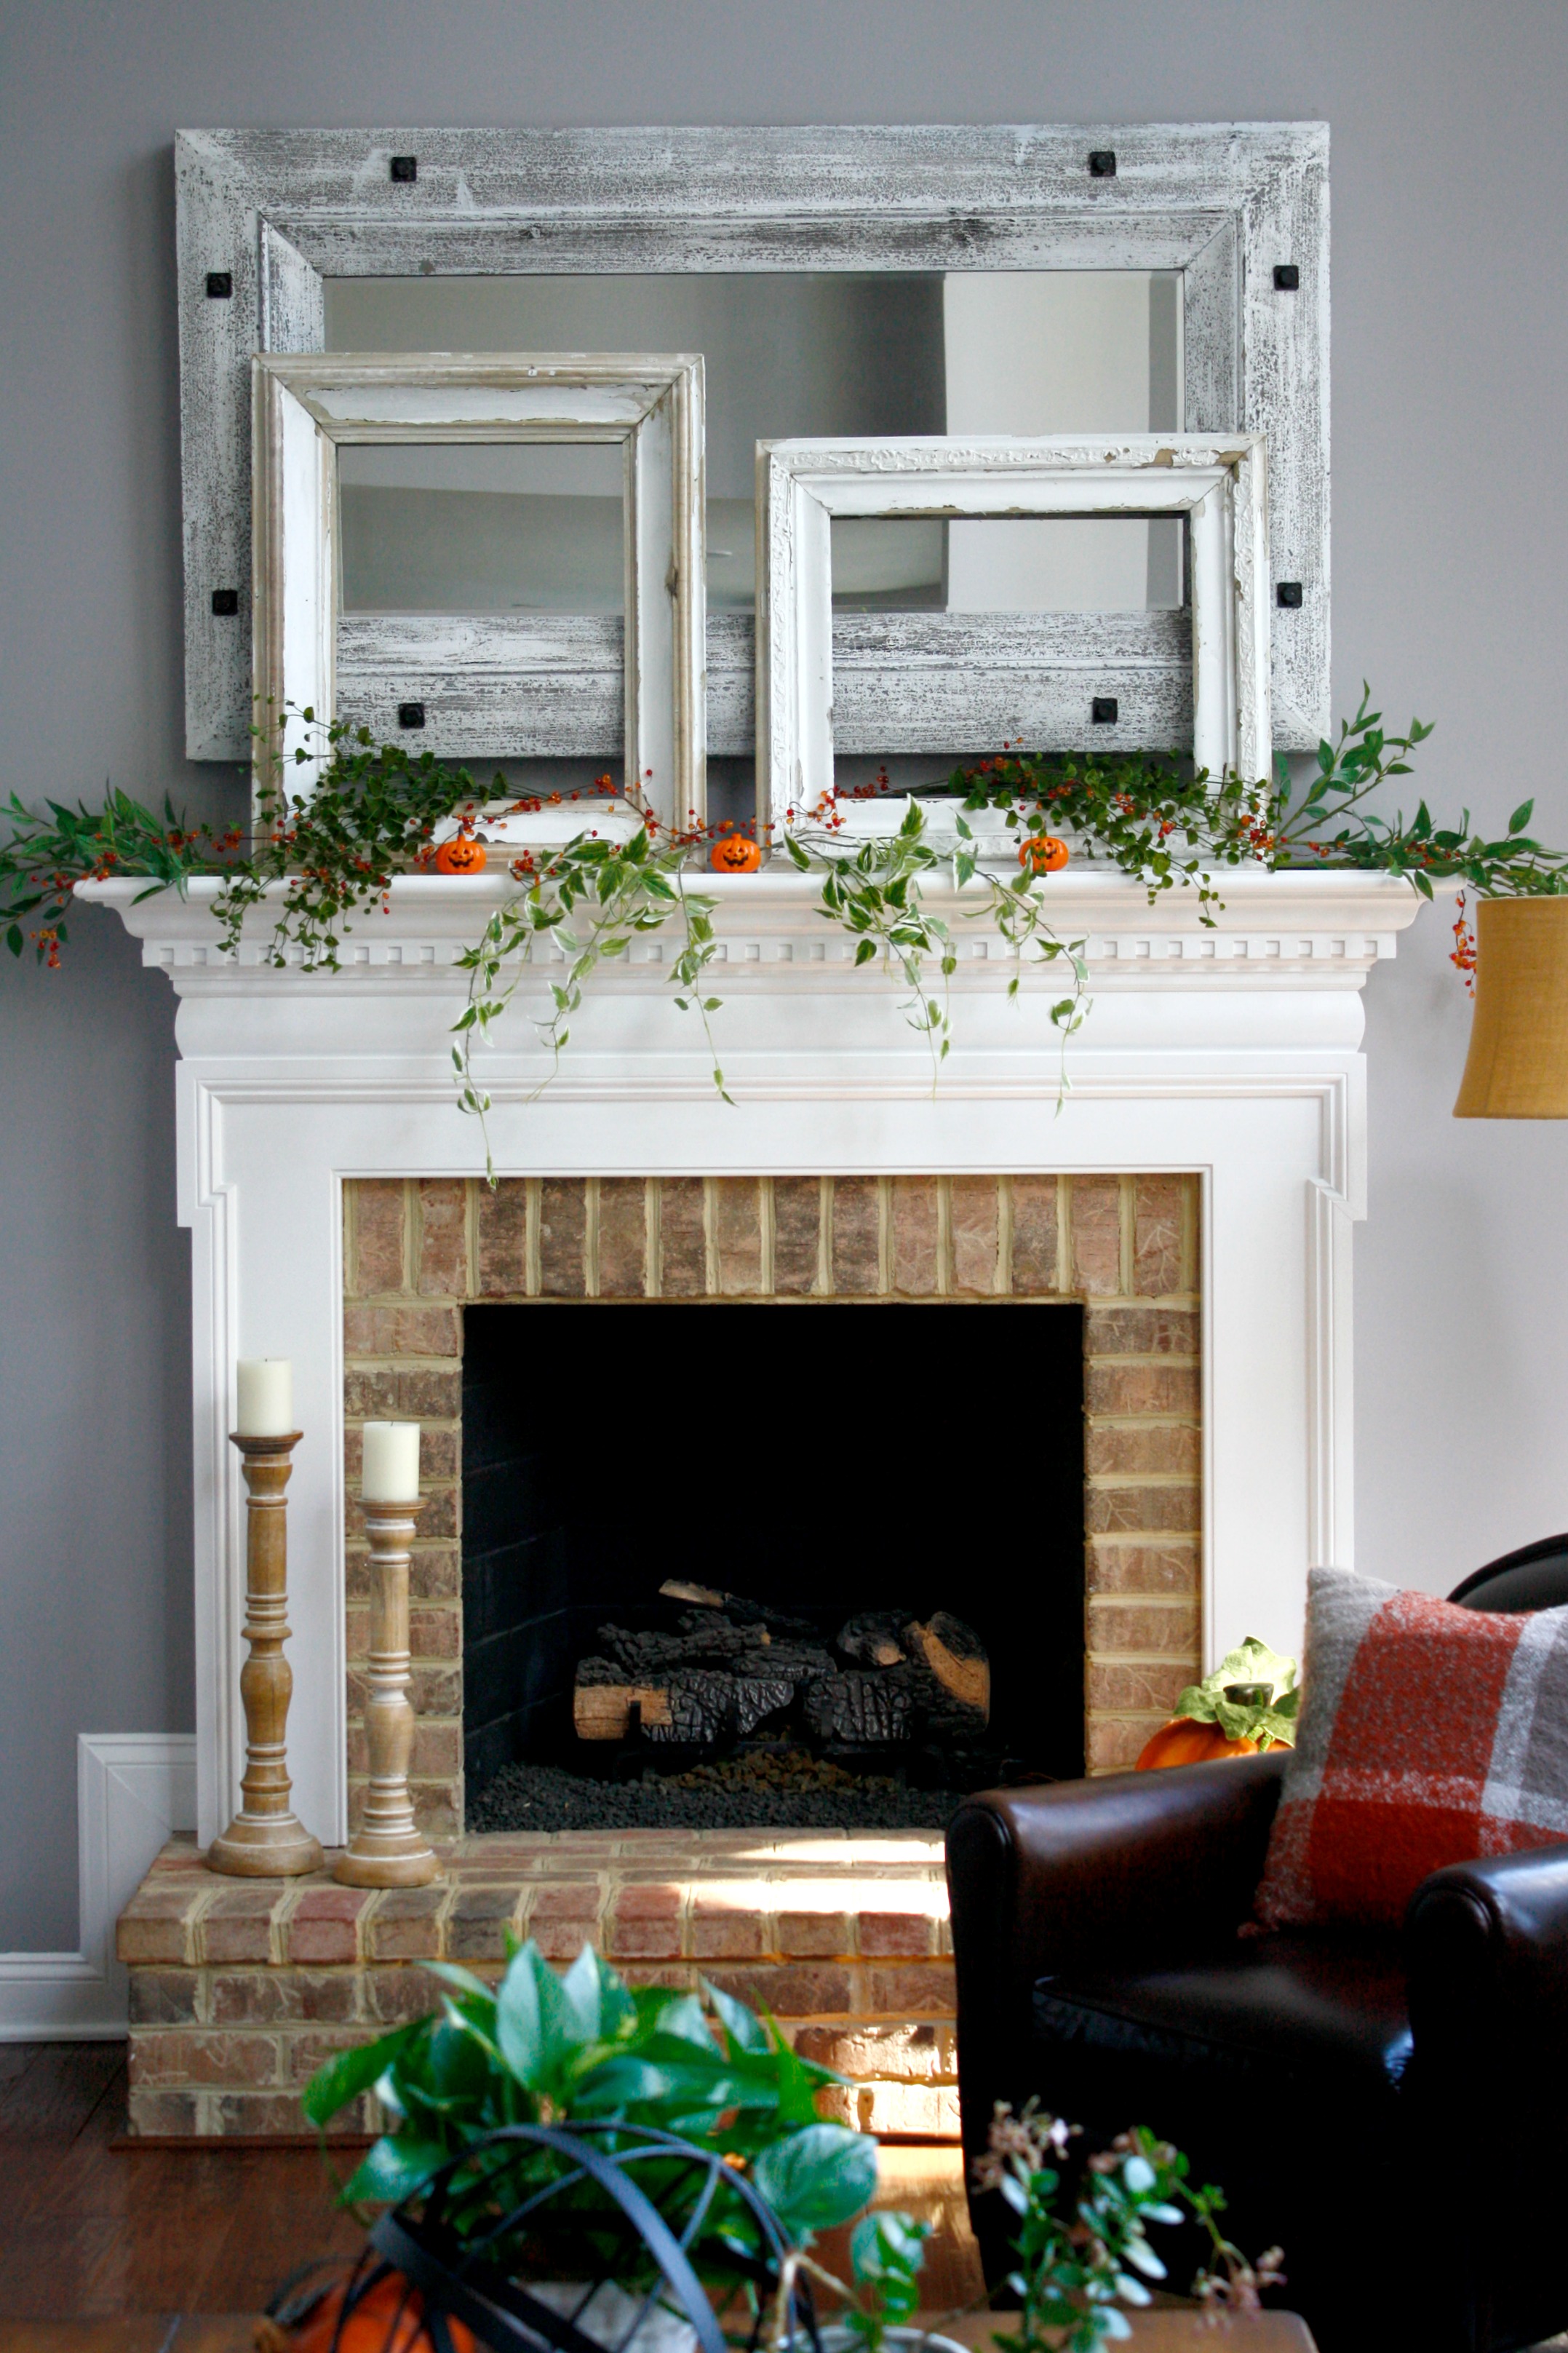
In the living room, I added pops of orange with pillows and a throw that I had from previous years. I also used my favorite pumpkin that my older boys picked out over twenty years ago which I guess makes it vintage now.

Adding Simple Fall touches with pillows and throws.

Using my favorite light up pumpkin which is now considered vintage.
On the hearth, I filled a basket with a Fall pillow, a cozy throw, and a pumpkin.

One of the most used rooms in our home is the sunroom. I kept it very simple in here. I scattered a few pumpkins and that is it.

Adding pumpkins and greenery to a bowl adds a bit of Fall in the sunroom.
I placed a mini pumpkin by my wire vine to add a bit of whimsy.

I love this little table. It has been moved from room to room but I think this is my favorite spot. I picked it up at a thrift store a long time ago and it’s been painted about three different times. A cheap and easy refresh!

As for the outside, I kept it very simple with pumpkins, a few mums and ornamental pepper plants.

Decorating with a vintage stool, mums, and pumpkins.
A pumpkin stack and mums finish of the side porch.
Decorating my vintage plant stand with ornamental peppers and mini pumpkins.

I have shared this plant stand before. When I went home to visit my parents, I took my mama thrifting and I found this. It used to be on the porch of my mom’s neighbor when she was a child. I just like that it is now on my back deck, it’s a little piece of home.

That wraps up my little Fall home tour. Now that we are into my favorite time of year, hopefully, I will be posting a bit more. I hope you all enjoyed this little glimpse into my home.

Until Next Time,

Filed Under: DIY Crafts, Home Tour, Projects and DIY, Thrift Shop Tagged With: DIY, fall decor, faux stems, Home Tour, pumpkins, Thrifting

Dressing Up my Pantry with a Vintage Door

July 14, 2019 By stylishrevamp Leave a Comment

Where has this summer gone?  In less than a week, we are going to be seeing back to school ads and the bus stop schedule. I’m not ready!  It seems like only last week I shared my pantry organization.  It’s hard to believe that was back in January. Well, today I am sharing how I dressed up my newly organized pantry with a vintage door.  Not going to lie, I love it!

Back in January when I organized my pantry, I knew that I wanted a vintage half lite door.  Trying to find the right door was a bit more difficult than I expected. After months of looking, I finally found one in rough shape, a little too wide and about 4 inches too short.  Not to mention the smell!

Vintage half lite door

I absolutely love this door.  It was definitely a labor of love getting her to where she needed to be. It took a lot of stripping and sanding and painting but she was worth it, oh so worth it!

Vintage Pantry Door

I actually didn’t mind the stripping process.  Once I got the hang of it, I found it to be quite relaxing. I used orange CitriStrip that I had on hand.  I painted on a thick coat of the CitriStrip then covered it with plastic wrap and let it sit for 24 hours.  After 24 hours, I was able to scrape off the 4 different layers of paint. Then I flipped the door over and repeated the process.

before shot of my vintage door

My husband trimmed the door down an inch and a half on each side and we had to add four inches to the top.  We added to the top of the door so the bottom still lined up with the door trim.  We planed down a piece of wood to match the thickness of the door.  We drilled three holes in the 4 inch piece of wood and the top of the door.  We attached the extra piece of wood to the door with a dowel and wood glue.  Surprisingly, it was easier than I had anticipated and the fit is seamless.

Vintage Door with added height to fit existing door frame

I originally wanted to keep the door with the raw wood but I knew I wouldn’t be able to match the new wood to the old door. At this point, I was getting so excited to finish it off and had to pace myself on the painting.  I typically rush the painting process so I can finish a project but this time I left myself plenty of time to let the paint dry between the coats.

Vintage half lite door

I had to order a new door knob because the original knob and lock set was missing several pieces. Luckily, I was able to find an exact match here. I adore the ceramic knobs.

vintage door knob

We have managed to keep the pantry organized since January and the glass now keeps me motivated to keep up the neatness! I love the finished look and now I’m on the hunt for a bubble glass door for my cleaning closet.

Vintage Pantry Door

I hope you all are enjoying your summer.  FYI, I am watching Christmas in July on Hallmark as I type this.  It is a true obsession and I do not use that word lightly!

To my dad, good luck tomorrow. I love you and will see you week after next! XOXOXO

Until Next Time,

SR_signature

Filed Under: Before and After, Fabulous Finds, Home Tour, Projects and DIY, Thrift Shop Tagged With: DIY, door, pantry, Shopping, thrift, Vintage

My Version of Tidying Up the Pantry

January 27, 2019 By stylishrevamp 13 Comments

I think everyone has hopped on the Marie Kondo bandwagon.  I watched one episode on Netflix and I have to say it stressed me out.  I can live with mess  for only so long before I lose it.  That was the case with our pantry.  I wanted to tackle it before Thanksgiving and time just got away from me.  I decided to wait on the revamp until after the Holidays and it drove me crazy looking at the mess every day.  It got to the point where we were buying things because we couldn’t find the ones we already had in the pantry.

Pantry before the Major overhaul

This is the hot mess we lived with in November and December. Chaos like this drives me crazy.  I am the type of person that has to have my house in order when I go to bed.  No dishes in or on the sink when I go to bed at night, pillows fluffed on the couch and throws folded and placed where they need to be.  It just helps me function better, especially when I start my day off with a clean kitchen.  So this mess was difficult to deal with to say the least.  After Thanksgiving, I knew I wouldn’t have time to complete it and I wanted to decorate and enjoy my Christmas home but this mess was always lurking in the back of my mind.

So, January was a fresh start.  Once the Holiday decor was boxed and put away, we emptied out the pantry and got to work. I have to admit, this was my least favorite project ever.  I felt like it was never-ending.  So much stuff to sort through and quite frankly it was just mind numbing.  I liked the actual revamping of the shelves and I didn’t mind painting the entire pantry but going through the food and organizing it was pure misery.

My version of tidying up the pantry

Pantry organization

I have to admit the outcome was so worth the two weeks of misery I went through getting this space organized. I’ll take you back through the process and show you what it looked like.

The pantry cleared out

This is what the panty looked like once we removed all the food.  I then got busy removing all the old contact paper that originally lined the shelves.  Once that was done, I scrubbed everything down with hot soapy water.

Then we made a trip to Home Depot.  We picked up some Lauan Plywood (it is the very thin plywood that everyone is making faux shiplap from and something I am trying to talk my husband into doing in our sunroom. I’ll keep you posted on that situation). We had them cut the plywood down to the right size in the store and my husband made the angled cuts once we were home.  We also bought some 1 x 2’s to trim out the shelves.

Shelves resurfaced with Lauan Plywood

Once that was done, we puttied the nail holes and sanded everything.  Then I got busy painting.  I painted the ceiling, shelves, walls and the trim a nice bright white.Painted and trimmed out Pantry Shelves

Resurfacing and trimming out the shelves made a huge improvement.  Finishing out everything with bright white paint brightened up the space a great deal. The earlier paint was an off white with yellowish undertones not to mention any touch ups done throughout the years was done in different paint. So not only was it disorganized but we had about 4 different color paints jobs going on in there.

Now the fun(ish) part, the organizing in pretty containers. I have collected glass jars from Goodwill for years. I also asked for pantry organization items for Christmas and I have shopped at Bed Bath and Beyond too.

Getting rid of most of the cardboard packaging in the pantry was the biggest space saver of all.  I never thought I would have enough plastic and glass containers to organize my pantry or that I would be able to fit everything back on the shelves but I did and I still have extra space.

Pantry Organization

Organizing the Pantry with Bed Bath and Beyond expandable a shelf

Adding the shelf risers for canned goods is a great space saver and it makes everything assessable and easy to see.  Placing together similar loose items in tray keeps everything organized as well.

Organizing Pantry with Baskets from Home Depot

I wanted to keep everything off of the floor.  Adding these wire basket from Home Depot was the perfect solution to keeping things off the floor and organized.  I will link everything at the end of the post. These baskets are a favorite! My brother-in-law made me this hand loomed rug and I adore it!

Organizing the Pantry with OXO Pop Tops

Some of the glass jars that I picked up at Goodwill throughout the years do not have an airtight seal.  For the containers that are not air tight, I use them for all my coffee and tea k cups or packaged food.  I also added two lazy susans in the corners.  I may still add one to each shelf.  We are also still think of adding another shelf up high for all of our paper products but for now, I think everything fits and we are fine as is.

Revamping our pantry

Here are a few of my take aways from this project followed by links to products in our pantry revamp.

  • remove items from cardboard packaging
  • place similar loose items together in a clear tray
  • add wire basket for potatoes and onions
  • use risers for canned goods
  • use lazy susan in corners for easy access

 Links for items used in this post are below:

Oxo Pop Top Containers 

Clear trays

Lazy Susan

Expand A Shelf

Hanging Wire Baskets  (i used the white shelves and mine came in a four pack)

Chalk Labels


I love how organized the pantry is and I don’t mind putting groceries away now.  Having said that, this project was a tough one for me but I am glad it is over and I am hoping it NEVER gets that messy again.  Thanks for joining me on this adventure. For any questions on this or any other post, I can be reached at krkolson@gmail.com or you can leave me a message in the comment section.


Until Next Time,

SR_signature


Filed Under: Before and After, Home Tour, Projects and DIY Tagged With: bed bath and beyond, Home Depot, lables, organization, Paint, pantry, shelving, trim

The Home Holiday Tour Continues

December 20, 2018 By stylishrevamp Leave a Comment

Today wraps up my Holiday Home Tour with a peek into my sitting room right off of the master bedroom. This is a small space with soaring ceiling. Even with the tall ceilings, it’s cozy and warm and I am usually the only one that uses it which is perfectly fine with me. Chick flicks, HGTV, Bravo and Hallmark on repeat all day every day. This is definitely a no news zone!

  Master bedroom sitting room dressed for Christmas

Holiday Home Tour

I’m still loving the shiplap on the fireplace wall.  It really helps break up the deep, dark navy walls.  The mantel is dressed with a Christmas swag that is made of metal and I adore it not only because it is fabulous but it was a gift from my sweet friend who knows me so well! I think of her every time I walk into this space!

 Switching up the look of the glass jars for each season is a quick and easy decor change. The frosted pine cone branches that I used are from Michaels. It’s a simple change but makes the space look new each time I change it out.  The wooden NOEL letters were moved up to mantle last year. They are placed in a vintage chicken feeder. I’m keeping them in my space so I don’t have to walk into the kitchen and see LEON spelled out from an unknown prankster.

My flocked Christmas Tree was purchased from Walmart a few years back and I have to say it is one of my favorites.  It is really flocked nicely and it’s a breeze to put together.  It is so lightweight and easy to handle.  I picked up another tree from Walmart last year for our sunroom and it is also a great tree.  For about $120, the quality is topnotch!

Walmart flocked tree
(The 2nd Walmart tree is in our Sunroom)

Sitting Room Home Tour

A vintage Bell Atlantic wooden ladder decked out with vintage Christmas stocking.

I’ve shared my vintage Bell Atlantic ladder before and I bought it specifically with Christmas in mind. I knew that I wanted to hang vintage stocking from it. She was a bit rough when I bought her and some doubted my purchase but she cleaned up nicely! Love, love, love it!

I ordered the vintage stockings from ebay because they remind me of the ones my mom, dad and  brothers had growing up. They even have a glitter mom and dad glued on them just like my mom did with all of ours.  I am thinking of stringing some Christmas lights on the ladder, I still have 5 days to do it, right? Hmmm, maybe I should hang some lights tomorrow!

I wish that time would slow down so we could just sit back and enjoy the season. I do like the hustle and bustle of the Holidays but I am ready to slow down for a bit! I am officially done wrapping and will do some more baking over the weekend which I enjoy doing.  Fingers crossed that my ebay package arrives tomorrow. It’s been delayed twice.  I cannot wait for it to come!  I have become completely obsessed with tracking it! I will post a picture of it on Instagram if it ever shows up on my doorstep! It was a total impulse buy and I cannot wait to share it with you in all its vintage glory!

I hope you all are enjoying the season with family and friends and have some time to take it all in this weekend before the chubby man in red flies through the sky on Monday night!

Until Next Time,

SR_signature

Filed Under: Home Tour Tagged With: Christmas, Holiday Home Tour, Home, ladder, stockings, Vintage, Walmart

A View of our Christmas Home

December 17, 2018 By stylishrevamp Leave a Comment

Only 8 more day before Christmas is upon us.  I finished up my wrapping today which I am so happy to have it done.  Every year, I say I am going to wrap as I go but next year I really mean it.  I don’t know why I put it off for so long this year.  Next up on my to do list is grocery shopping and food prep but not today.

Today, I am continuing my home tour.  I am sharing our Christmas kitchen and family room.  My kitchen tree is another slim tree  and it holds handmade ornaments that the boys made years ago.  It is also where I put the ornaments that we picked up on our travels.

Kitchen Christmas Tour

Kitchen Christmas tree

I always place our DIY Christmas Tree sign out first.  It kind of kicks off the Holiday season for us.  You can see the tutorial here. I also added mini trees to the DIY window wreaths.  You can see a bit of the wreath in the photo. It is hard to get a good picture of the windows.

DIY wood Christmas Tree Sign

Three tiered tray dressed for Christmas

I added some mini Christmas trees and candles to my tray which was a thrift store find.

Vintage Red Toy truck carrying a Christmas tree

Another favorite I pull out each year is my husband’s childhood toy truck. I love the little wreath that I added to it last year.

DIY chalkboard with Santa's reindeer

I used a chalk pen to list Santa’s reindeer and added a red pom-pom with a glue dot to complete Rudolph’s name. The Santa going down the chimney and the sled are vintage inspired.  They make an appearance every year.

A view into the the Kitchen from our Family Room

Family Room Christmas Tour

From the kitchen, we will head into the family room.  This is the only real tree that we have.  I enjoy having a real tree and I don’t find it to be messy at all other than the taking down part.  I still think it is totally worth it!

Our real Christmas tree in the family room

My husband and I still wait until the boys are in bed on Christmas Eve to place the gifts under the tree.  Even though two of the three are adults and the third is 15.  You are never too old to believe!

Fireplace Mantle dressed for Christmas

I kept the fireplace the same as it was last year.  I like the traditional red during the holiday. The yarn tree on the coffee table is new this year.  I used the leftover yarn from my braided garland to make this DIY Christmas Tree.

DIY yarn Christmas tree

Another DIY Christmas project is the two twig stars I made. I made a large star and a smaller one.  The smaller one is on my office tree. I was originally going to put the larger one on my family room tree but it hasn’t made it to the top of the tree yet.  Maybe Santa will do it on Christmas Eve!

DIY flocked twig star

HomeGood find

I picked up this little tree at Homegoods while waiting in line to make a return.  Good things can happen while waiting in the checkout line.

Goodwill Metal Christmas Tree

This was a Goodwill find several years ago.  I just use it to for some of my vintage inspired  ornaments. My Christmas Mantle

My Christmas tour will wrap up tomorrow with a quick  glimpse into the sitting room in my master bedroom.  Thanks for joining me on the tour of our Holiday Home!

Until Next Time,

SR_signature

Filed Under: Home Tour Tagged With: Christmas Decor, Christmas Kitchen, Christmas Tour, DIY Christmas Projects, Holiday, Holiday Home Tour, Home Tour

Holiday Home Tour

December 16, 2018 By stylishrevamp Leave a Comment

Only nine more days until Christmas and I am finally posting  part of our Holiday Home Tour.  I really do not switch things up too much from year to year.  I like the traditions we have in place and the memories we have created but I do like to add a few new decor items whether they are DIY projects or new to me items.  Today I am sharing our dining room and my home office. With that said, sit back and enjoy our Holiday Home Tour. I am so happy you are here!

Home Office Holiday Home Tour

DIY 25 sign

The sign is a new addition this year. I was inspired by Heather Tartaglia from The Morning House.  I made this DIY just like all of my other signs that you can check out here and here. I like the view into the sunroom from my office.

Pencil tree with DIY Braided

I bought this pencil tree at Michaels a few years ago for a little over $30.  I flocked it last year with this product I bought on amazon.  I used the same flock on the DIY star topper that I made from twigs gathered from our yard. It was a quick and easy project that I will try to do a mini tutorial on later this week.  The braided garland is also another DIY project that was inspired by Erin@CottonStem.  The last new item in my office is the tree collar that I ordered from Home Depot. I really like this tree collar because it is adjustable, you can make it larger or smaller and it latches with a hook and chain.

Here's an up close view of the braided garland.

Here’s a close up of my DIY braided garland.  I picked up my chunky yarn at Michaels and used my 40% off coupon so it ended up being a little over 17$.  I love this new addition to the tree! Thanks Erin for the great idea!

Dining Room Christmas Holiday Tour

O.k.we are switching gears and heading into the dining room.   I added a few touches of Christmas sprinkled throughout the room. Here are a two of my favorites.

A view into my Office at Christmas time.

I use my bread bowl as a center piece by adding some greenery with red glass beads and some gold ornaments.  I like the glimpse of the Office Christmas tree you can see peaking around the corner.

Large vintage copper bowl with a vintage table cloth on the buffet table

 This buffet is my absolute favorite piece of furniture in the entire house! I’m a bit obsessed with it to say the least.  I picked up the vintage table-cloth over the summer when I was home junking with my mama. I actually bought it in the vintage store that used to be our old apartment. You can read about that here.   I remember mom used to have one like this that she used for Christmas Eve and Christmas Day dinner. I like to think that this was actually hers.  I’m always on the lookout for vintage Christmas textiles. I guess it just reminds me of Christmas time from my past. I hope my boys will one day look back at our traditions and pass some of them on to their future families.

I hope you enjoyed this small little glimpse into our Holiday Home Tour.  I will be back tomorrow with a mini tour of our Kitchen and Family Room and end the last home tour on Tuesday with our Sitting Room Christmas decor.  Thanks for stopping by to visit us!

Until Next Time,

SR_signature

Filed Under: Home Tour, Projects and DIY Tagged With: Christmas, Christmas Decor, Christmas Tree, decorations, Home Tour, table cloth, Vintage

Welcome to my Fall Home Tour

October 21, 2018 By stylishrevamp Leave a Comment

I feel like I am behind on the Fall bandwagon.  Before you know it, it will be time to get out the Christmas decorations. Not that I’m complaining but I need to get moving! With all the traveling we have been doing, my motivation is a bit lacking!

Today, I am sharing a mini Fall home tour.  I don’t typically go out and buy new decor every year.  I like the tradition of pulling the old out and reminiscing.  Having said that, I did decide to part ways with a few things that were no longer my style.  I offered them to my oldest son for his apartment but he said thanks but no thanks. I will admit, there was a wee little wince when he said no. I think some of my most treasured memories with the boys are the ones of us decorating for the different holidays.

Welcome to my fall Home Tour

I made this Hello Fall Welcome wooden sign like my DIY Christmas sign.  You can read about it here. I asked my husband to draw the truck for me and I used carbon paper to trace it onto the board. I think adding DIY signs is an easy way to add decorative touches for little to no cost.

Welcome to my Fall Home Tour

I also scattered a few pumpkins, leaves and a fairy in the kitchen to amp up the Fall touches. I like the color orange with all of the grey we have in the house.  It provides a little punch of vibrant color.

Welcome to my Fall Home Tour

Welcome to my Fall Home Tour

Welcome to my Fall Home Tour

What holiday would be complete without decorative pillows?  I. Can’t. Help. Myself!! I picked up both of the pillows at Michaels on clearance.  I do believe it is a true obsession.

I also added some Fall touches to the living room.  I pulled my orange pillows and throws out, dressed the mantle with some greenery and added a few mini faux jack o lanterns.  It creates a warm and inviting space.

Welcome to my Fall Home tour

Welcome to my fall home tour.

Welcome to my Fall Home tour

In the Dining Room, I added a new to me Goodwill basket filled with pumpkins and some gourds to the tablescape.


Welcome to my Fall Home Tour

The last part of the tour is the sitting room off of the Master Bedroom.  I still adore the transformation of this space.

Welcome to my Fall Home Tour

Welcome to my Fall Home Tour

So that’s all I have for the mini Fall Home Tour.  If I can get myself organized and go out and buy some pumpkins for the outside, I will share our Fall Front Porch.  I think I am in a bit of shock that October is almost O-V-E-R! Guess what that means…we are closer to the Countdown to Christmas with HallMark!!!

I Hope you enjoyed the tour.

Until Next Time,

SR_signature

Filed Under: DIY Crafts, Home Tour Tagged With: Fall, floral, Home Tour, orange, Pillows, pumpkins

Hometown Thrifting Adventures

July 29, 2018 By stylishrevamp Leave a Comment

For the past few months, I have been traveling to my hometown in West Virginia to visit my parents.  While there, I took my mama on some thrifting adventures. Today, I am going to share with you one of my favorite thrift shops back home and the reason why I love it.

The back of the store and the apartments above

This thrift shop is so special to me  because we used to live there when I was a child.  I’m not really sure I remember living there, so much as, remembering it from stories and pictures. When we lived there, the bottom of the building was a store and the upper level was divided into two apartments.  We lived on one side and my mom’s best friend of over 60 plus years and her family lived on the other side.  There was a door between the two apartments. My mom has so many special memories from that time in her life.


Christmas morning with mom and three of my brothers

Hanging on the porch with two of my brothers

When I was home last, my mom was telling me a story about when she was first married and how she didn’t know how to cook or make a single thing. One day, their Priest was at the apartment because my dad was converting to Catholicism so they could remarry in a Catholic Church.   Her best friend that lived on the other side cracked the door open and slipped my mom a cup of coffee so she could offer it to the Priest.  I loved hearing her tell this story.

Hometown Memories

My older brothers have more memories of our apartment.  I think I was only 3 or 4 when we moved out. Like I said, I think my memories are from old pictures and stories that have been shared.

Playing with my brother in our old apartment.

Celebrating my birthday

I have been back to that old building many times over the years because my mom’s best friend ended up owning the building and running the store on the main level.  Once we moved, we still went to visit at the store and at her new home which was right next to the store.  However, I haven’t been upstairs to the old apartments until recently. When I went home, I told mom we were going junkin’ and this was our first stop.


I had no idea the thrift store was on all three levels.  I was so excited to see it. This is the first time I can honestly say I was more interested in the space itself rather than what was inside and for sale.  Don’t worry, I have since gone back and done some shopping!

I loved the thought that we used to live there.  It is everything that I love today.  The beautiful original hardwood floors, the unique lines of the ceilings, and of course what was left of the vintage kitchen! Who knows, maybe there is where my love of all things vintage started.

I hope you enjoyed this little glimpse into my life.  To see more of my hometown trip check out my IGTV  video.

Until Next Time,

SR_signature


Filed Under: Fabulous Finds, Home Tour, Thrift Shop, Uncategorized Tagged With: Childhood, Family, Friends, Hometown, memories, Shopping, Thrifting, West Virginia

My Obsession with Pillows

May 24, 2018 By stylishrevamp Leave a Comment

Awhile back, a friend shared this tweet with me and asked if it reminded me of anyone…


I’m secretly doing an investigation on how many decorative pillows I can put around the house till husband loses his shit.

Current count:23

— mama77⚽️ (@deegeemindi) April 13, 2017

If you listen to Instagram stories, almost every single person talks about their “obsessions.” They’re obsessed with a new lipstick, outfit, shoes and the list goes on and on.  Well, in all honesty, I do not think it’s a real obsession unless they are hiding their crap in the back of their car, a closet or some secret compartment in an ottoman.  If they are… then it just may be a real honest to goodness obsession!

Now, we are going to see if my husband actually reads this little blog because if he does the gig is up! Today I am sharing my obsession with pillows and it may be a real obsession. Husband of mine, you may want to stop reading at this point!

My Obsession with Pillows

I feel like my love of pillows is a fairly new thing for me.  It probably started a few years back at Christmas time.  I mean have you seen some of the fabulous pillow designs around the holidays?  I really think that is where this all began and it has since spiraled into other holidays and seasons.  It is so easy to change the look of a room with a few pillows.

Let’s start with my most recent purchase.  If I’m being totally honest, I order this months ago but it was on backorder and I kind of forgot about it until it showed up on my doorstep yesterday.

Painted Fox darling pillow

I debated on this one for a while but it was too cute to pass up. I order it from The Painted Fox and it makes a lovely addition to the other 50 pillows on our bed!  While I was waiting for this pillow to come in (or forgot that I ordered it, however you want to look at it) I found another one that has since been moved to the chest at the end of our bed.

Painted Fox Darling pillow with some Homegoods finds mixed in

I was kind of hoping my husband wouldn’t notice but he did. You can’t see them all but there are actually only 9 pillows on our bed.  To be fair I sleep with 2 of those 9.

Now on to my sitting room which is a little cozy nook off of our bedroom.  I have two chairs and an ottoman in this room.  It is where I watch all of my shows. It is a news free zone!

Homegoods pillow for my sitting room

Holiday pillows stored in my Ikea Ektorp Ottoman

If you are wondering what this is, it is my hidden loot.  I have four Holiday pillows stored in my ottoman.  Next year, when I start to decorate for Christmas, can someone please remind me that they are in there?  You know I am going to forget!

GoodWill credenza and DIY Shelving

Yes, there are several pillows inside my Goodwill Credenza.  This piece is great for hiding/storing extra pillows. I also have my Fall pillows stored in my closet.

Adding pops of green in a neutral bedroom

Since my oldest son has graduated and moved out, I redid his room.  It’s probably a little more my style now than his, hence the green decorative pillow.  I will share more on his old room in the next few weeks.

More Homegoods Pillows

This is another bedroom revamp,  I added these decorative pillows to all white bedding to finish off the look.  I will share this room in a few weeks as well.

Decorative Pillows

Adding blush pillows to a grey family room

I added blush pillows to the family room recently.  I thought there would be some push back on the color choice. Either no one has noticed or they really do not care.  I think this room transforms the most by changing out the pillows.  Apparently, I am the only one…still no comment from the other members of this household.  Maybe that is why I keep buying pillows…no one notices!

Pillows add softness to the Kitchen

This pillow on my bench in the kitchen is one of my favorites and has been around for several years.  I really like the texture of it.   It is very reminiscent of the Magnolia line of pillows minus the cost. The pillows in my office are also similar to the Magnolia line as well.  I picked them up at HomeGoods for a great price.

A magnolia market dupe found at Homegoods

It’s a good dupe isn’t it?

I added a few new pillows to the sunroom and kept my favorite whale pillow. Charlie is always laying up against it.

Sunroom Pillow from Homegoods

Adding whimsy with pillows

and lastly,

Hiding my extra pillows in my Ikea Ektorp Ottoman

more hidden pillows.

Current Count:45

Until Next Time,

SR_signature

Filed Under: Fabulous Finds, Home Tour, Uncategorized Tagged With: decorative pillows, HomeGoods, Pillows, The Painted Fox, throw pillows

My Christmas Home 2017

December 22, 2017 By stylishrevamp Leave a Comment

Here we are again.  Two and a half shopping days left until Christmas.  I am so happy that I am done and completely wrapped!  Today the hubs and I went to the mall and it felt so good to be able to enjoy the hustle and bustle of the other shoppers without any stress on us. We enjoyed a nice leisurely lunch, picked up a few odds and ends and came home. I actually like to shop for others and I tend to do it year round.  When I see something I think someone would enjoy, I pick it up and keep it hidden until Christmas. I also keep a running list of what I have purchased throughout the year in my journal.  Next year, I am going to wrap it when I buy it or so I tell myself!

Now on to the last tour of My Christmas Home. I hope you enjoy.  Today I will share our foyer and my home office.

My Christmas foyer with garland draping the front door and Santa there to greet you as you enter.

My front door wrapped in garland and lights.

These two tables flank the front door which is draped in garland. The gold bowl on the table is filled with vintage milk glass Christmas light bulbs and the Nutcracker is at least 25 years old, another oldie but a favorite.

Decorating for Christmas using Vintage Items

Decorating for Christmas with a vintage demijohn bottle

I picked up this vintage demijohns bottle at our local vintage/ antique Fair.  I usually have two feather trees on the foyer table but I wanted to do something different.  I sprayed some branches with white paint and added glittered snow while the paint was wet.  I then hung our personalized snowmen ornaments on the branches.  I have a personalized ornament for each family member and extended family member. I got this idea from my friend’s mom.  Her little tree was so adorable and I loved the idea and have been doing it ever since.  My mom started me off with my first three ornaments with our boys name on it.  Hallmark used to carry the snowmen ornaments but they haven’t had them in years so I search ebay whenever I need to add another new family member.

If you look closely at the banister, you can see another favorite of mine.  My mom bought me this Santa when I first got married.   Now he sits on the banister, he is one of the first things you see as you enter out foyer.  If I remember I will post a close up of him on instagram.

My Christmas Home

Banisters draped in garland with DIY Reindeers waiting for takeoff.

If you look in the right hand corner of the photo, you can see the DIY reindeer my dad made for me when I first moved out of my parents home into my first apartment. When my middle son was little he would climb on them to see if he could make them fly.  I miss those days!

I only took a few photos of my office.  It pretty much remains the same each year but I took photos of the new additions.

My home office decorated with a DIY flocked pencil Christmas tree

The pencil tree is the same one I used last year.  I bought it at Micheals for a steal.  It wasn’t the prettiest tree I have ever seen but I wanted something skinny and cheap!  This year I flocked it and I think it’s an improvement.  Although, I didn’t follow the directions for the flock, it turned out pretty well.  You were supposed to wet the tree and gently sift the snow while spraying  more water as the snow was falling.  I did that in the beginning but that grew old quickly. I did spray water on the tree then I tossed the snow in a thicker application followed by more water. Patience is not something I am very good with apparently.  I let this dry for several days before I attempted to carry it upstairs into my office. Yep, you read that correctly, I did this all inside.  In my defense, I did put a tarp down first!  Lastly, I cut up a feather boa from the craft store and placed the pieces on the branches for a snowy look and added some red berries.

Decorating my home office with Christmas throws and pillows

I added a few new Christmas throws and pillows to add a bit of brightness and cheer.  The other new item I bought was this fabulous green metal K.

Decorating my Billy Bookcase for Christmas

That wraps up the tour of My Christmas Home.  I truly love decorating for the Holiday Season and creating new memories with friends and family.  I hope you and your family enjoy the Holiday Season and Have a Merry Christmas!

Filed Under: Home Tour, Uncategorized Tagged With: Christmas, Decor, Holiday Home Tour, Tour

  • 1
  • 2
  • 3
  • …
  • 6
  • Next Page »

Meet the Team

Hi, I'm Kathy! Mom to 3 boys, lover of thrift shopping and all things vintage.

Follow along with me as I revamp our home using thrifted finds!

Subscribe via Email


Visit Stylish Revamp's profile on Pinterest.

Our Favorite Posts

  • IKEA BILLY Bookcase Hack
    IKEA BILLY Bookcase Hack
  • DIY Headboard
    DIY Headboard
  • Revamping my Closet with the IKEA Pax Wardrobe
    Revamping my Closet with the IKEA Pax Wardrobe
  • Driftwood Christmas Tree
    Driftwood Christmas Tree
  • My Version of Tidying Up the Pantry
    My Version of Tidying Up the Pantry

Categories

  • Before and After
  • DIY Crafts
  • Fabulous Finds
  • Friday Favorites
  • Goodwill Goods
  • Home Tour
  • Projects and DIY
  • Thrift Shop
  • Thrift Shop Thursday
  • Uncategorized

Topics

Basket Chairs Chalk Paint Christmas Christmas Decor Christmas Tour Consignment Shop Consignment Shopping Desk DIY Driftwood Fall Flea Market gold Goodwill Halloween Holiday HomeGoods Home Office Home Tour IKEA Kitchen ladder Master Bedroom Michaels Milk Cans Nautical Paint paint pen Pillows pumpkins Shopping Sign spray paint thrift Thrifting thrift shop Thrift Shopping thrift shop thursday Tour Vintage White dishes wine rack Wood Wreath

Archives

Follow us on Pinterest!

Visit Stylish Revamp's profile on Pinterest.

Follow us on Twitter!

Tweets by @StylishRevamp

Follow us on Instagram

Screen Shot 2018-09-16 at 8.50.53 PM

Like us on Facebook!

Like us on Facebook!

Copyright © 2025 · Chic Pro Theme On Genesis Framework · WordPress · Log in