Stylish Revamp

Redecorating on a Budget

  • Home
  • About
  • Home Tour
  • Projects
  • Disclosure

Paint Pens and Pallets – A DIY Christmas Sign

November 23, 2016 By stylishrevamp Leave a Comment

We are having our Thanksgiving meal today.    Tomorrow we will head out for dinner with family but we wanted to have leftovers so I am making the entire dinner with all the trimmings today. I love the smell of turkey and stuffing cooking in the oven.  So while the turkey is roasting,  I wanted to share another quick Christmas sign with you using paint pens and pallets.

Using Pallets and Paint Pens to make DIY Christmas Signs

A few weeks ago I shared my DIY Christmas Trees for Sale sign.  I love the way it turned out and decided to make another Christmas sign this time using pallets and paint pens.  I really love the paint pens because they are so easy to use. The Pallets on the other hand not so much.

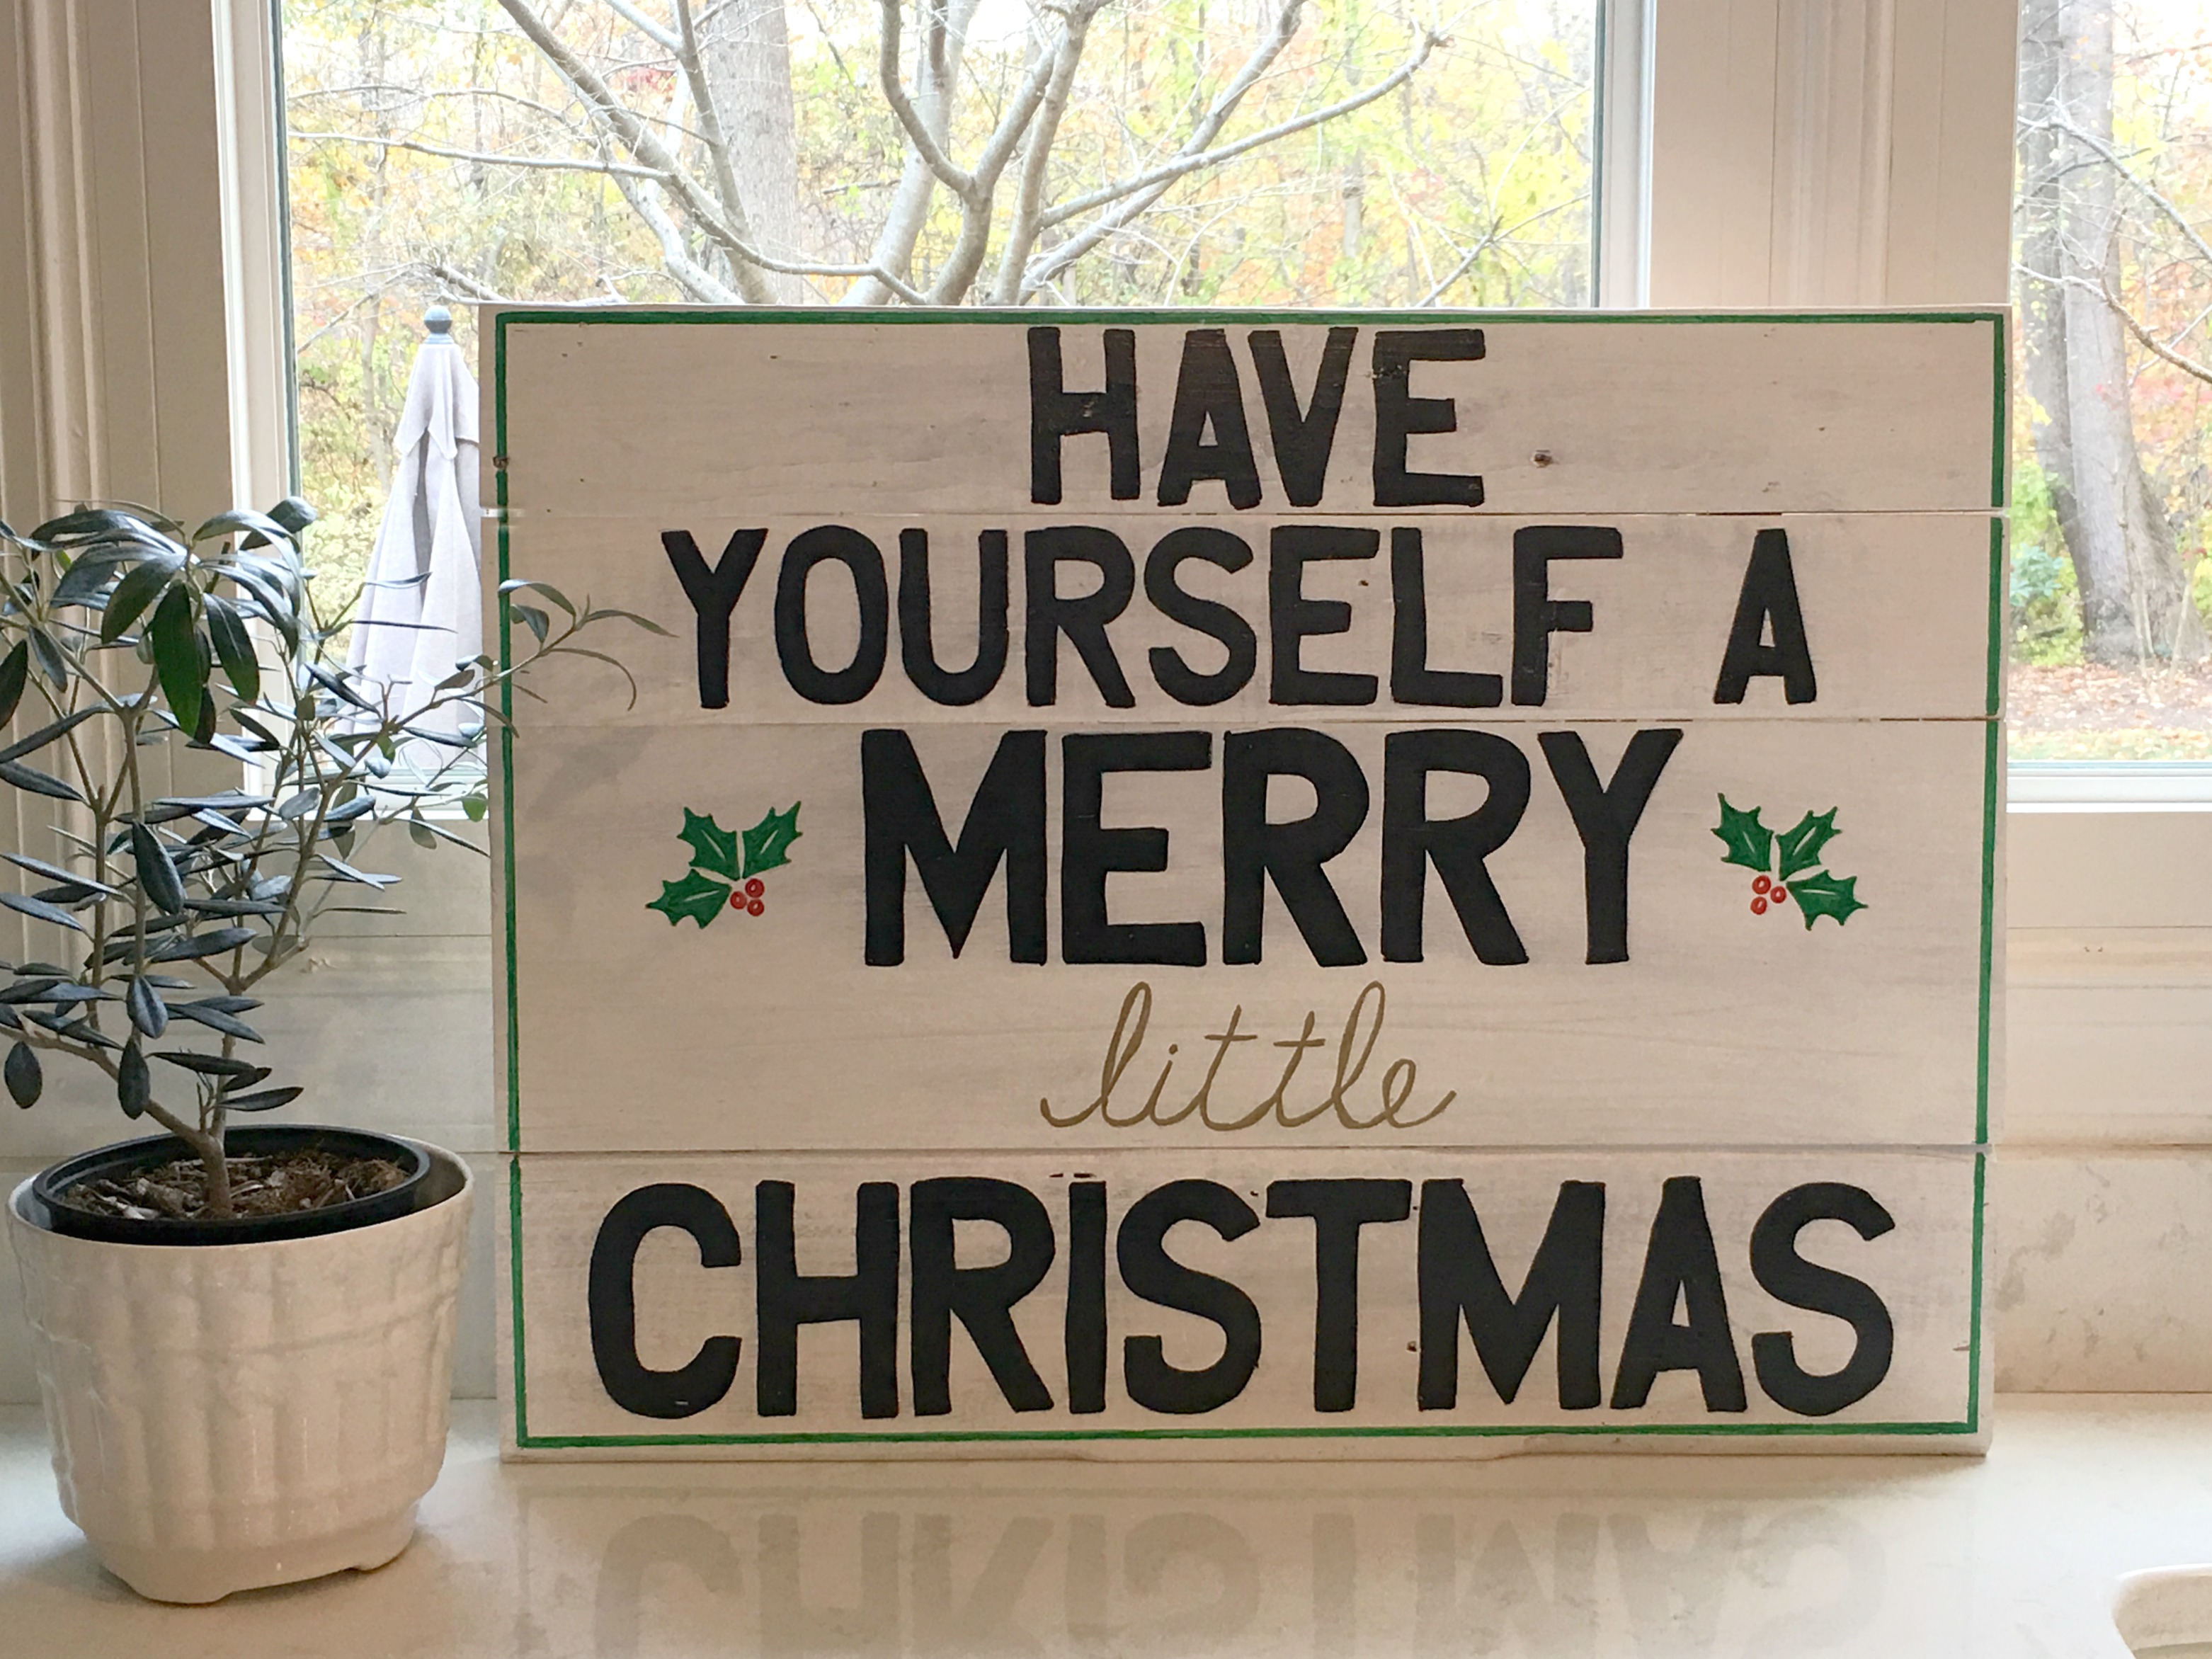
My son brought home a pallet from work and I loved the color on it. What I did not like was how difficult that thing was to take apart. I know some people can tear through a pallet within thirty minutes but not me!  I was finally able to get enough pieces off of mine to make the sign then I was done.

Can you see the big blocks of red wood on the pallet?  I have a great idea for those pieces but sadly they are still attached to the remaining bits of the pallet and at the moment I have no desire to try to rip them off!  I am hoping BK will finish it off for me.

Breaking down a pallet

DIY Christmas sign using pallets and paint pens

Back to the sign…I basically did the  same set up on this sign, using carbon paper and making my stencil.  You can read more details on the process here.  The only difference with this sign was using the pallet wood which made it a bit more rustic looking.  I cut the pieces down to size and gave them a good sanding.  The pieces are still a bit rough but I like the rustic look it adds to the sign.  I attached the four pieces of wood together with some scrap wood and my Ryobi Brad Nailer.

Designing a wood Christmas sign using pallets and paint pens

DIY Christmas sign using pallets and paint pens

Once everything was ready, I let the Gman paint the lettering with the paint pens while I enjoyed a cup of coffee.

Hand painting DIY Christmas signs using Sharpie paint pens.

I am so ready to start decorating for Christmas.  I am going to begin on Friday after I do the Turkey Burn at the gym which is a 90 minute workout.  O.K. first I will do the Turkey Burn, take a nap then I will get started with my decorating.  I am looking forward to using my new signs in my Christmas decorating this year.

Have Yourself a Merry Little Christmas

I hope you all have a wonderful Thanksgiving with friends and family.

Until Next Time,

SR_signature

Filed Under: DIY Crafts, Uncategorized Tagged With: Christmas, Paint, paint pen, Pallets, sharpie, Signs, Wood

How to Make an Easy DIY Christmas Sign

November 8, 2016 By stylishrevamp 1 Comment

How I made My DIY Christmas Tree for Sale Sign.

I know we just got through Halloween and we have several weeks before Thanksgiving arrives but today I wanted to share with you an easy DIY Christmas project.  Yes, I said it Christmas.  I love, love, love Christmas but it is too early even for me to begin decorating.

Now having said that, last year on The Fixer Upper, I saw a Christmas sign that I loved and knew that I wanted one.  By the time I saw it though, it was too late to make it and enjoy it over the holiday season.   So I wanted to get a jump on it for this year’s Christmas Season, that is why I am sharing my “How to make and Easy DIY Christmas sign” before we have even had a chance to eat the turkey and stuffing!

DIY Wooden Christmas Trees for Sale Sign

The first thing I had to do was pick up a piece of plywood at Home Depot.  Surprisingly, I did not have any scrap wood around that I could use.  Apparently, the garage clean out this summer was a bit too thorough.  Anyway, I trimmed the wood down to the size I needed to fit over my cooktop.  Then I gave it a quick sanding before giving it two coats of white paint.  Any paint on hand will do.  I originally wanted to spray it with my chalked paint by rustoleum but it was too windy outside and I was impatient so I used some leftover white paint from a previous project and rolled it on…it took about two minutes. (Which reminds me, I need to share with you in a later post a tip on tacky/sticky paint…remind me if I forget)

prep work for my DIY wooden sign

While the paint was drying, I used my stencils to create a pattern for the lettering.  It was easier for me to trace my stencil letters on computer paper then lay the design out on the wood.  It made the placement and spacing of the words easier.

Tracing my letters using carbon paper.

Once I decided on the layout, I placed carbon paper underneath the letters and lightly traced over them.  I only wanted to leave a light outline of the letters.  I wasn’t sure how well the paint would cover over the carbon imprint.

Tracing my letters using carbon paper.

DIY Christmas Trees for Sale Sign

When all the lettering was transferred to the wood, it was time to start painting.  I knew I would never be able to hand paint each letter neatly and stay within the lines.  That’s where the Sharpie Paint Pen comes in…I LOVE these paint pens!  I also used them on my DIY driftwood sign that you can see here.  It makes painting letters so easy!

Painting with the sharpie paint pen.

I had Gman finish painting for me.  It really is simple.  It is just like using a regular sharpie.  I would never have been able to paint the letters freehand using a paint brush.  This was easy and quick.

My version of the Christmas Trees for Sale sign. I love how my DIY sign turned out.

I am trying to decide if I want to add any trim to the border, paint a trim, or just leave it as is.  Once I am really ready to decorate for Christmas, I will had some greenery or something on the vent hood surround to break up all of the white.  Until then, I will continue with my Christmas projects!

Until Next Time,

SR_signature

Filed Under: DIY Crafts Tagged With: Christmas, Christmas Decor, DIY, paint pen, Signs

How to Paint a Driftwood Sign the Easy Way

October 4, 2016 By stylishrevamp 1 Comment

How to Paint a Driftwood Sign the Easy Way

When we bought our home on the Island, it already had a name or at least a little driftwood sign above the door letting people know that We Got The Point and that’s how people usually know where we are located on the Island. The previous owners named the home and everyone wanted us to leave the sign so several years later We still Got the Point. Our home is on a point of land that juts out to the water which is how the previous owners came up with the sign…so we are just going to go with it.

Repainting a driftwood sign using a sharpie paint pen


Since our home is out on the point, it gets  a lot of wind and we get damage from the salt water.  The driftwood Point sign was in need of a little revamp. I was a bit worried about painting it since I do not have the steadiest of hands when it comes to small detail work but I found a little something that made it super easy!

How to Paint a Driftwood Sign the Easy Way

I made a trip to Home Depot (for something totally unrelated to this project) and I always stop by the paint section.  That is where I found this…

Sharpie Oil Based Paint Pen

The Sharpie Paint Pen was super easy to use.  I used it just as I would an actual Sharpie marker.  I was worried that it might run or drip but it really worked no differently than a regular marker.

First, I painted the entire sign with white paint that I had on hand and let it dry completely. Once that was done, I traced the letters with the Sharpie Paint Pen. This helps create a border that I can work within.

Painting with the Sharpie Paint Pen

The original lettering was grey but I chose to go with black.  Sadly, I have not been back to the Island Home to install it but you can see it finished now and later I will share it once I hang it back on the house.


Painted Driftwood Sign

Yep, I love it!  Even if I did not choose to label our home with this slogan!

I already have in mind the sign I want to make for Christmas with the Sharpie Paint Pen!

Until Next Time,

SR_signature

Filed Under: Before and After, DIY Crafts Tagged With: DIY, Driftwood, paint pen, Sign

Meet the Team

Hi, I'm Kathy! Mom to 3 boys, lover of thrift shopping and all things vintage.

Follow along with me as I revamp our home using thrifted finds!

Subscribe via Email


Visit Stylish Revamp's profile on Pinterest.

Our Favorite Posts

  • IKEA BILLY Bookcase Hack
    IKEA BILLY Bookcase Hack
  • Revamping my Closet with the IKEA Pax Wardrobe
    Revamping my Closet with the IKEA Pax Wardrobe
  • My Version of Tidying Up the Pantry
    My Version of Tidying Up the Pantry
  • Driftwood Christmas Tree
    Driftwood Christmas Tree
  • How to Make A DIY Driftwood Wreath
    How to Make A DIY Driftwood Wreath

Categories

  • Before and After
  • DIY Crafts
  • Fabulous Finds
  • Friday Favorites
  • Goodwill Goods
  • Home Tour
  • Projects and DIY
  • Thrift Shop
  • Thrift Shop Thursday
  • Uncategorized

Topics

Basket Chairs Chalk Paint Christmas Christmas Decor Christmas Tour Consignment Shop Consignment Shopping Desk DIY Driftwood Fall Flea Market gold Goodwill Halloween Holiday HomeGoods Home Office Home Tour IKEA Kitchen ladder Master Bedroom Michaels Milk Cans Nautical Paint paint pen Pillows pumpkins Shopping Sign spray paint thrift Thrifting thrift shop Thrift Shopping thrift shop thursday Tour Vintage White dishes wine rack Wood Wreath

Archives

Follow us on Pinterest!

Visit Stylish Revamp's profile on Pinterest.

Follow us on Twitter!

Tweets by @StylishRevamp

Follow us on Instagram

Screen Shot 2018-09-16 at 8.50.53 PM

Like us on Facebook!

Like us on Facebook!

Copyright © 2023 · Chic Pro Theme On Genesis Framework · WordPress · Log in